
GitHub Copilot
The AI Connector works in the GitHub Copilot desktop app, which runs the connector on your computer. Copilot Free works. You can follow the steps below, or send Copilot the link to the connector skill and ask it to set up the Quiq connector. It walks you through the steps and can do many of them for you.
Before you start
You need:
- A GitHub account with Copilot, and the GitHub Copilot app installed and signed in.
- A Quiq admin login.
- Your Quiq web address, for example
yourcompany.goquiq.com. Use the address you sign in with; some addresses redirect to another one, and the connector works with either.
What your IT team may need to allow
GitHub Copilot runs the connector on your computer, so no change is needed.
Set up
-
Download the connector skill. Create a folder named
quiq-login, put the file in it, and rename the fileSKILL.md. Copilot installs skills from a folder or a.zipfile. -
Add the skill. For details, see GitHub's Agent skills documentation. In the Copilot app, click Customize, then Add > Install skill. Click Browse..., choose the
quiq-loginfolder, review it, and click Install skill.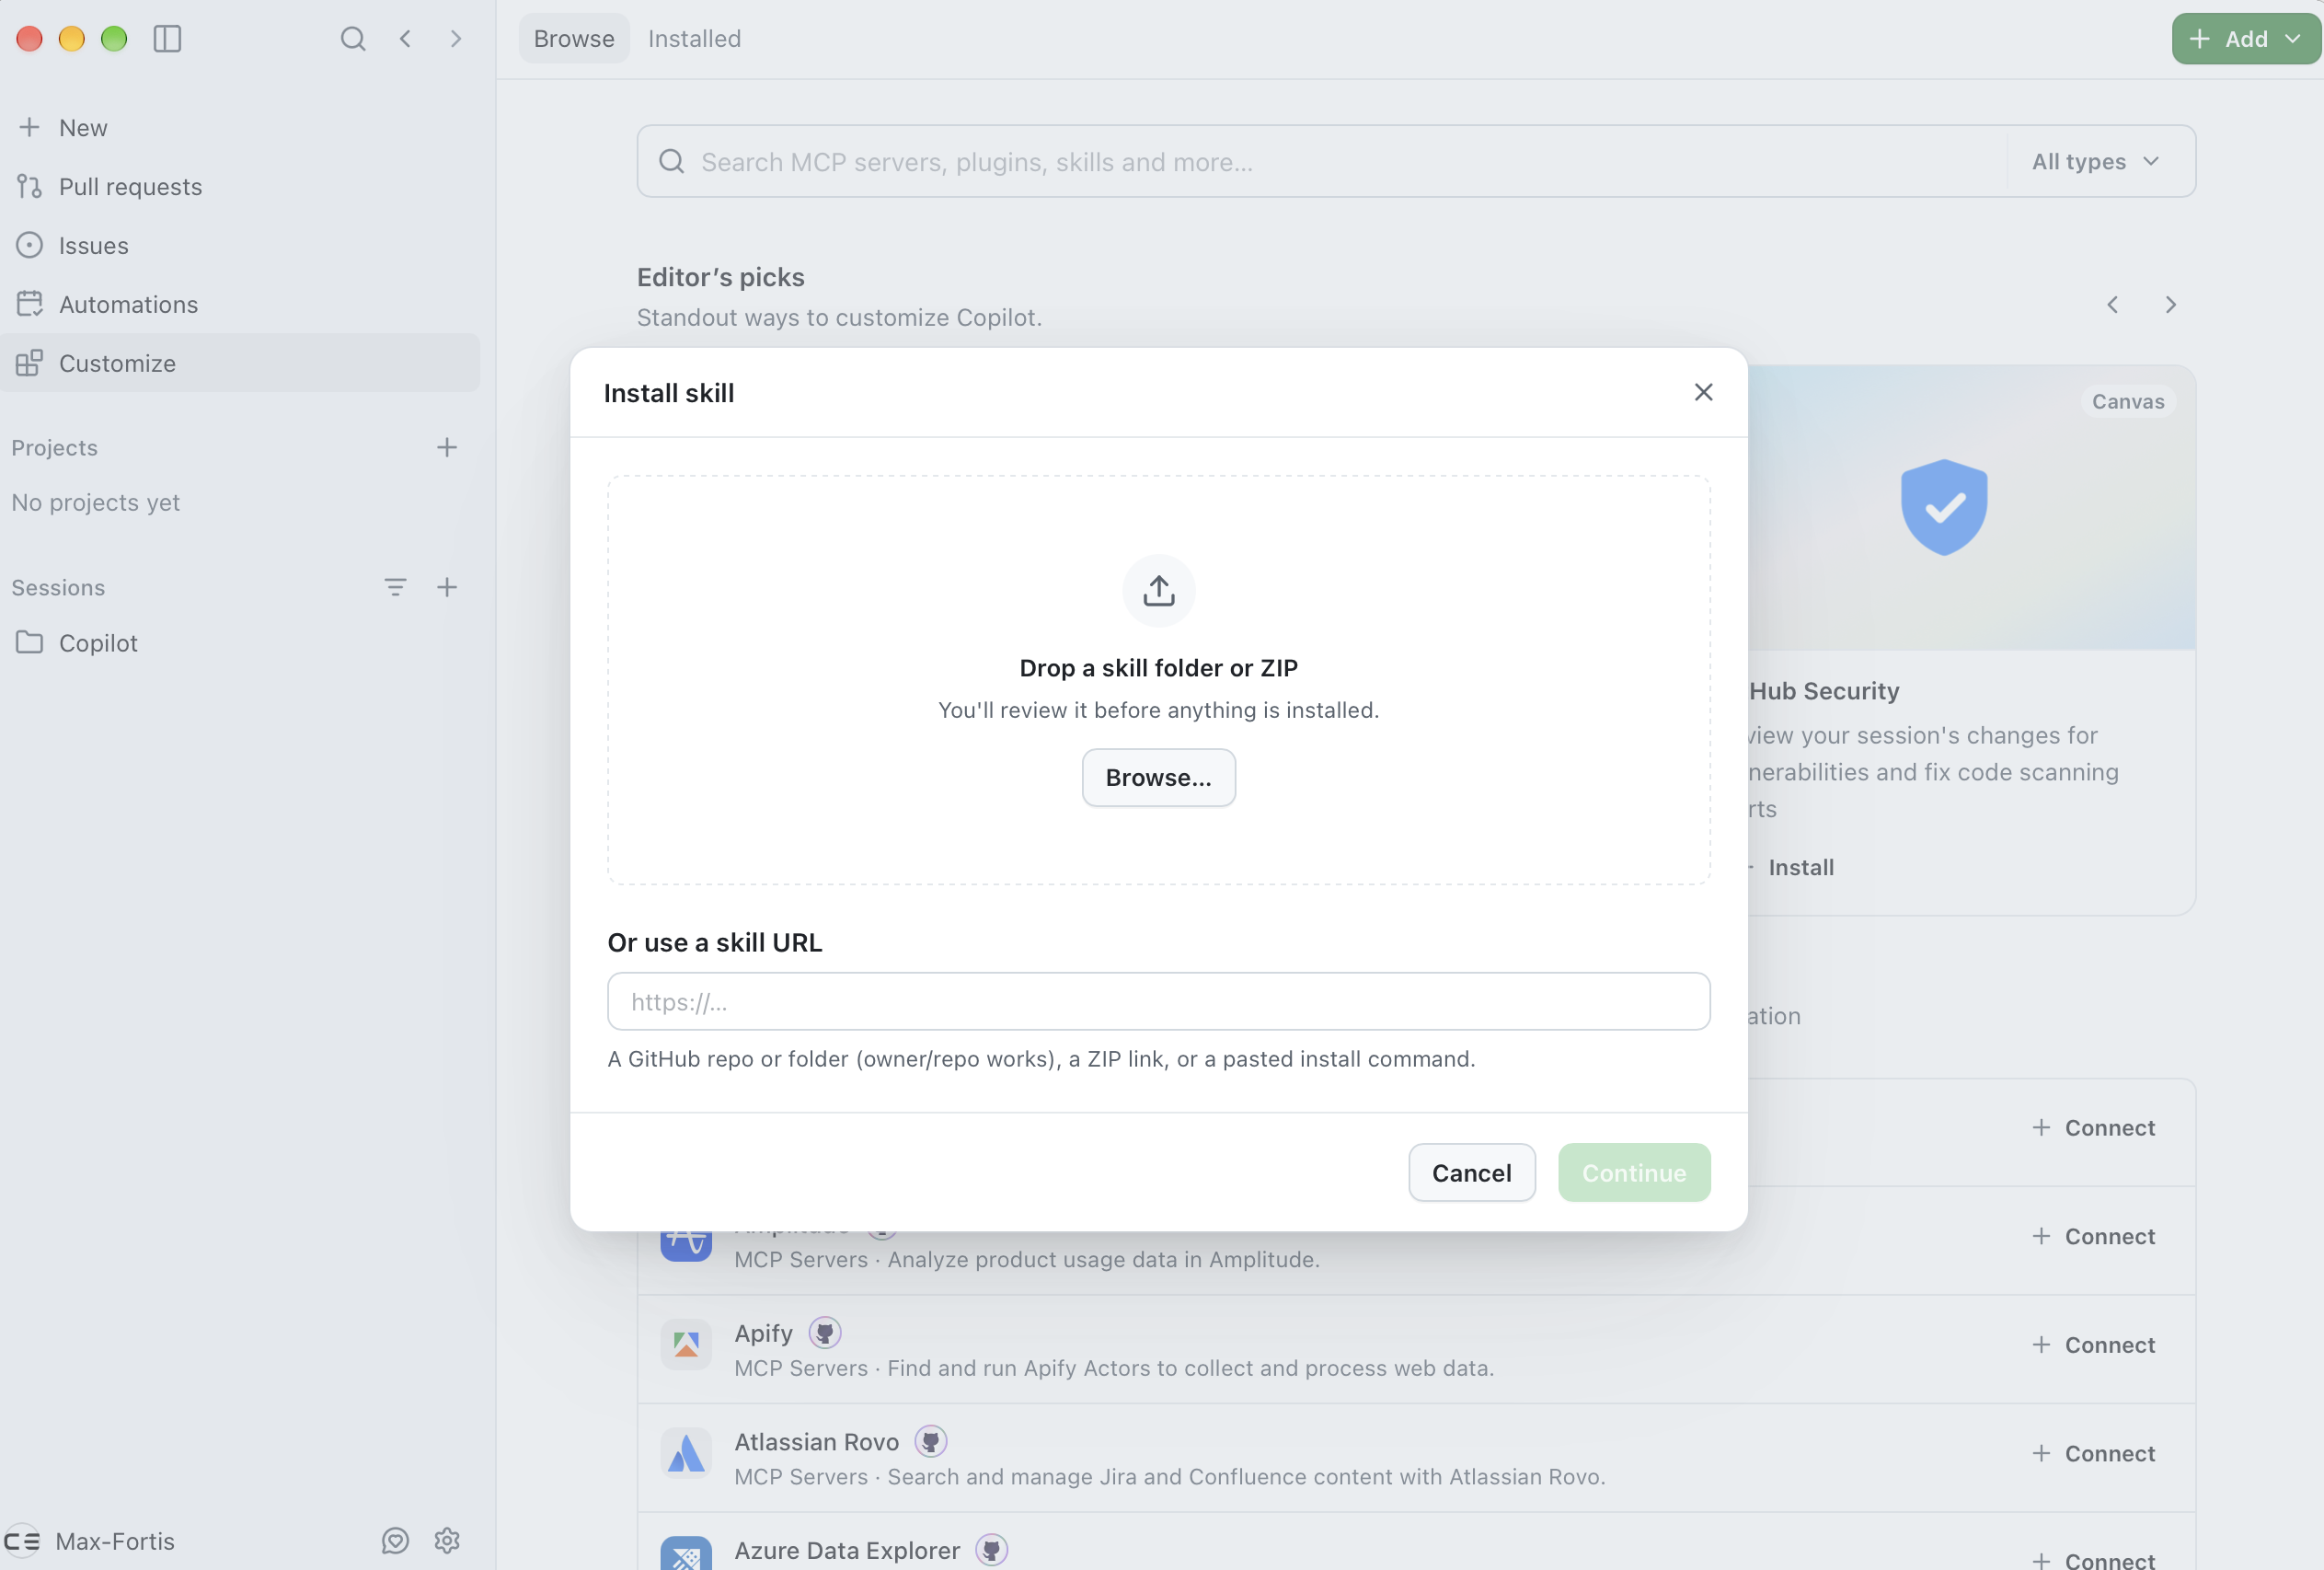
Copilot installs it to
~/.copilot/skills/quiq-login. Click Done. You can also move thequiq-loginfolder into~/.copilot/skills/yourself, which works for Copilot CLI and Copilot in VS Code too.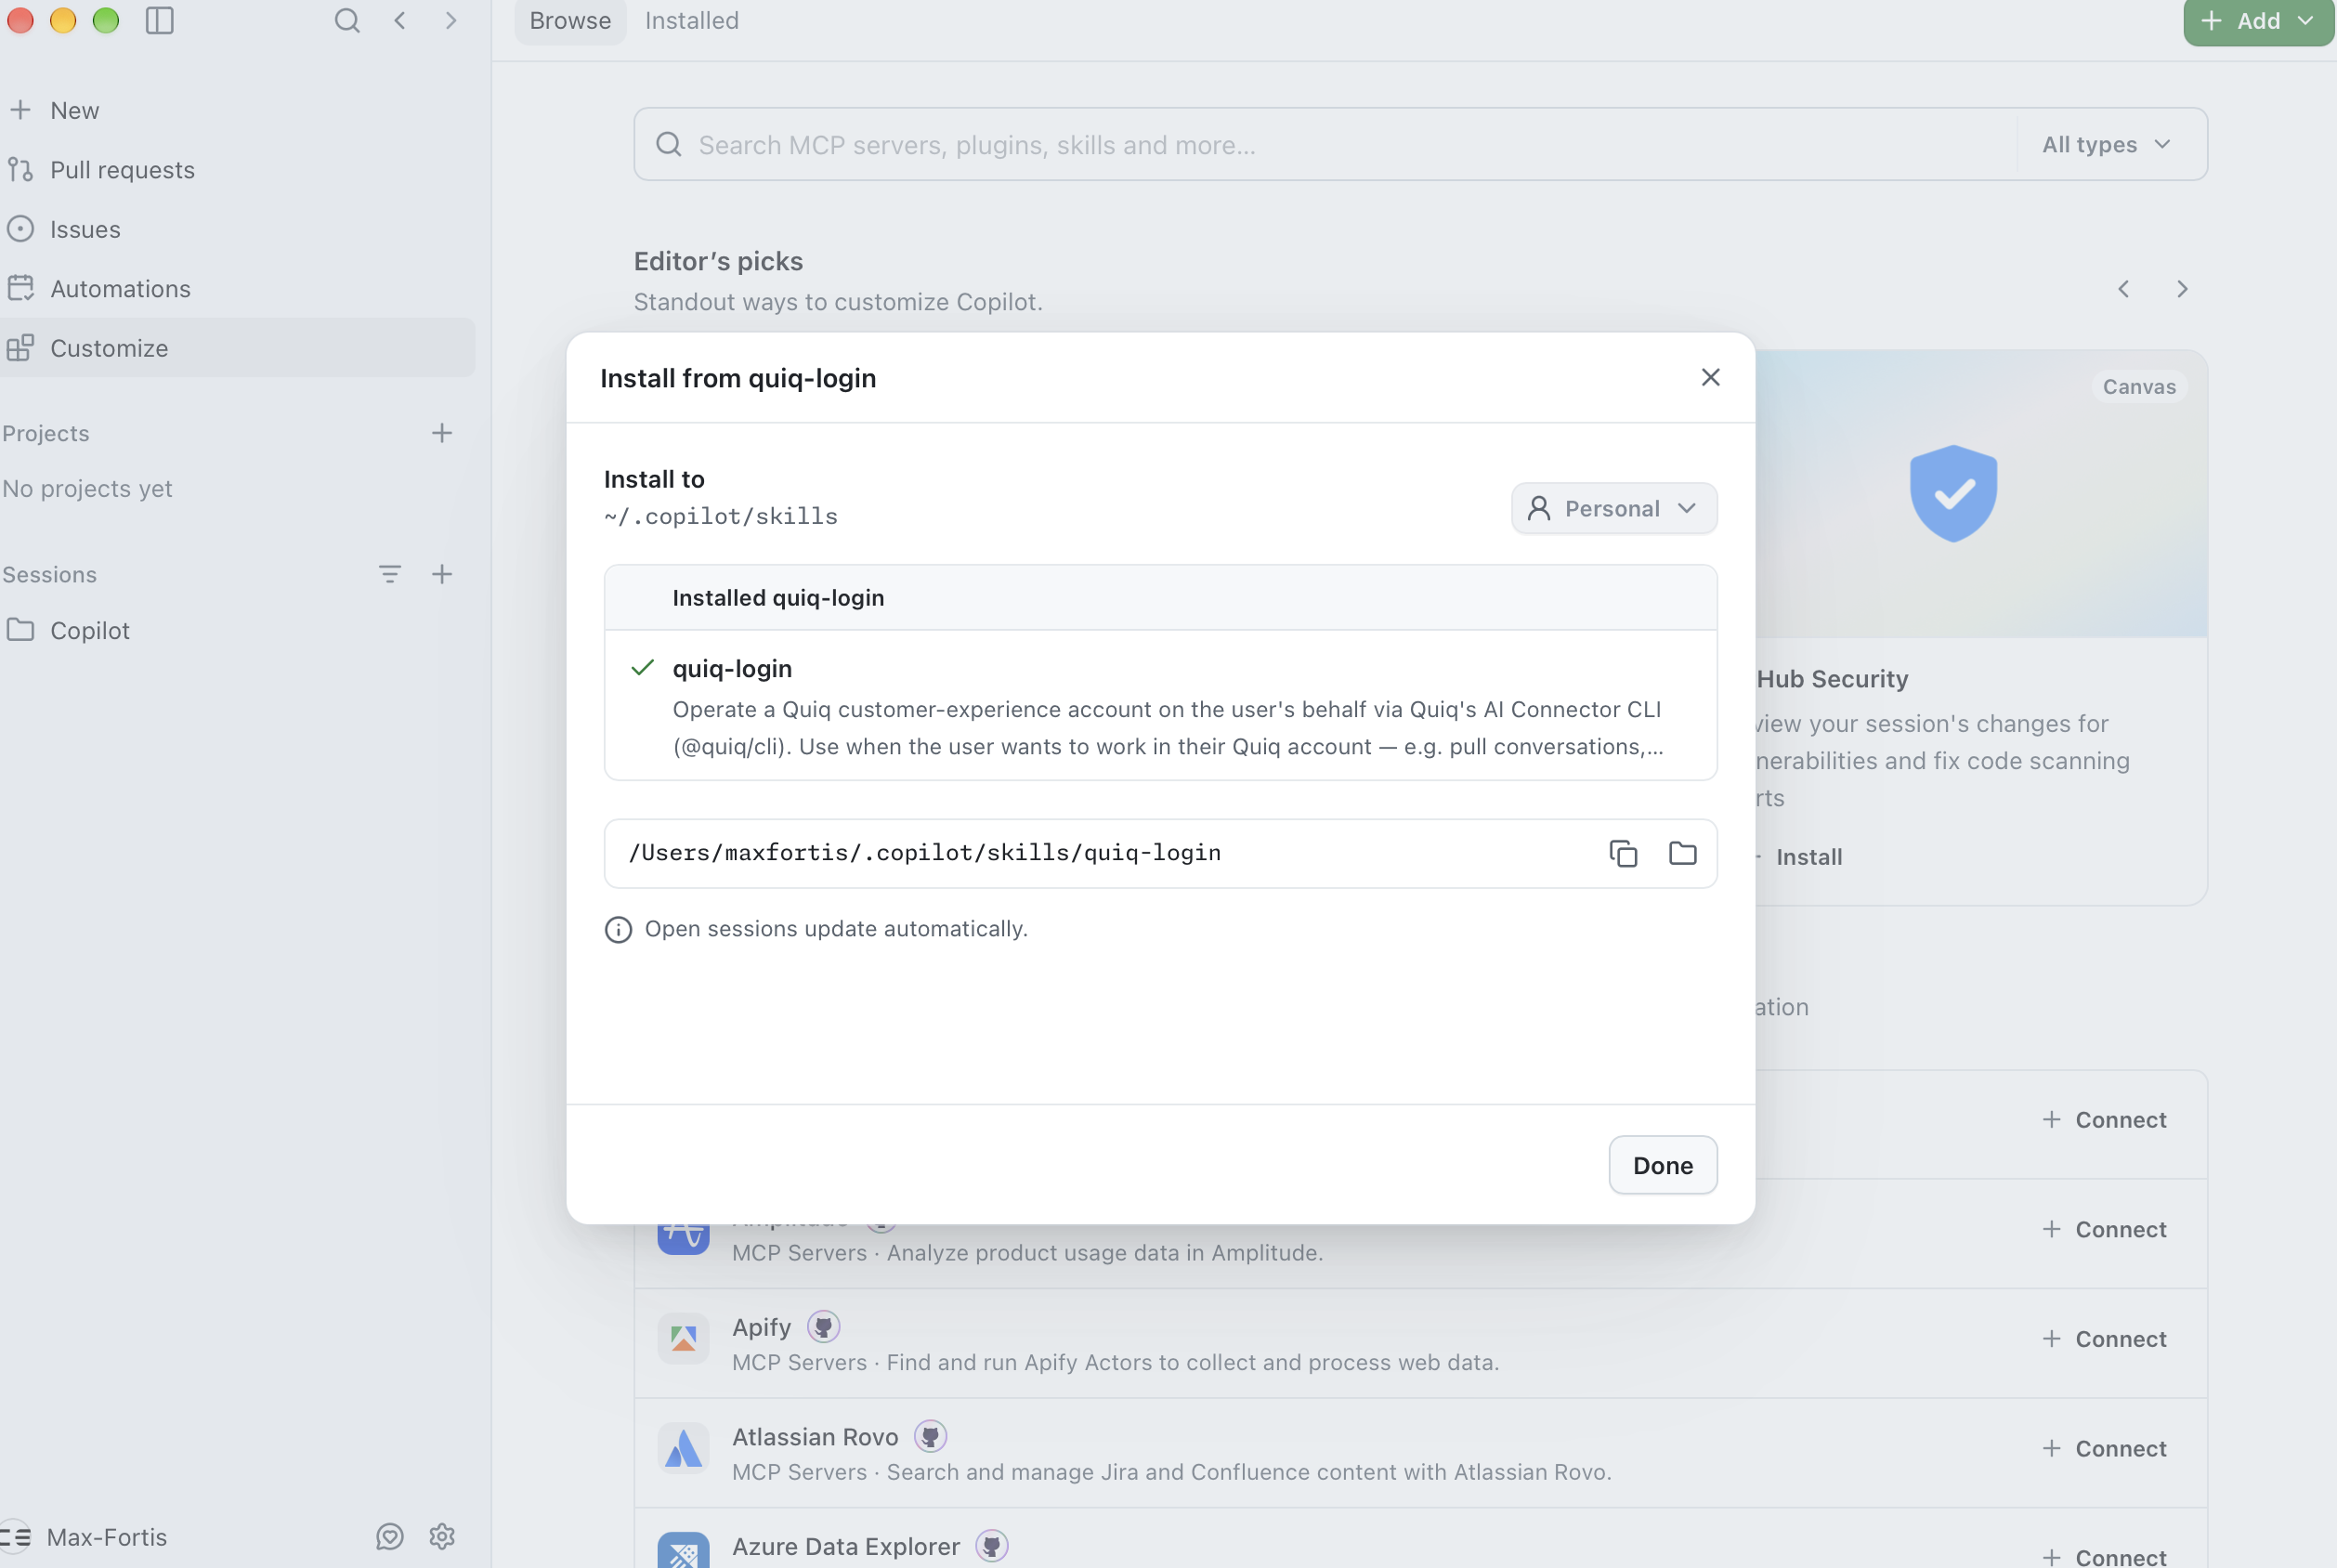
-
Click New and type
/quiq-login. Copilot installs the connector if needed and asks for your Quiq web address. Enter the full address, for exampleyourcompany.goquiq.com, and click Continue. The connector runs on Node.js; if your computer doesn't have it, Copilot helps you install it.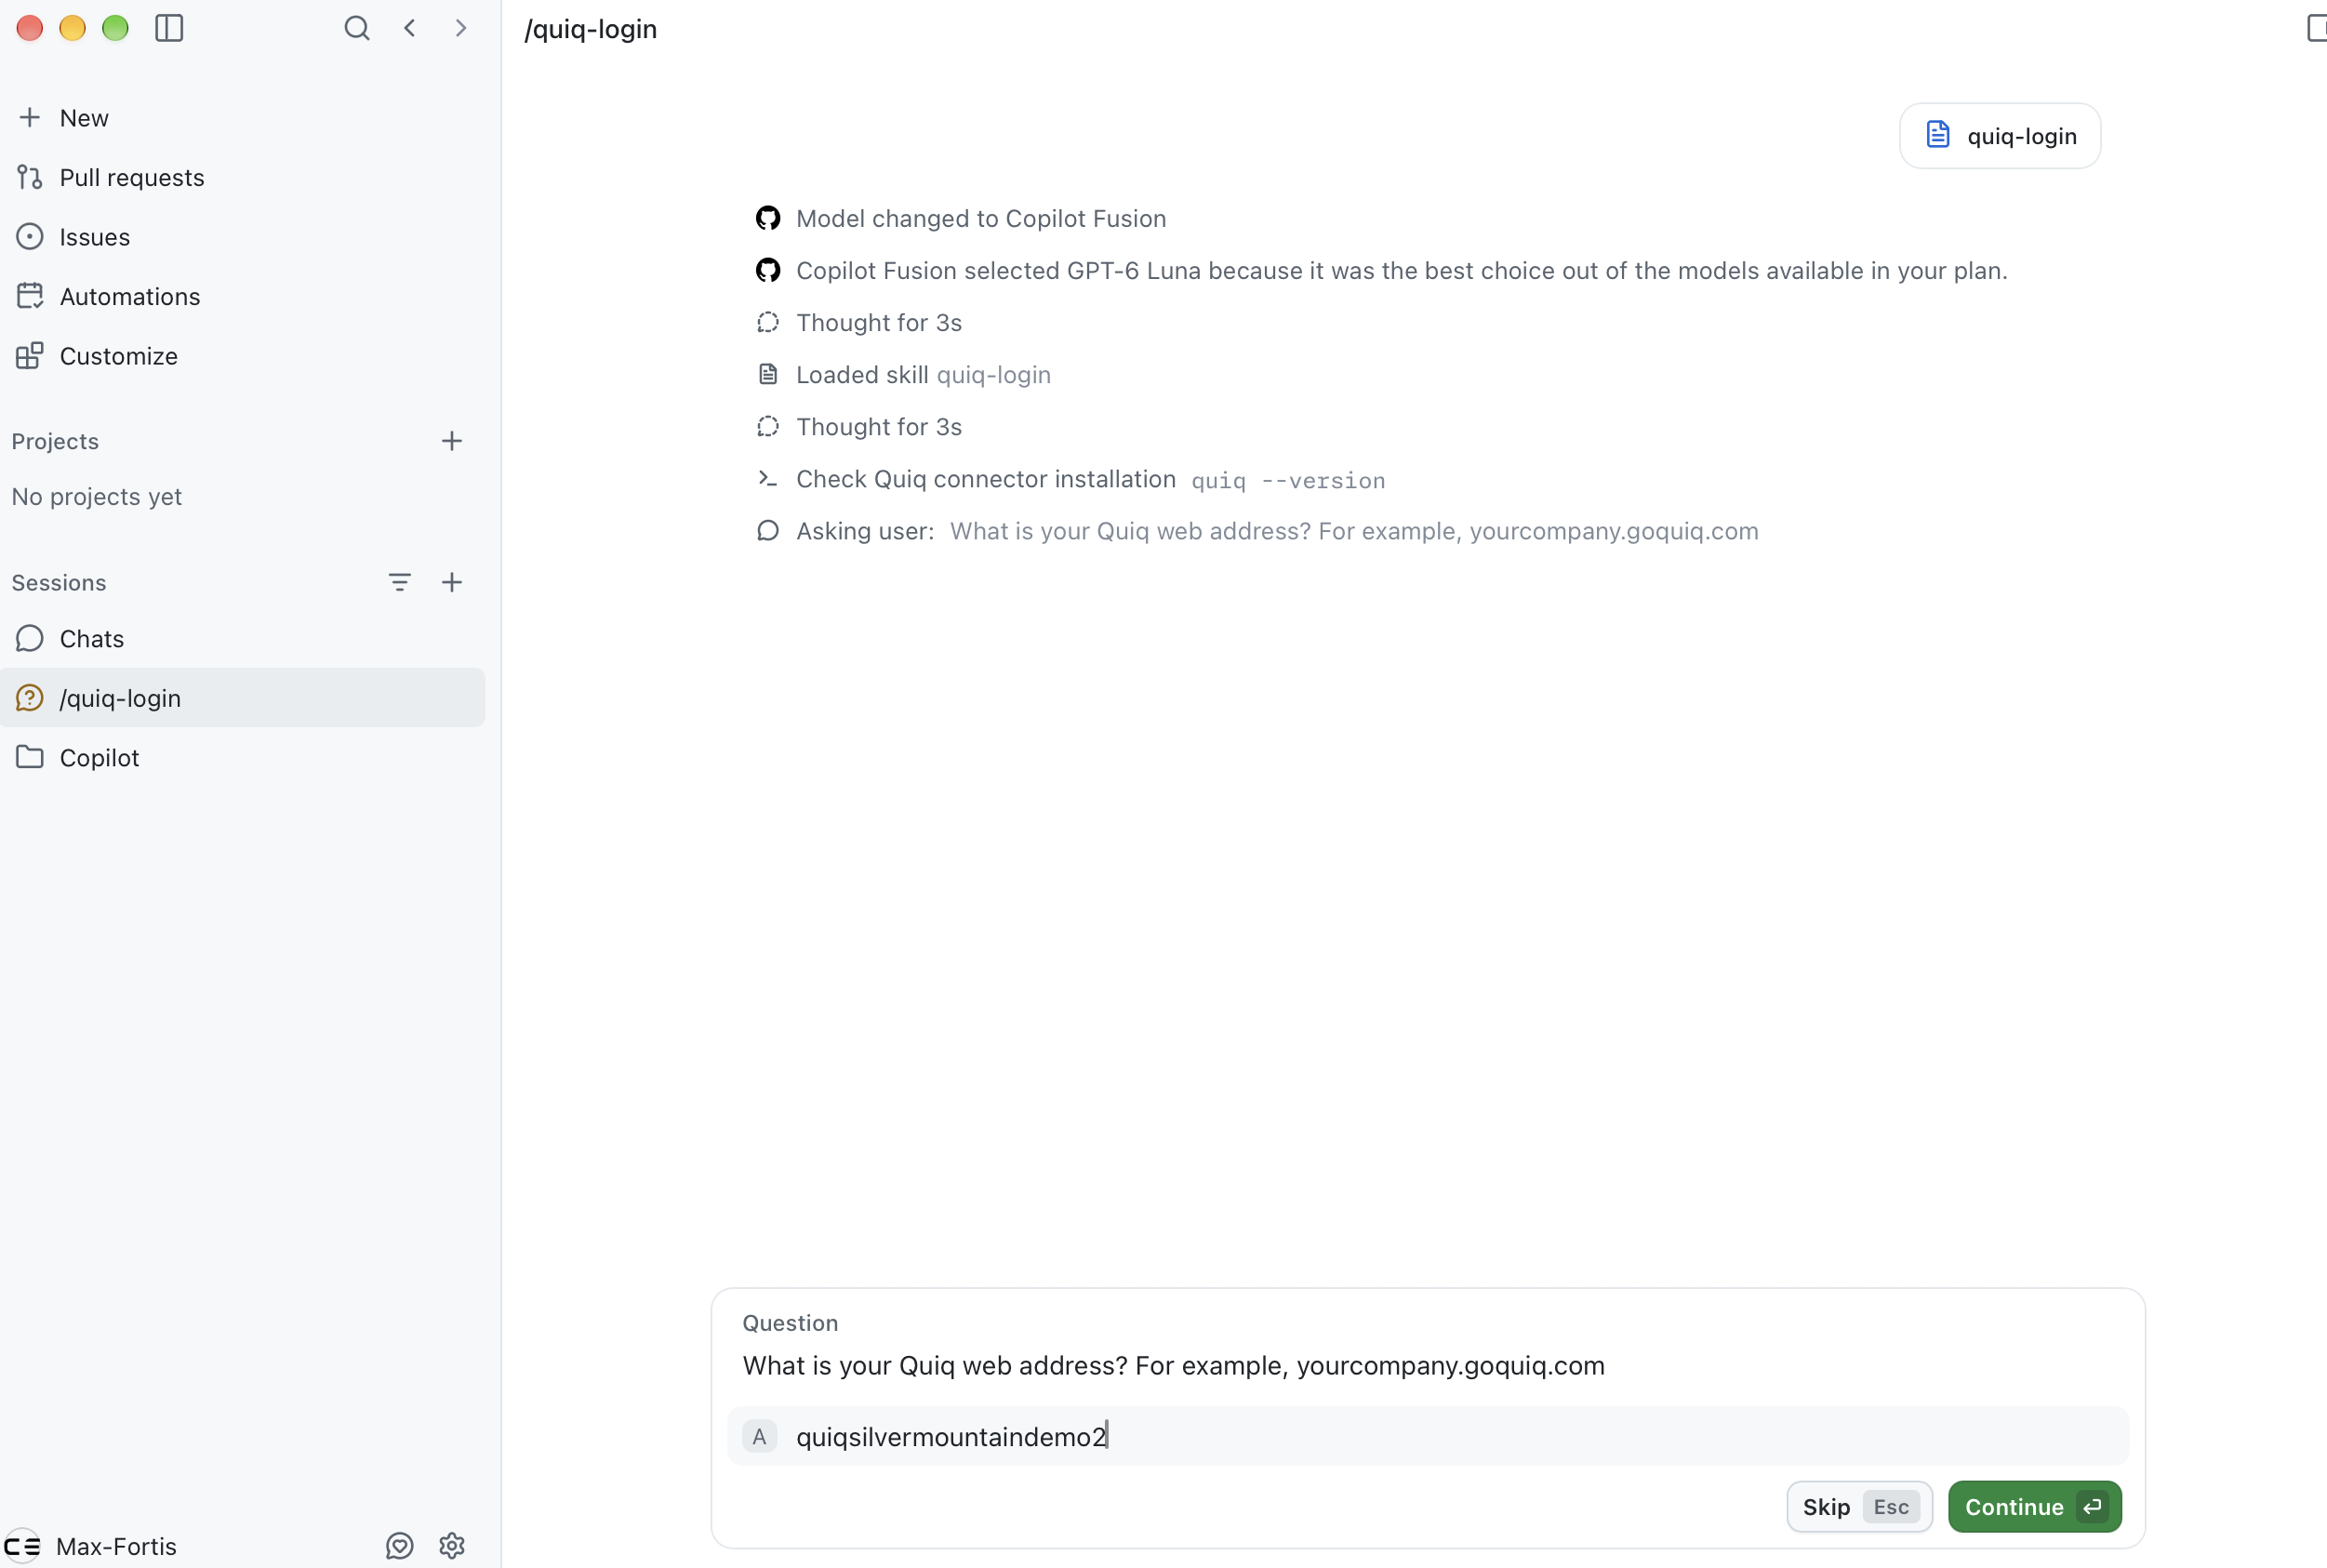
-
Copilot gives you an Approve Quiq access link. Open it, sign in to Quiq, choose what Copilot can access, and click Approve. Then tell Copilot you've approved, and it finishes connecting.
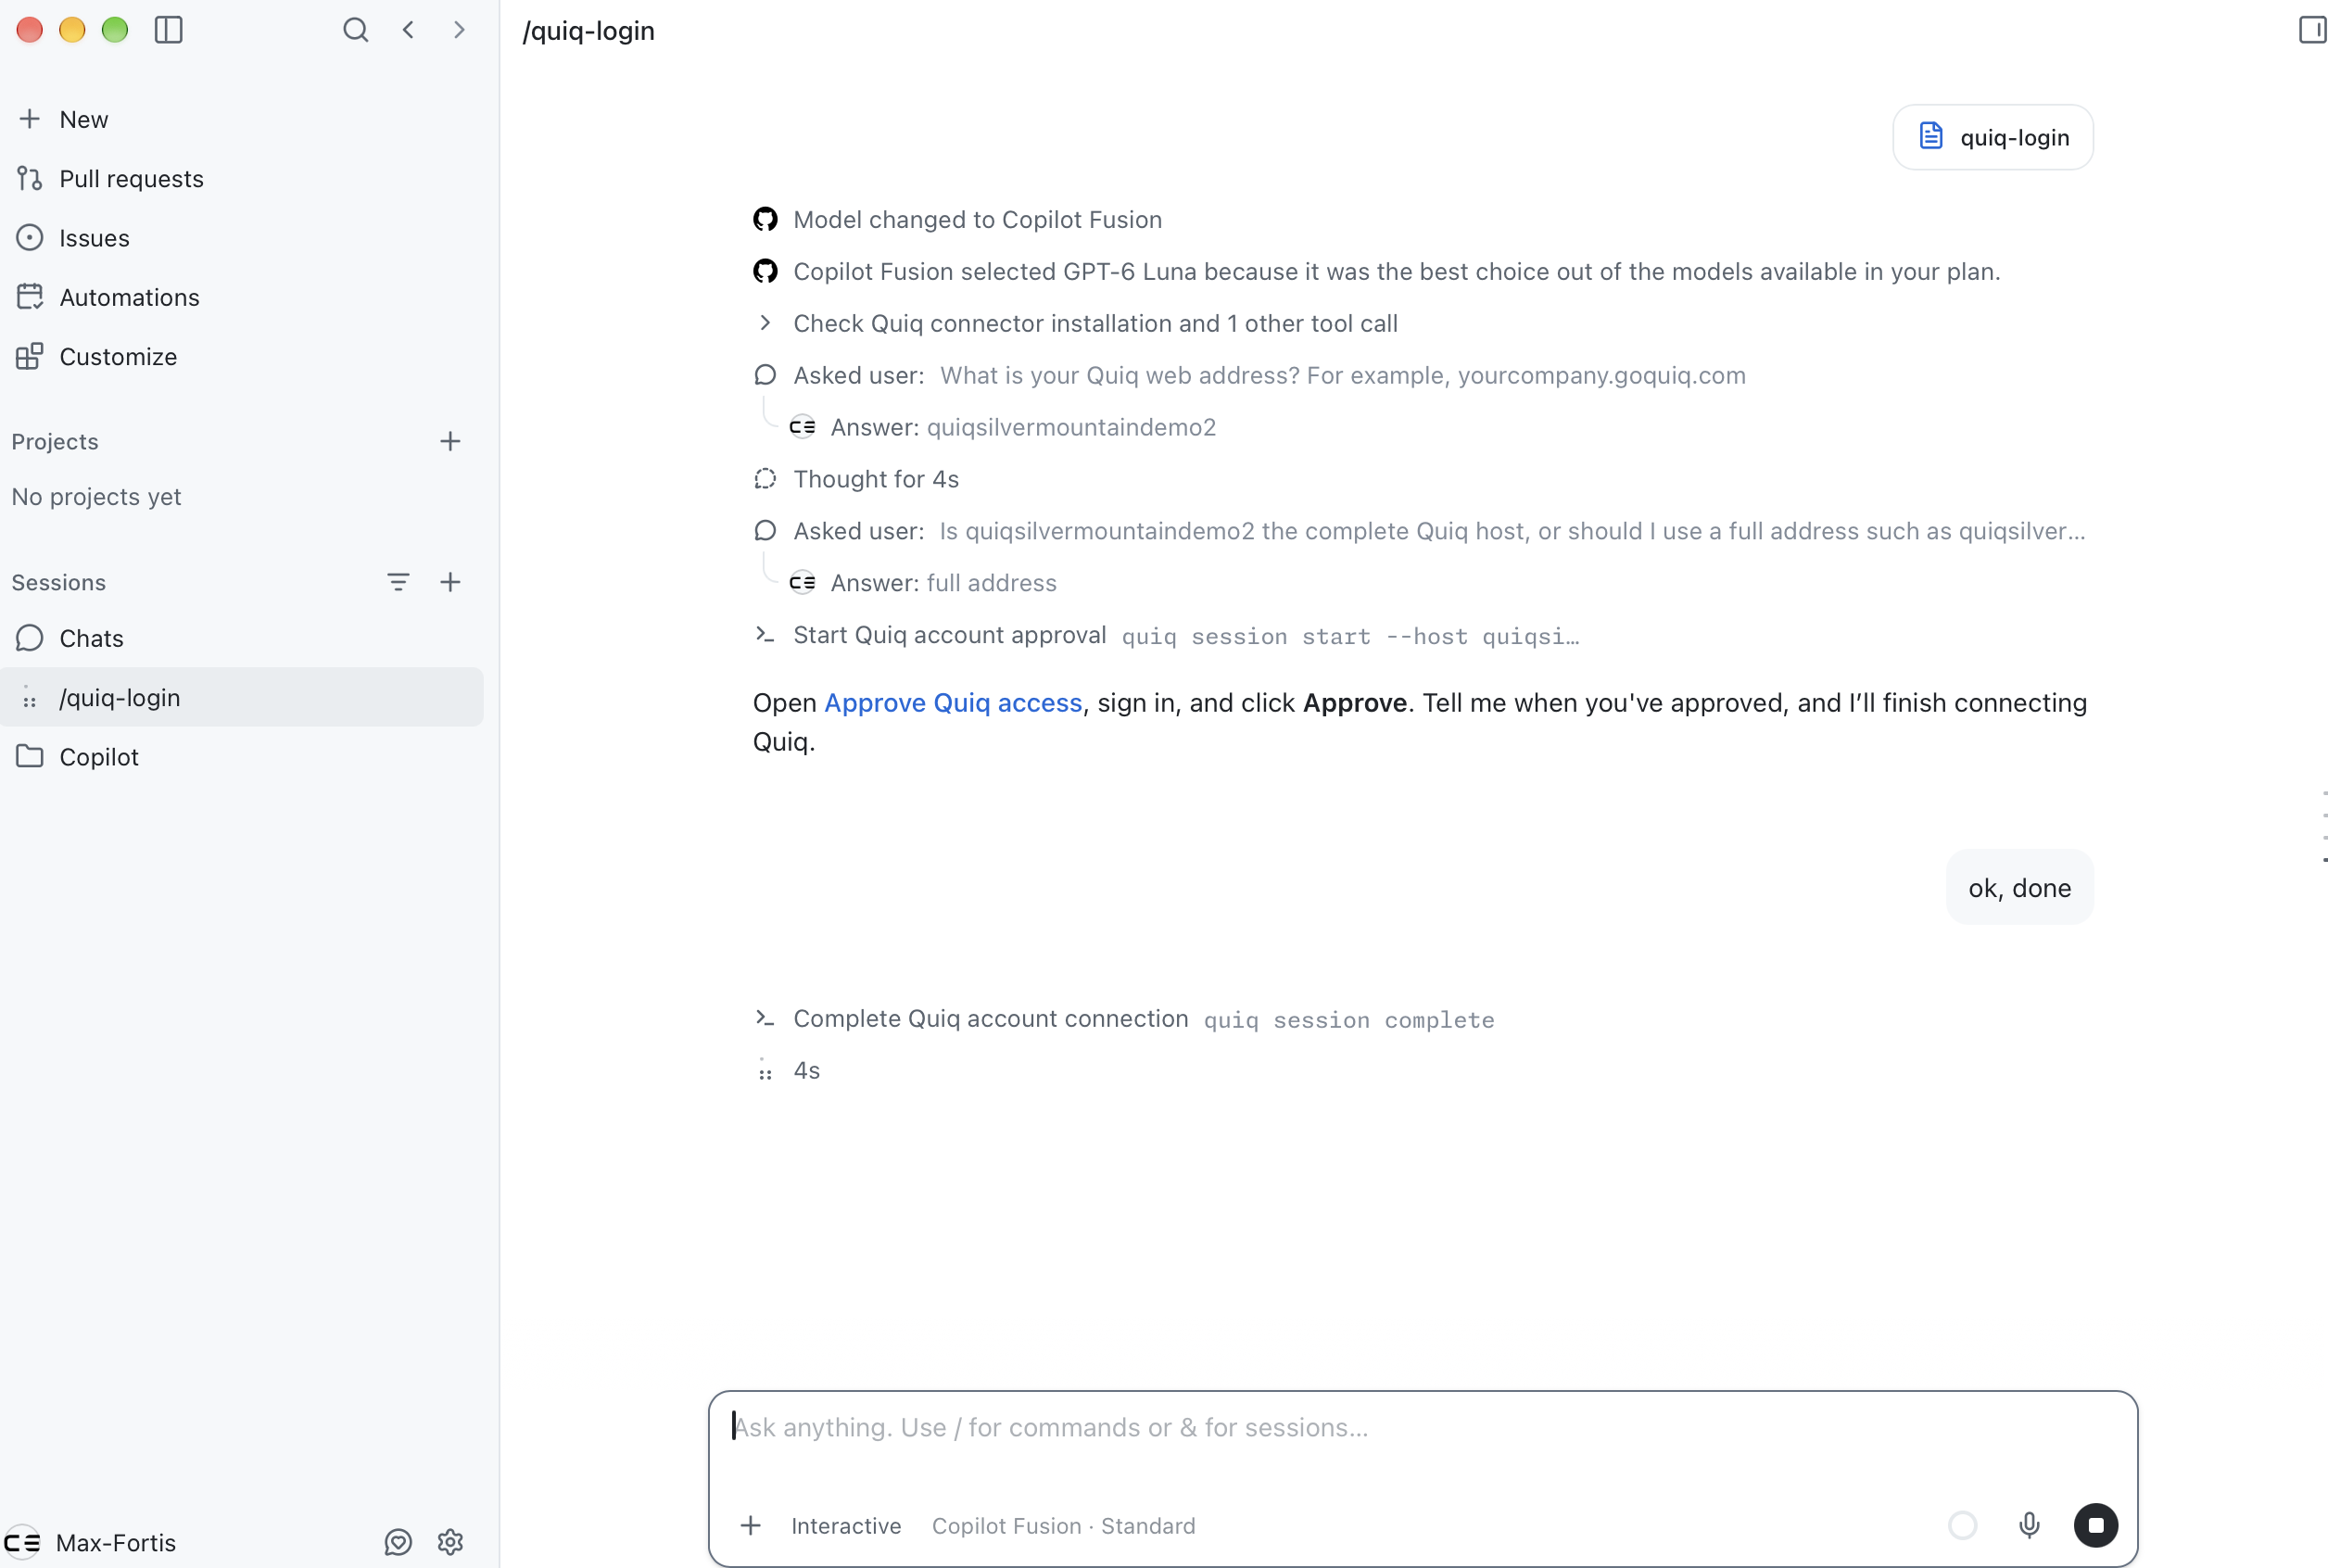
Then ask your first question. See AI Connector Tips & Examples for ideas.
Need help?
For help, or if your AI tool isn't listed, email [email protected].
Updated 1 day ago