
Widgets
Overview
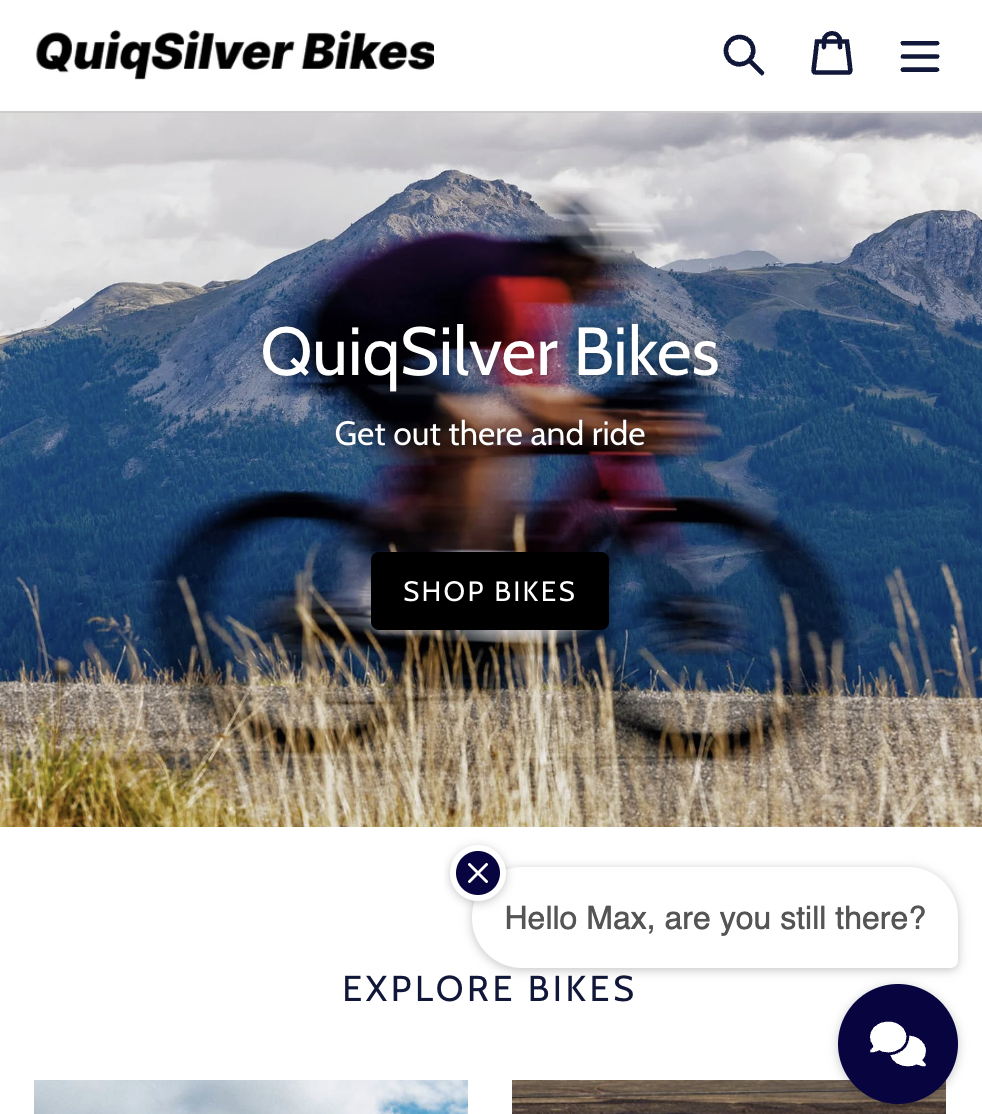
Widgets allow you to specify different ways of offering Conversation Starters to users who visit your page. By default when you create a Page Configuration, it will be associated with the Default Chat Widget, which will show the standard chat button in the bottom right corner of the page:

Configuring Widgets on a Page Configuration
To create a new Widget or modify an existing one, go to the Advanced Settings tab on your Page Configuration. There you will be able to see the Widgets associated with your Page Configuration and make changes.
To add a new Widget, click the + button within the Widgets field:

To edit any Widgets already associated with your Page Configuration, you can use the links below the Widgets field:

If you want to see and manage all Widgets defined in the system, you can access them by clicking on the gear icon to the right of the Widgets field:

Types of Widgets
There are four types of Widgets that can be created within Quiq, each of which will be detailed below:

Default Widgets
Default Widgets are widgets that will display on the page as Quiq's default chat button. You can choose if you want the Widget to Float, or appear relative to another page element by using the Position field.
Basic Settings

1. Contact Point: By default, the Widget will be associated with whatever contact point it is used on, however this can be modified on the widget.
2. Platform: By default the widget will use the Device Default platform.
3. Default Widget Configuration: Optionally use a custom HTML snippet instead of the default chat option.
4. Position: Select how your widget should be positioned, the default option is to Float in the bottom right of the page, however you can elect to position it relative to another element on the page:

Element Query Selector: If you elect to position your element using an option other than Float you will need to provide the class or id selector of the page element you'd like to associate your widget with:

Custom Widgets
Custom Widgets are widgets that are represented on the page by an element that already exists, such as a "Chat Now" link, or a "Chat" button that you have in your header or footer area.
When the user clicks on this element, Quiq will launch the configured platform for the user to send and receive messages. When using this type of Widget you will need to provide an Element Query Selector, which is a way for Quiq to identify the element in question on the page.
For best practices on how to construct your Custom Widget to take advantage of some of Quiq's advanced capabilities please go here. For styling best practices go here.
Basic Settings

1. Contact Point: By default, the Widget will be associated with whatever contact point it is used on, however this can be modified on the widget.
2. Platform: By default the widget will use the Device Default platform.
3. Element Query Selector: The class or id selector of the page element you'd like to associate your widget with.
Template Widgets
Template Widgets are widgets that will display on the page, but instead of using Quiq's default button, they will use whatever HTML you specify. This is really handy if you want to display an svg element to provide a button that matches the theme of your site.
For best practices on how to construct your Template Widget to take advantage of some of Quiq's advanced capabilities please go see the developer documentation. For styling best practices visit the developer documentation.
Basic Settings

1. Contact Point: By default, the Widget will be associated with whatever contact point it is used on, however this can be modified on the widget.
2. Platform: By default the widget will use the Device Default platform.
3. Template Widget Configuration: Insert the custom HTML snippet instead you'd like to use for the Template widget.
4. Position: Select how your widget should be positioned, the default option is to Float in the bottom right of the page, however you can elect to position it relative to another element on the page by providing an Element Query Selector
Inline Widgets
Inline Widgets are widgets that will display the Chat iFrame directly within your page, as opposed to floating above it. When using this type of Widget you will need to provide an Element Query Selector, which is a way for Quiq to identify the element on the page to embed the iFrame within.
Basic Settings

1. Contact Point: By default, the Widget will be associated with whatever contact point it is used on, however this can be modified on the widget.
2. Platform: By default the widget will use the Device Default platform.
3. Element Query Selector: The class or id selector of the page element you'd like to associate your widget with.
Advanced Settings
All of the Widget types detailed above have and Advanced Settings tab that enable you to configure how pop up message blurbs are displayed. There are three types of messages that can be displayed to users: Invitation Blurbs, New Message Blurbs, and Proactive AI Message Blurbs:

Notification Configuration
You can configure each type of message blurb to either be shown to the user or not, and you can also control how long the blurb will stay visible to the user before being automatically dismissed.
You can also specify what Proactive AI is configured for the widget with the Proactive AI field, and set an Intent using the Intent field. If you specify an Intent, that value will populate the Conversation Intent for any conversations that originate from the Widget.
Enable Invitation Message Blurbs
These message blurbs are generated from the ShowNotificationBlurb JavaScript SDK method. They are transient, meaning that even if the user interacts with the message, the message itself will never get added to the chat transcript.
Enable New Message Blurbs
These message blurbs are displayed to the user when they are already engaged in a conversation and receive a message from the agent/bot, but have the chat window closed and otherwise would not see the message. Since the conversation is already ongoing, these messages are always part of the chat transcript.
A new message blurb from an agent.
Proactive AI Message Blurbs
These message blurbs are generated from Proactive AI. If a Proactive AI is configured for your widget, the duration of any message blurbs displayed by it can be controlled here. If the user engaged with a Proactive AI message blurb, it will be added to the chat transcript.
Updated 8 months ago