Quiq Pay Integration
Overview
Quiq offers a native pay integration with both the Stripe and Braintree payment processors. This integration enables the collection of payments via a variety of methods such as credit card entry and Apple Pay. In order to ensure a smooth integration process, follow the instruction below to allow Quiq the access it needs with your preferred payment processor.
Stripe
The integration between Stripe and Quiq is simple and straightforward. The process focuses on using the OAuth flow provided by Stripe to allow Quiq the access it needs to create charges on behalf of your Stripe account.
Prerequisites
Before beginning the integration with Stripe and Quiq, please ensure the following:
- The setup process for your Stripe account has been fully completed
- You have the ability to sign in to your Stripe account as an Account Administrator. Only Administrators are allowed to grant Quiq the access it needs.
Integration
First, reach out to your Quiq Support Specialist to be given a URL that will grant Quiq access to your Stripe account. If you are not already signed in to your Stripe account, please do so now.
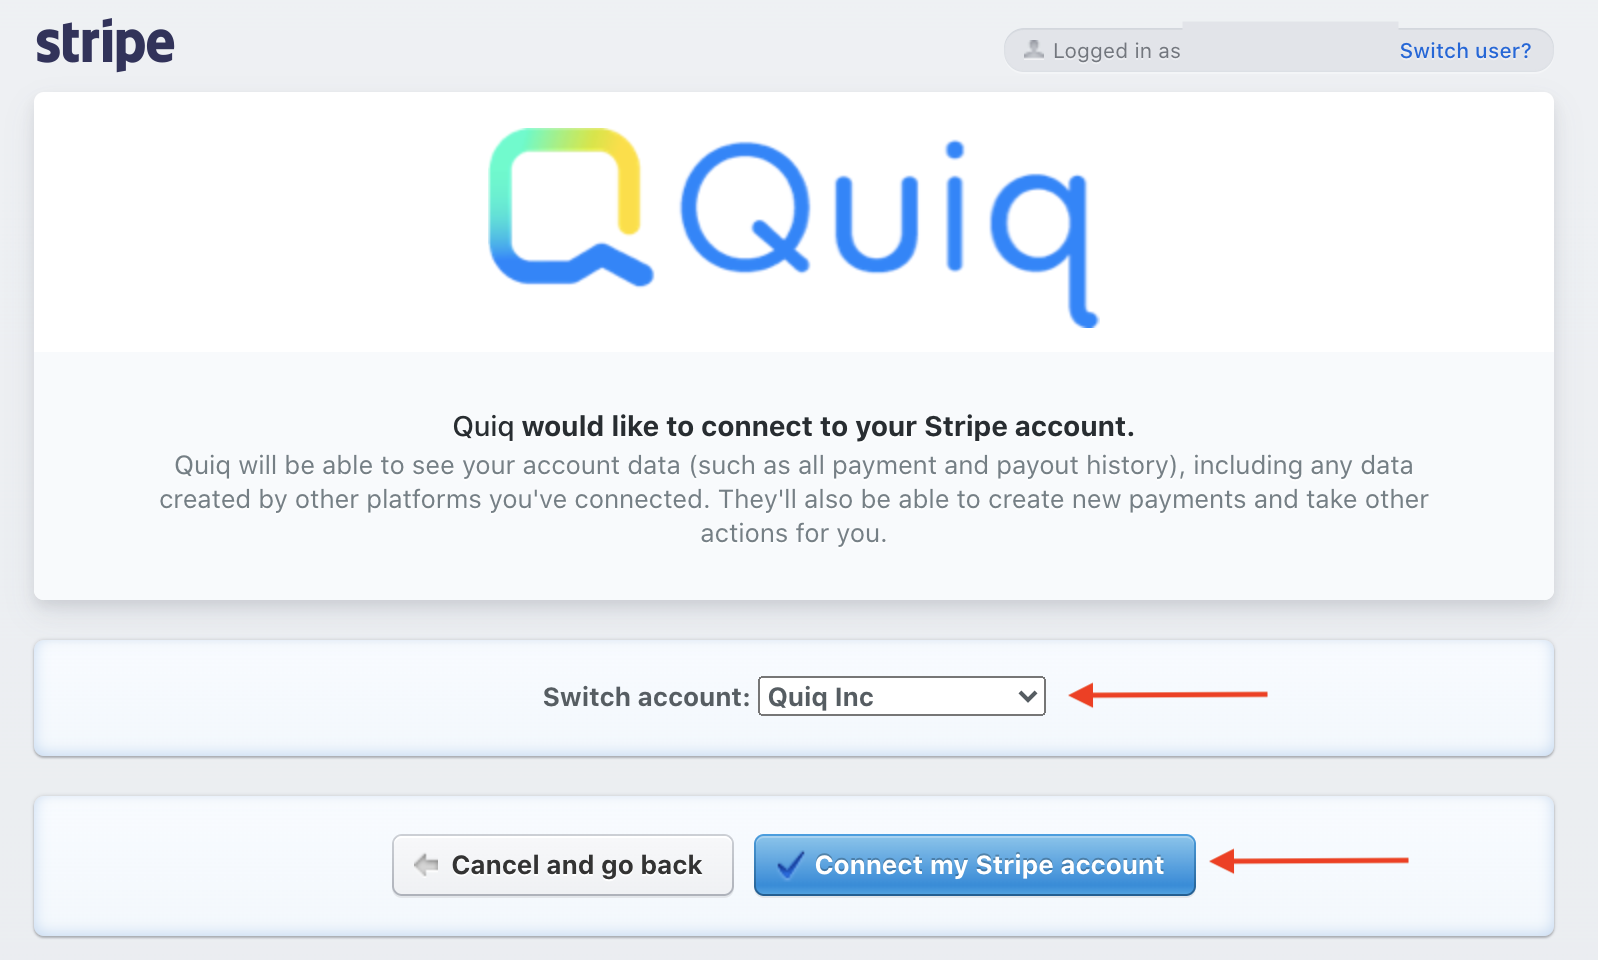
After clicking the URL, you will navigate to a page prompting you to grant Quiq access to your Stripe account.
If applicable, ensure that your desired Stripe account name is selected next to the Switch account dropdown selector.
Click Connect my Stripe account to allow access.

That’s it! Your Stripe account has now been integrated with Quiq and you can now begin requesting payments via your messaging platform of choice.
Braintree
The Braintree integration with Quiq offers two methods of collecting payments: credit card and Apple Pay via Apple Business Chat.
By completing the basic integration you not only enable payment collection via credit card, you are creating the foundation between Braintree and Quiq. The basic integration must be completed in order to allow other payment collection methods to be used.
The Apple Pay integration is optional however highly encouraged if your Quiq account currently has Apple Business Chat enabled.
Below, you will find information on completing the basic integration along with information describing the Apple Pay integration.
Basic Integration
Completing this basic integration is required to collect both credit card and Apple Pay payments.
Prerequisites
Before beginning the integration with Braintree and Quiq, please ensure the following:
- The setup process for your Braintree account has been fully completed
- You have the ability to sign in to your Braintree account with the Account Administrator Role. Only Administrators are allowed to grant Quiq the access it needs.
Creating Restricted User Role
Creating a restricted user role ensures that any associated API credentials are given only the minimum permissions required to facilitate transactions and nothing more.
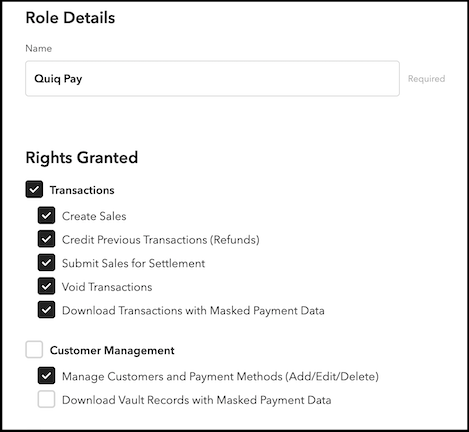
In order for Quiq to create transactions on behalf of your Braintree account, the following permissions must be granted when creating the role:
- All items under the Transactions section
- Manage Customers and Payment Methods under the **Customer Management **section

See the Braintree support article on Creating Roles for instructions on how to complete this step.
Creating an API User
Now that a user role with restricted permissions has been created, a user with API access must be associated with this role.
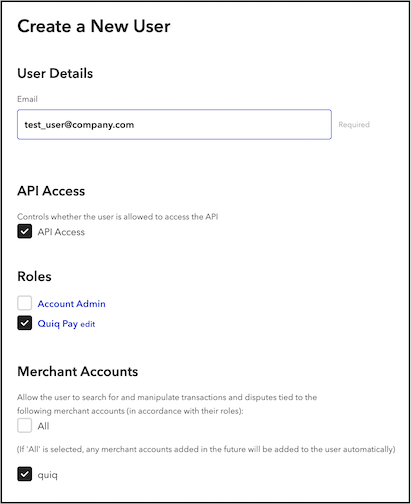
When creating the new user, please ensure the following:
- The user is given API access by verifying the API Access checkbox is selected
- The user is assigned to the newly created role with restricted permissions
- The user is allowed access to the Merchant Account to be used for the integration with Quiq

For information on how to complete this step, see the Braintree support article on Creating Users.
Gathering API keys
Now that the new user has been created and associated with the restricted permissions role, the user’s API keys must be fetched by following these steps:
1. Sign in to your Braintree account as the user that was just created
2. Navigate to API Keys (Settings (Gear Icon) -> API)
3. Under the API Keys section, a key should already be generated for the user. If not, click Generate New API Key.
4. Click View under the Private Key column to see all key information
5. Gather the following key information:
- Public Key
- Private Key
- Merchant ID
Once this information is collected, it must be sent securely to your Quiq Support Specialist via a URL generated using YoPass. Please specify the One Week option when choosing the message lifetime settings.
After Quiq processes this support request, your Quiq account will then be enabled to collect payments using credit cards.
You have now completed the basic Braintree and Quiq integration!
Apple Pay
In addition to collecting payments using credit cards, it is also possible to collect payments via Apple Pay using Apple Business Chat. The following instructions explain how Apple Pay can be added to your existing Braintree integration.
Prerequisites
Before beginning the Apple Pay integration, please ensure the following:
- All prerequisites listed in Basic Integration have been completed
- Your Quiq account has been enabled with Apple Business Chat
- You have access to an active Apple Developer Account with the ability to sign-in as a user with the Admin role.
- An Apple Payment Processing Certificate has been created, associated with your Apple Merchant, and uploaded to your Braintree account. For more information on how this can be achieved, see the Braintree support article on Apple Pay Configuration.
- A Merchant Identity Certificate has been created and associated with your Apple Merchant in your Apple Developer Account. See the Apple Support Article on Creating a Merchant Identity Certificate to complete this step.
Encoding Merchant ID Certificate
⚠️ NOTEThe following instructions were generated using a Mac computer. It is possible to achieve the same result using a different operating system, however those steps are not documented here.
In order for your Merchant Identity Certificate to be usable by Quiq, it must be properly encoded by following these steps:
- Download the active Merchant Identity Certificate associated with your Apple Merchant from your Apple Developer console.

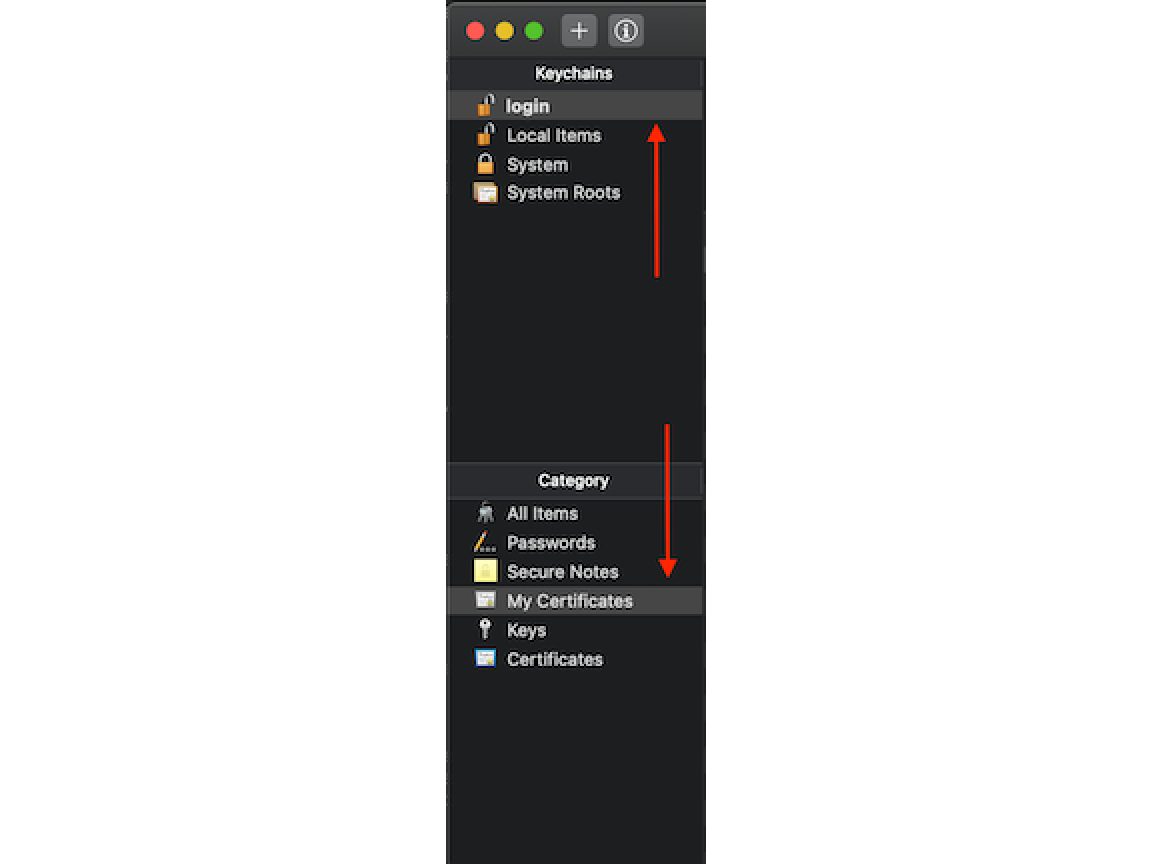
- Open the certificate file in Keychain Access by double-clicking the file. If prompted, place the certificate in the login keychain.
- Once added, ensure that login is selected under the Keychains section and that My Certificates is selected under the Category section.

- Find the Merchant Identity certificate that was just imported, right-click on it, select Export, and specify the Personal Information Exchange (.p12) format.
⚠️ NOTEif Export is not an option that is available, click on the drop-down arrow to the left of the certificate revealing both the certificate and its private key. Selecting both of these items followed by right-clicking should allow you to export.
- Next, you will be prompted to create a password for the exported file.
Please keep note of this password securely as Quiq will require this password in a later step.
Securely Share With Quiq
At this point, both the Merchant Identity Certificate .p12 file and its corresponding password have been generated. Quiq needs both of these items in order to complete the Apple Pay integration.
To securely share the certificate .p12 file, visit Yopass file upload. This will allow you to upload the certificate file and receive a URL that you can share with your Quiq Support Specialist.
For securely sharing the password generated when creating the certificate .p12 file, visit Yopass. Similar to uploading the certificate file, the password can be pasted and a subsequent URL is generated. Please specify the One Week option when choosing the message lifetime settings.
Now that both URLs have been generated, contact your Quiq Support Specialist and provide them to complete your Apple Pay integration with Braintree and Quiq.
Your Braintree and Quiq integration is now enabled with Apple Pay!
Updated about 1 month ago
