
Facebook Tab
Connecting an existing Facebook page to Quiq causes all Messenger traffic directed to the page to be sent through Quiq. This turns Facebook interactions into Quiq conversations and potentially CRM records if your Quiq instance is integrated to a CRM. The person configuring the Facebook integration must be signed in to a Facebook account that has admin privileges, within a different tab of the same browser where Quiq is being used. This ensures the scripted actions work without issue and allows the integration to flow smoothly.
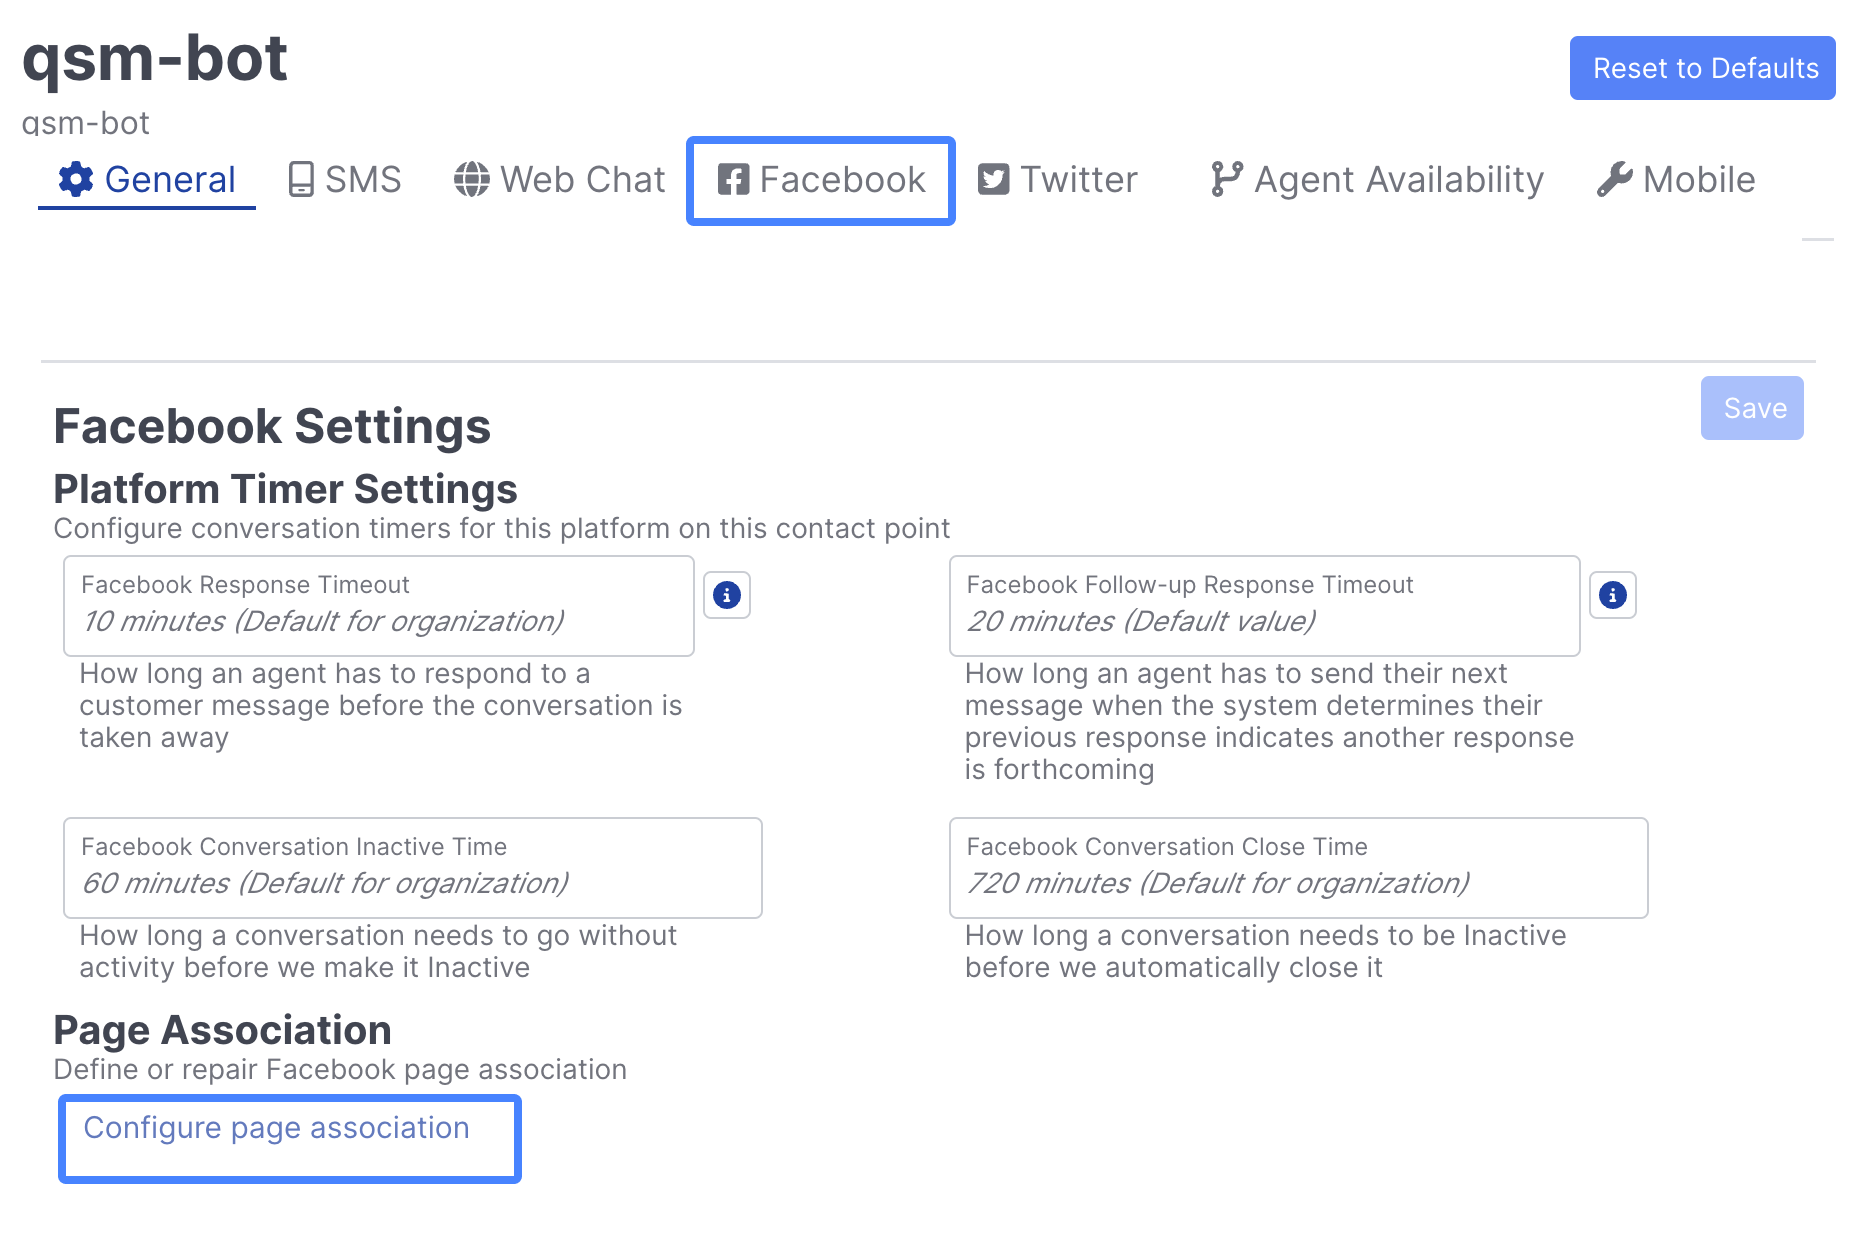
Once configured, Platform Timer Settings and Page Association sections are available.
Platform Timer Settings
Just as these may be overridden at the contact level, the timer settings may be further overridden at the platform level, with the most specific set of timers being applied. Other platform tabs will provide the same options specific to conversations taking place on the given contact point and platform. This allows a specific “SLA” to be applied to each platform. Web Chat and Apple Business Chat my have shorter timers given the nature of the platform and customer expectations of a more real-time interaction.
Page Association
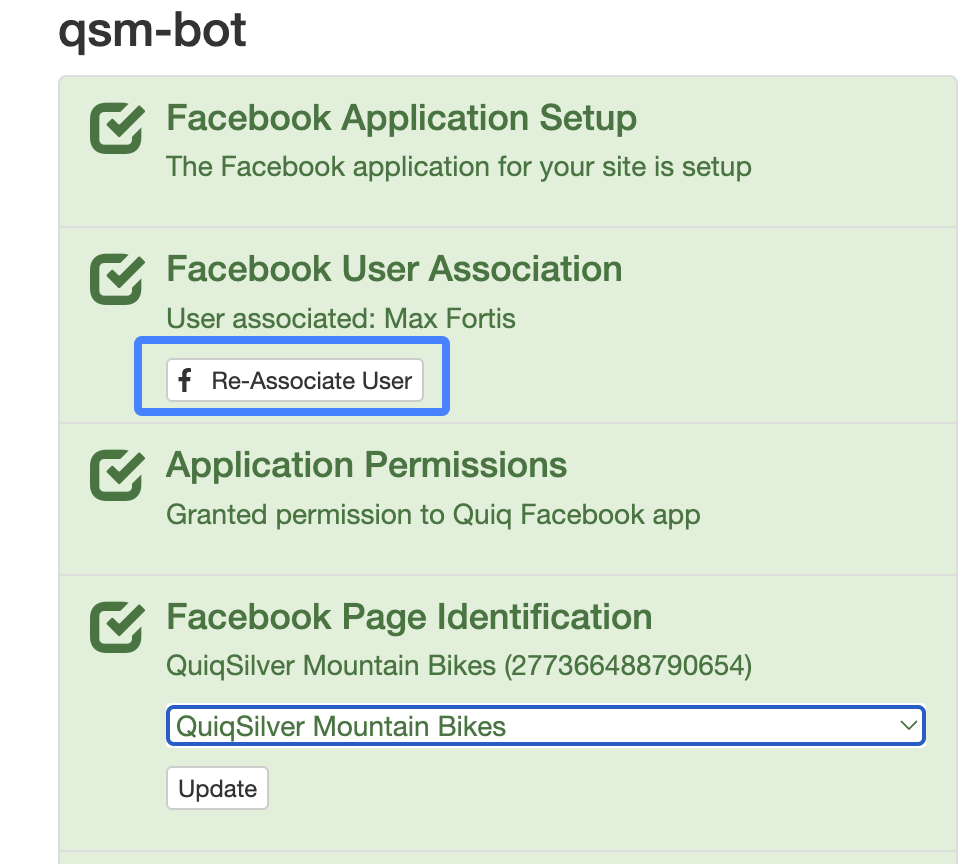
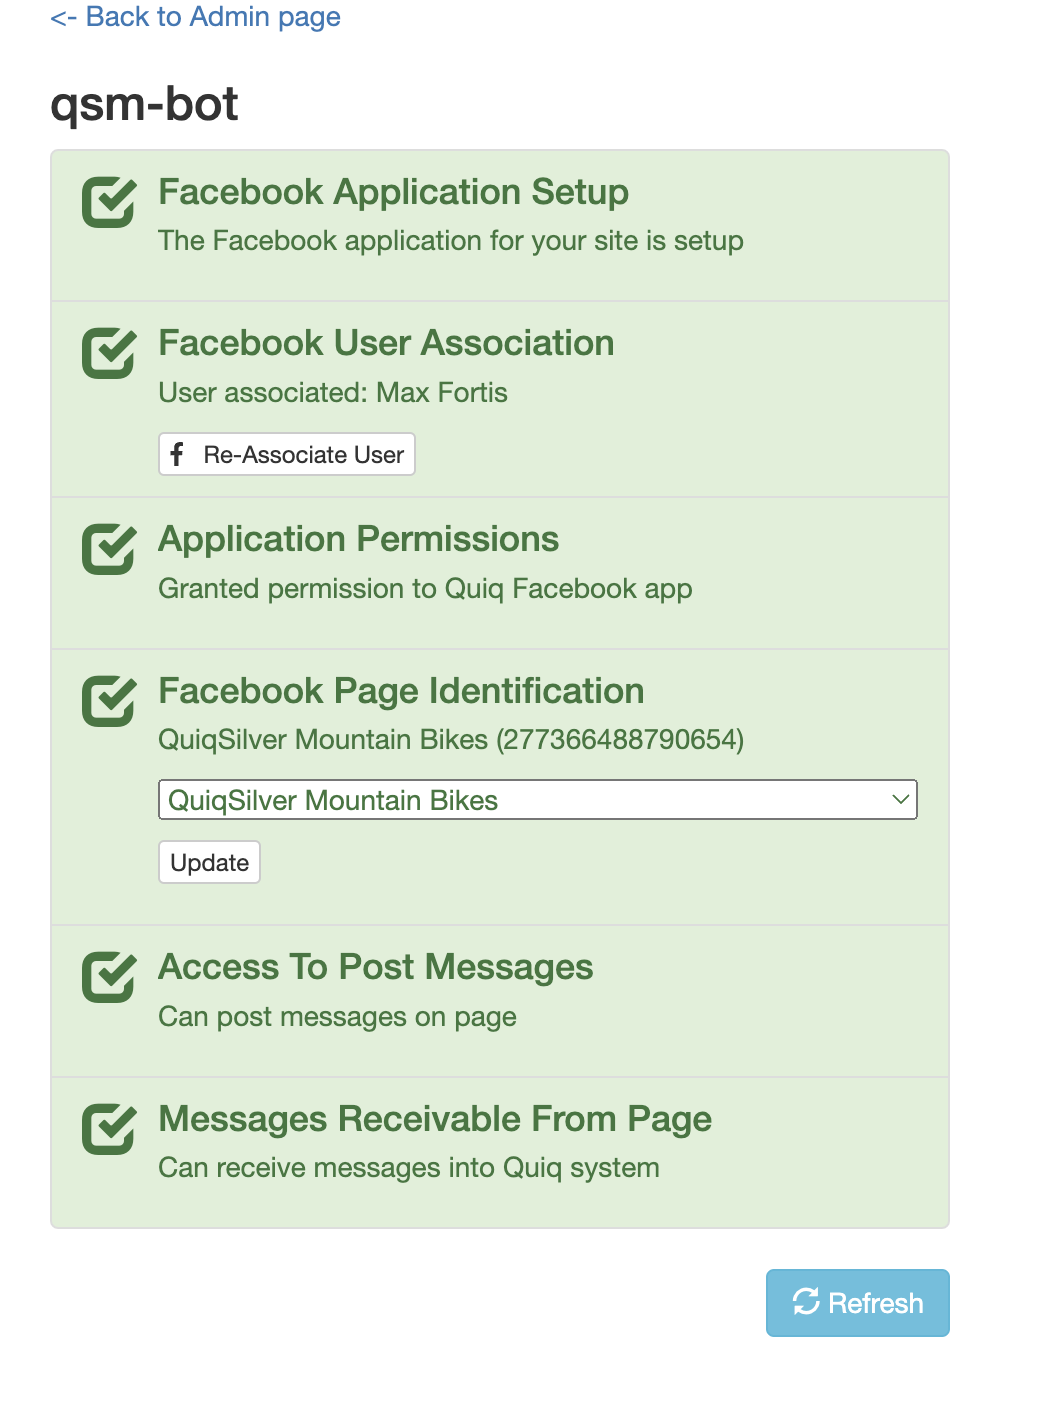
Click the link to view the checklist and identify any errors in the configuration. A healthy configuration will appear as follows:

⚠️ NOTEThe Facebook Page Identification section becomes blank as soon as it is submitted. Quiq does not retain the URL, but uses it to find the page ID. So long as the other sections are green, the integration is functional. A yellow section will indicate a problems, and the Facebook admin should re-complete the checklist.
Reconnecting your Facebook Account
Your Facebook account may become disconnected, especially if you change your Facebook account password.
The steps to re-connect to your Facebook page are as follows:
-
First, ensure that you are logged into Facebook as a user with Admin permissions on the Facebook page.
-
In the same browser, access your Quiq instance and navigate to Admin > Contact Points > [Your FB contact point]
-
Select the Facebook tab and click the Configure page association link at the bottom:
-
This will display a list of items to complete within Facebook. First, select Associate User:
-
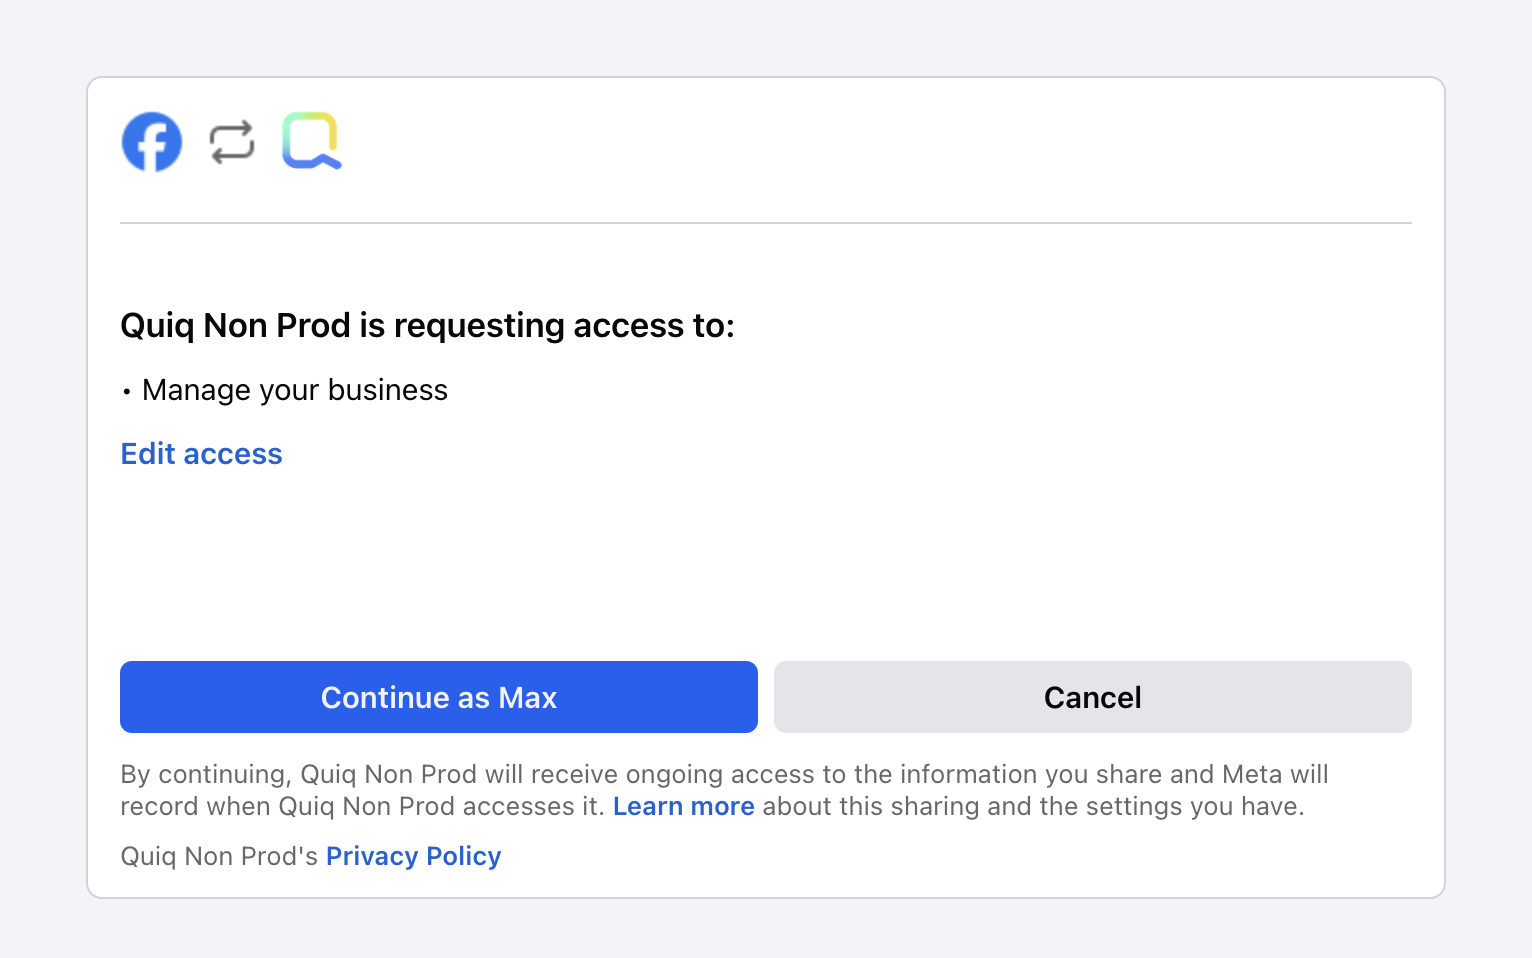
Next, grant Quiq access to the required permissions:
-
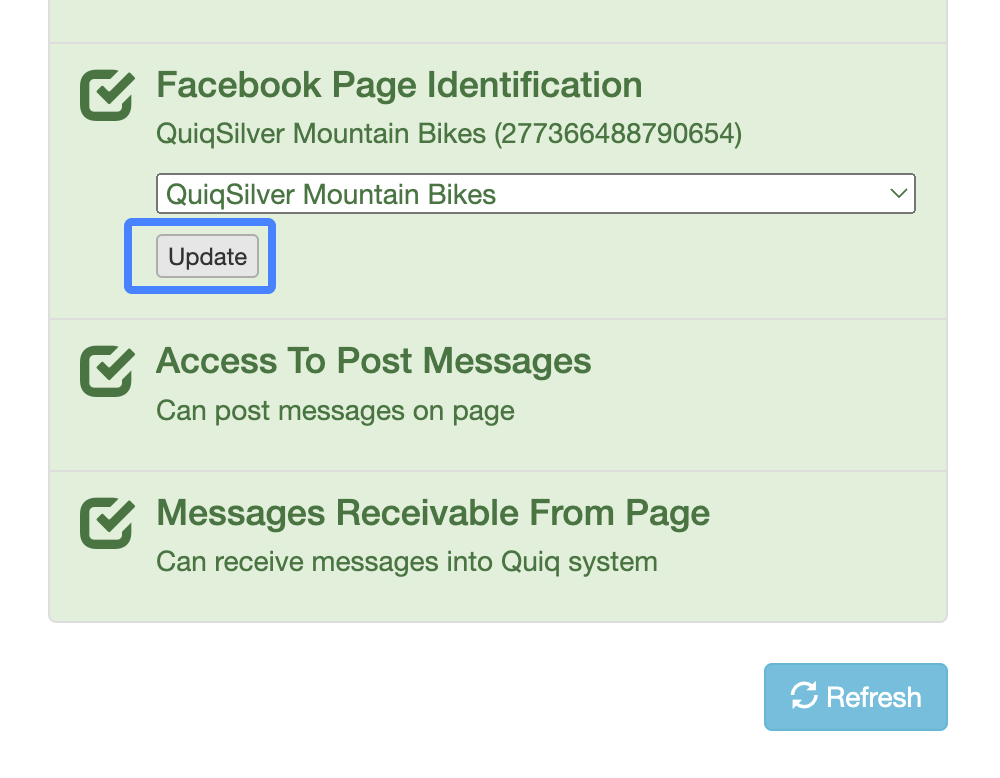
Next, ensure the appropriate Facebook page is connected and select Update:
-
When done successfully, every section should be Green, at which point your Messenger or Instagram page is up and running again:
Updated 8 months ago