
Custom Fields
Overview
Custom Fields allow you to collect and store different conversation or customer attributes. There are two classifications of custom fields: Conversation and Customer.
Conversation Custom Fields
A Conversation custom field is used to store data specific to the conversation. For example, create a Text custom field to store an order number or create a Select custom field with options on the reason why your customer is contacting you. Conversation custom fields do not persist when/if your customer starts a new conversation.
Customer Custom Fields
A Customer custom field is used to store attributes about the customer. For example, create a Text custom field to store your customer’s street address or an Integer custom field to store a unique customer ID.
Customer custom fields persist when/if your customer starts a new conversation.
Field Data Types
Before you add a custom field, determine the type of field you want to create. Field types can not be changed after the initial save.
Text
Open text that may contain alphanumeric characters with a maximum character limit of 512. You may allow your users to add the text on multiple lines by toggling on the Allow multiple lines setting.
Integer
May only contain numeric values with a minimum value of -2147483647 and a maximum value of 2147483647.
Select
Allows your users to select from a predetermined list of choices. Choices contain both a Label and a Value. The Label is what will be displayed to the end user. The Value is what will be stored for reporting purposes. The maximum characters allowed for both is 128. You may add up to 100 choices and may rearrange the ordering of the choices using drag and drop functionality.
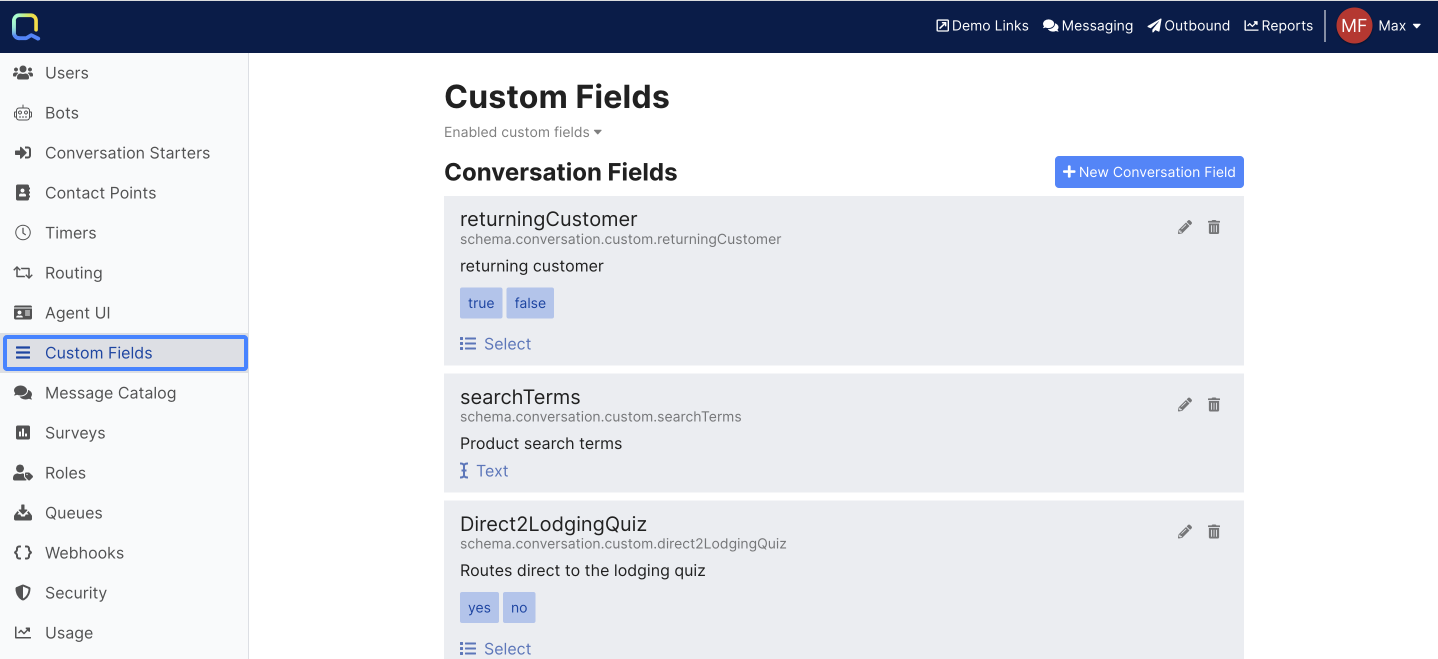
Add a New Custom Field
To add a new custom field, simply click on either the + New Conversation Field or the + New Customer Field button.

1. Enter a Label
- The label may contain spaces or special characters.
- Max label character length is 128 characters.
- Be sure to follow your business’s naming convention.
2. Enter a Description
- This is for internal use only.
- Max characters are 256.
3. The ID will automatically be populated, but you are allowed to edit it initially. Once the custom field is saved you will no longer be able to edit the ID.
- The ID may not contain spaces or special characters. Only letters and numbers are allowed, and it must begin with a letter.
- Max characters length is 128 characters.
*Duplicate ID’s aren’t allowed. - The ID is what will be displayed as the column header in your data exports.
4. Set the Required toggle button to your preference. If it is set to required, a value has to be entered for the field before a conversation can be ended.
5. Set the Hide from customer toggle button to your preference. If toggled on, the field will only be visible to agents, so it won't be available to add to customer-facing content such as Chat Welcome Forms or Data Gathering Behaviors in the Bot Designer.
6. Select the field Type.
7. Set the field type options.
8. Save
Disable Custom Fields
If you no longer need a custom field you can disable it. Deletion is not an option as the field may be related to historical conversations.
To disable a custom field:
1. Select the “trash” can button next to the field label.
2. You will be prompted for your confirmation.
3. Select Disable
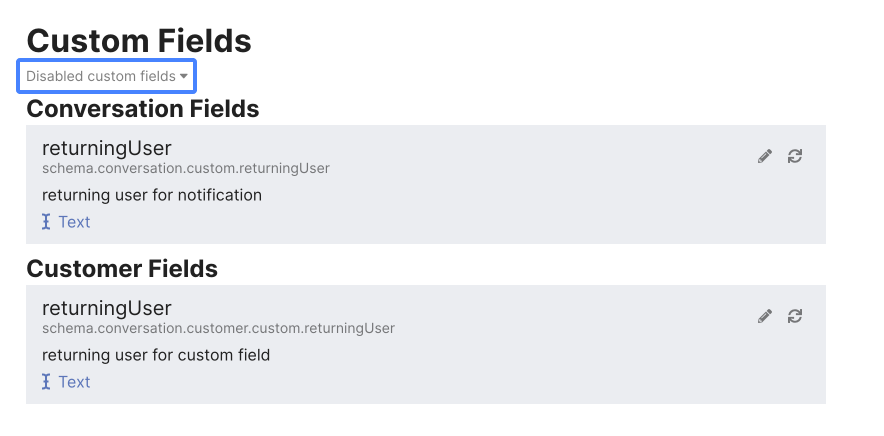
To view a list of your disabled custom fields, change the filter to Show disabled custom fields.
Disabled custom fields are not counted toward the maximum 50 fields per Conversation or Customer classifications.
When a custom field is disabled it’s no longer available or included in the following areas of Quiq:
- Closed Conversations CSV export
- Bot Statistics CSV export
- Admin > Agent UI > Start Conversation Fields (Only Conversation custom fields)
- Admin > Agent UI > UI Extensions
- Admin > Agent UI > Conversation Details
- Conversation Rules
- Bot Designer
- Admin > Contact Points > Web Chat > Welcome Form
- Snippets editor
- Active conversation view
- Outbound > Send Notifications
- Message Catalog
If a custom field is already referenced in one of the areas above, and it’s later disabled, it isn’t automatically removed. It will still be selected and function as defined at run-time.
If you wish to re-enable a custom field, simply click the Enable button for it. You will be prompted for your confirmation - select Enable.
Default Customer Fields
In addition to the ability to create custom fields, your Quiq tenant also comes with a range of default fields, you can find a list of these below. Depending on the Channels enabled in your tenant, you may have access to additional out of the box fields.
General Default Fields
conversation.customer.firstName
conversation.customer.lastName
conversation.customer.email
conversation.customer.phoneNumber
conversation.customer.preferredLanguage
conversation.customerPlatform
conversation.customerHandle
Web Chat Default Fields
conversation.webData.ip
conversation.webData.userAgent
conversation.webData.referrer
conversation.webData.timeZone
conversation.webData.browserCaps.deviceType
Apple Messages for Business Default Fields
conversation.appleMessages.group
conversation.appleMessages.intent
conversation.appleMessages.locale
Google Messages Default Fields
conversation.googleMessages.store
conversation.googleMessages.entryPoint
conversation.googleMessages.userDeviceLocale
conversation.googleMessages.shopping
conversation.googleMessages.dialer
conversation.googleMessages.dialer.deflectedPhoneNumber
conversation.googleMessages.shopping.allGlobalTradeItemNumbers
conversation.googleMessages.shopping.conversationType
conversation.googleMessages.shopping.merchantOfferId
conversation.googleMessages.shopping.productCategory
conversation.googleMessages.shopping.productImageUri
conversation.googleMessages.shopping.productTitle
conversation.googleMessages.shopping.productUri
conversation.googleMessages.store.address
conversation.googleMessages.store.name
conversation.googleMessages.store.placeId
conversation.googleMessages.widget.className
conversation.googleMessages.widget.groupId
conversation.googleMessages.widget.intentId
conversation.googleMessages.widget.storedContextId
conversation.googleMessages.widget.url
conversation.googleMessages.widget.webData.referrer
Instagram Default Fields
conversation.instagram.conversationStartedFromStoryMention
conversation.instagram.followerCount
conversation.instagram.isVerifiedUser
conversation.instagram.username
Custom Field Locations
Custom fields are available in the following areas of the Quiq application:
- Reports > Closed Conversations CSV export (included when Include Custom Fields is enabled)
- Admin > Bot > Download Bot Statistics CSV export (Conversation custom fields are included)
- Admin > Agent UI > Start Conversation Fields (Only Conversation custom fields can be used)
- Admin > Agent UI > UI Extensions
- Admin > Agent UI > Conversation Details
- Admin > Conversation Rules (in decision steps)
- Admin > Bot Designer
- Admin > Contact Points > Web Chat > Welcome Form
- Settings > Snippets
- Admin > Message Catalog