
Contact Points
Overview
Contact points are typically aligned with different lines of business, functions, or divisions by language. All Quiq tenants have at least one contact point. This control panel allows an Admin to enable web chat or configure additional platforms for the contact point, configure the options available for web chat, and manage Stop Lists for a given contact point.
General Tab
The General Tab allows Admins to configure settings for their Contact Point, which can be overwritten by platform specific settings
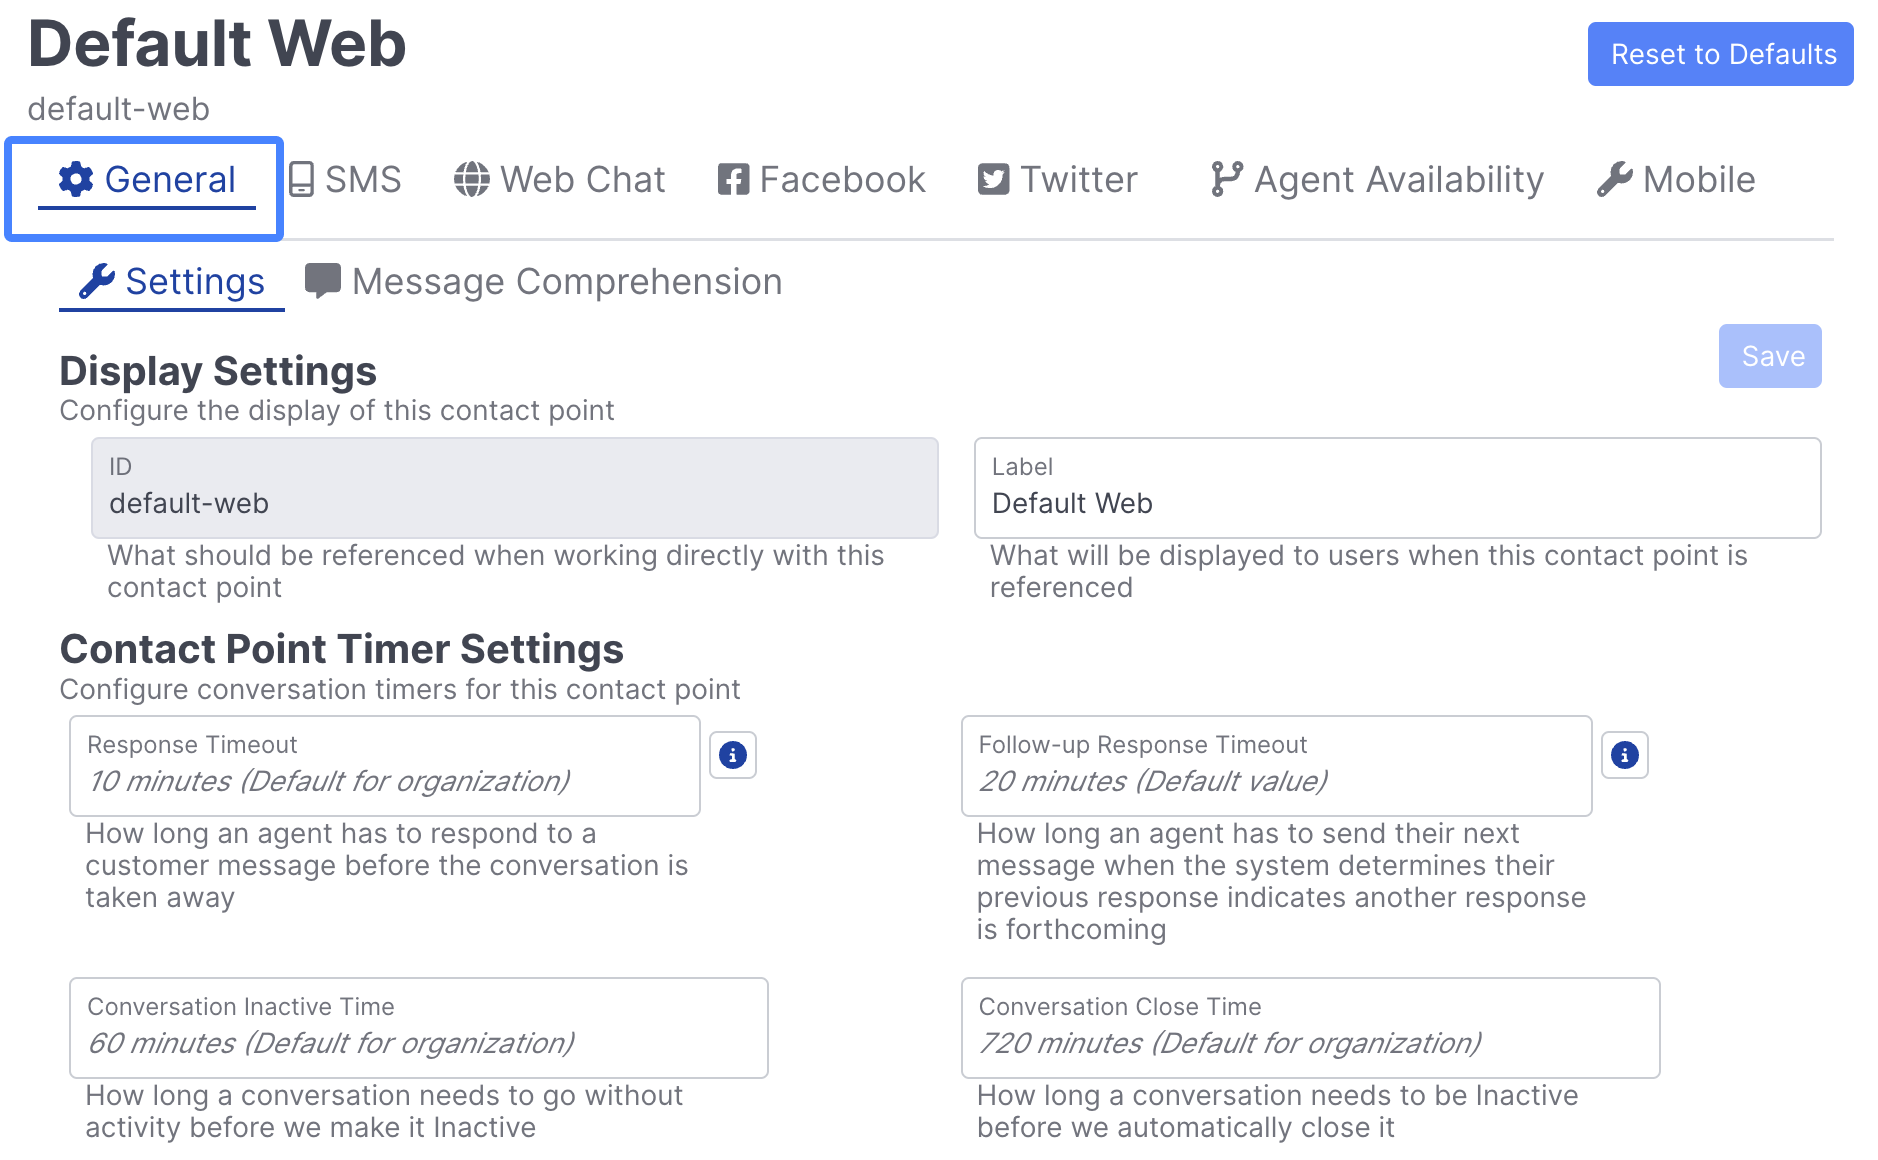
General Settings
Contact point ID’s are fixed, but labels may be changed by clicking the Label item, making the desired change, and clicking the Save button.
Contact Point Timer Settings
These settings override the tenant level settings applied under Timers for the given contact point. This allows specific use cases among different contact points.
Outbound Roles
Roles may be given rights to start a conversation or send notifications from the contact point. An agent may send an SMS message to a customer using one of two methods, Start Conversation or Outbound Messaging:

Start Conversation immediately begins a conversation and assigns it to the agent, while a Notification does not generate a conversation unless the customer replies. Reference Outbound Notifications for additional details.
The Outbound Roles provides an administrator with a method of limiting these actions to specific roles. This is best explained via an example:
-
A site with a Sales and Service contact point may wish only users in the respective departments to use those contact points. Roles defined along these departmental lines allow the Admin to limit the Sales contact point to the Sales role, and the Service Contact Point to the Service team. A Manager role may be given access to both contact points.
-
Additionally, each function (Start Conversation and Send Notification) is managed separately for each contact point. In the above example, Sales may be given access to the Send Notification item for Service in order to message about service specials, but not added to the Start Conversation list, as only Service reps should have Service conversations.
Click the Edit link to alter the list of Roles authorized to use each function. Once changes are made, ensure the Save button at the top of the Contact Point configuration page is clicked to retain the changes made.
Additional Roles may be considered for the purpose of managing this access.
Conversation History
Conversation History enables Admins to configure Roles that can view conversation history from a contact point, even if they would not have access to this otherwise. By default, no roles will be selected, meaning only users who have the requisite level of access to this contact point can view conversations associated with it.

Common ScenariosThere are a range of scenarios where you may wish to allow agents to view prior conversation history from a contact point they otherwise wouldn't see:
- For example, you may wish to enable your sales agents with a
Salesrole to view conversations from aServicecontact point, so they've got full visibility into past customer interactions that may be relevant, but you may not wish to enable your Service agents to see Sales conversations, because you'd like them to remain focused on their job at hand.
When enabled, prior, or current, conversations from the Contact Points with Conversation History enabled will show up in the transcript view for users with the appropriate permission.
Channel Configuration
Below you'll find channel specific documentation for each contact point.
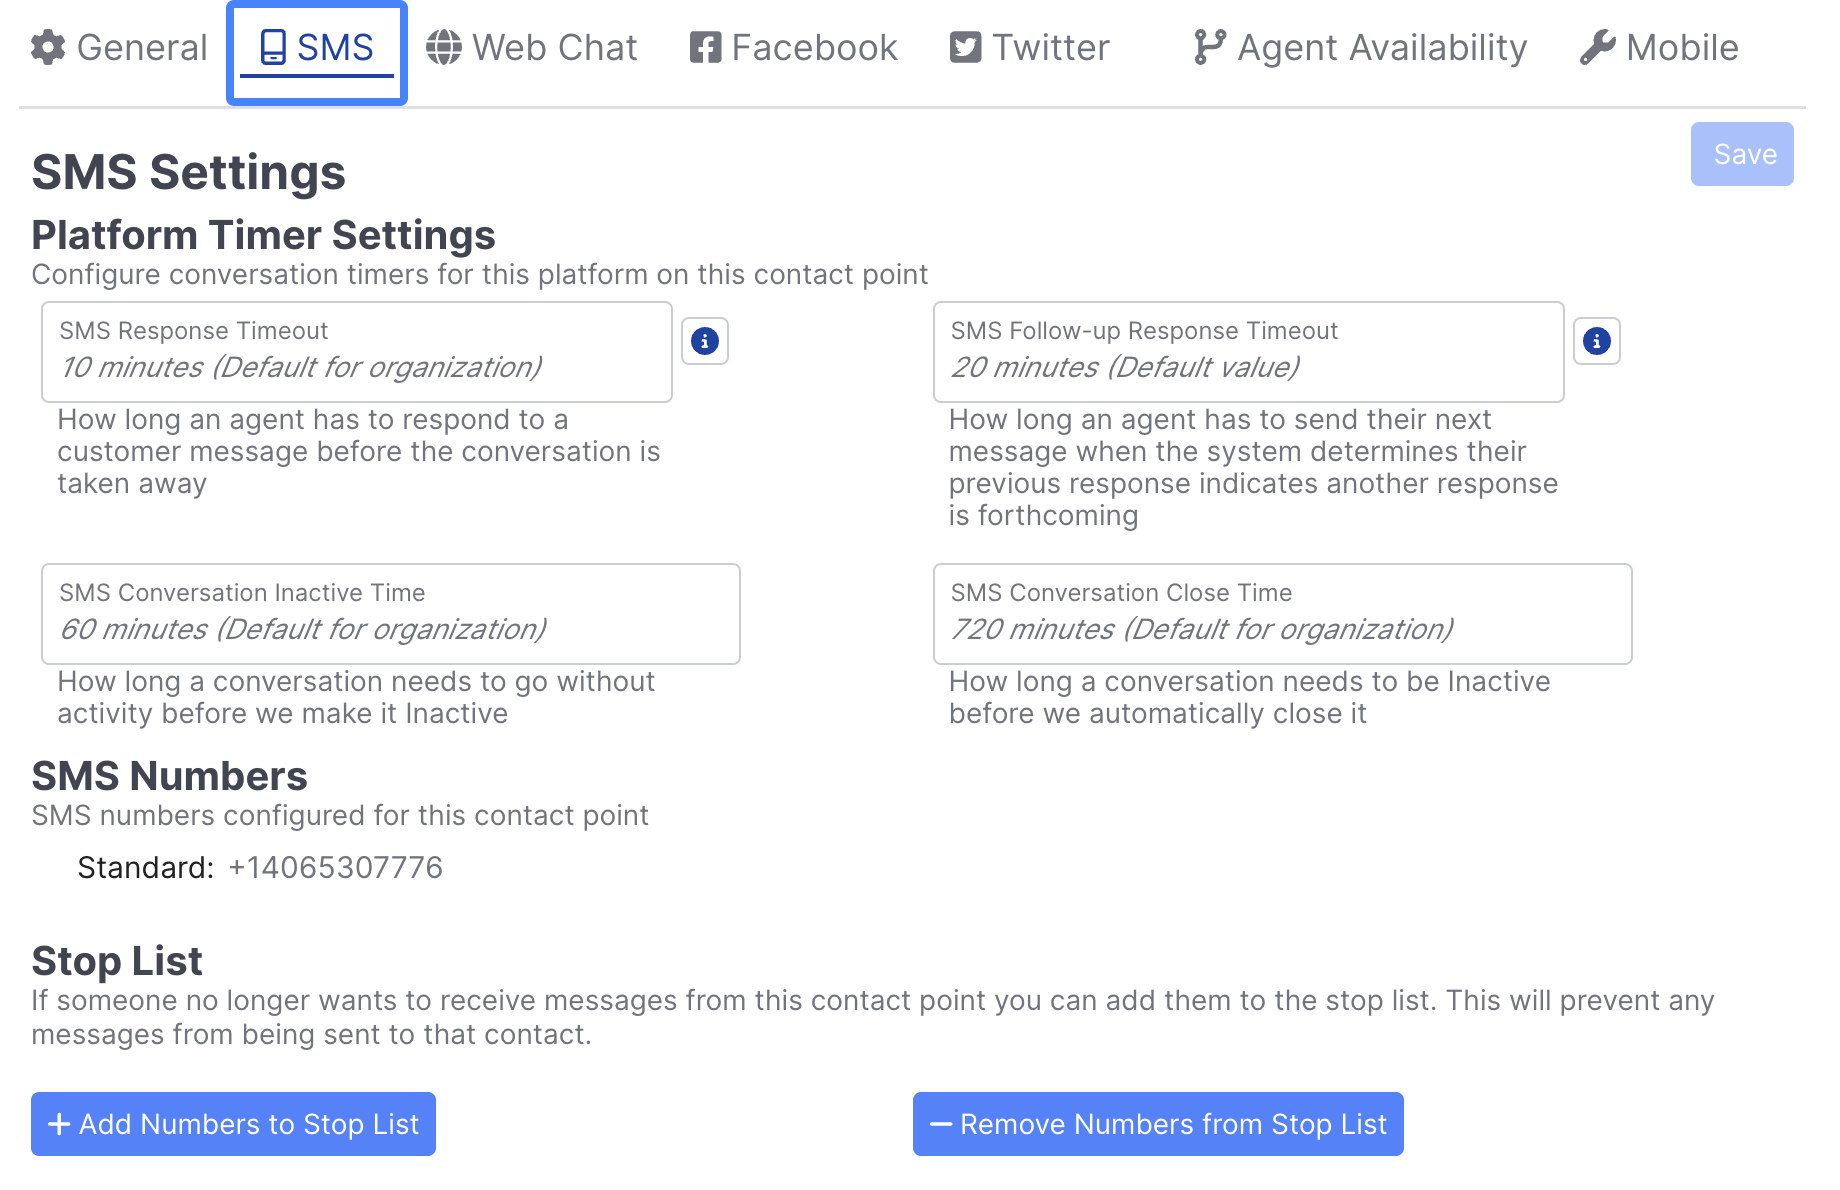
The SMS tab enables Admins to configure SMS specific settings per Contact Point. Learn more
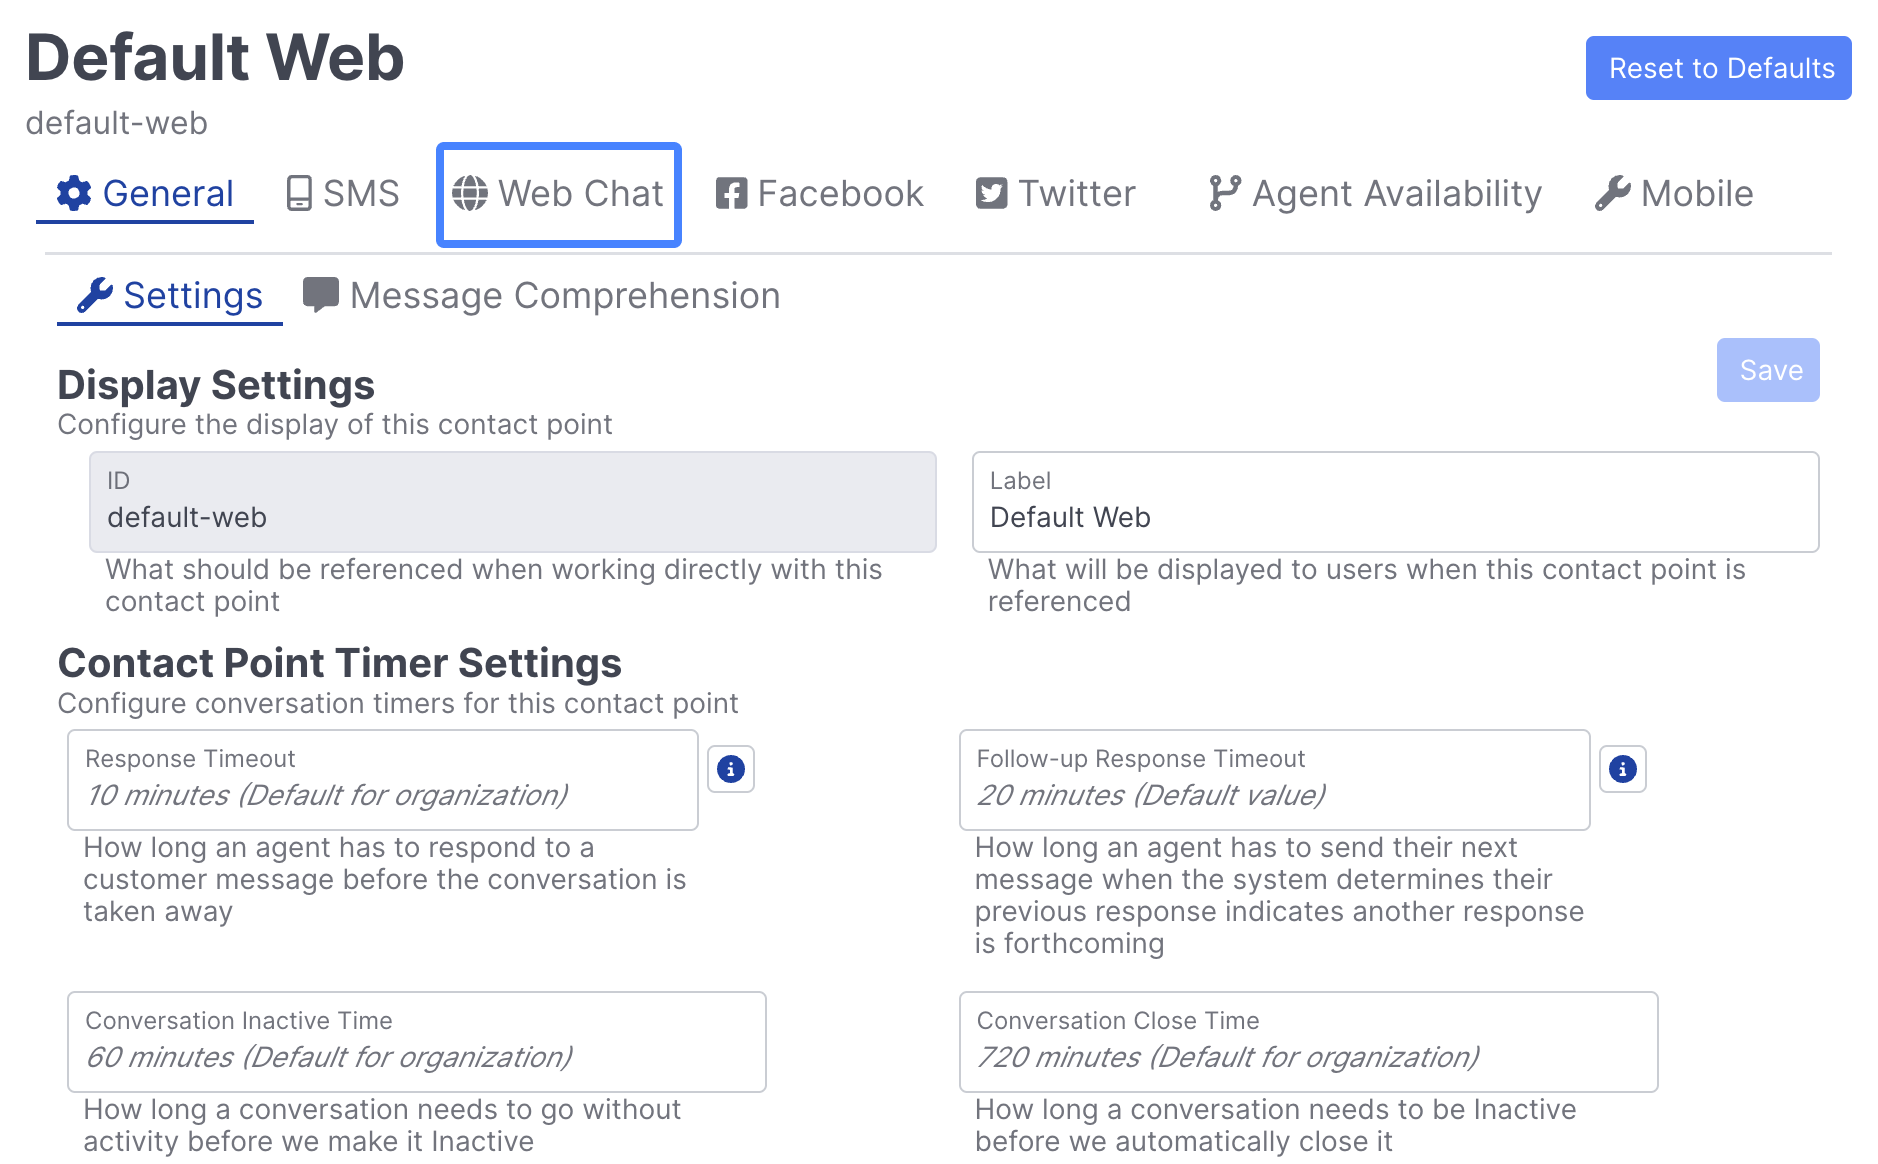
The Web Chat tab enables Admins to configure Web Chat specific settings per Contact Point. Learn more
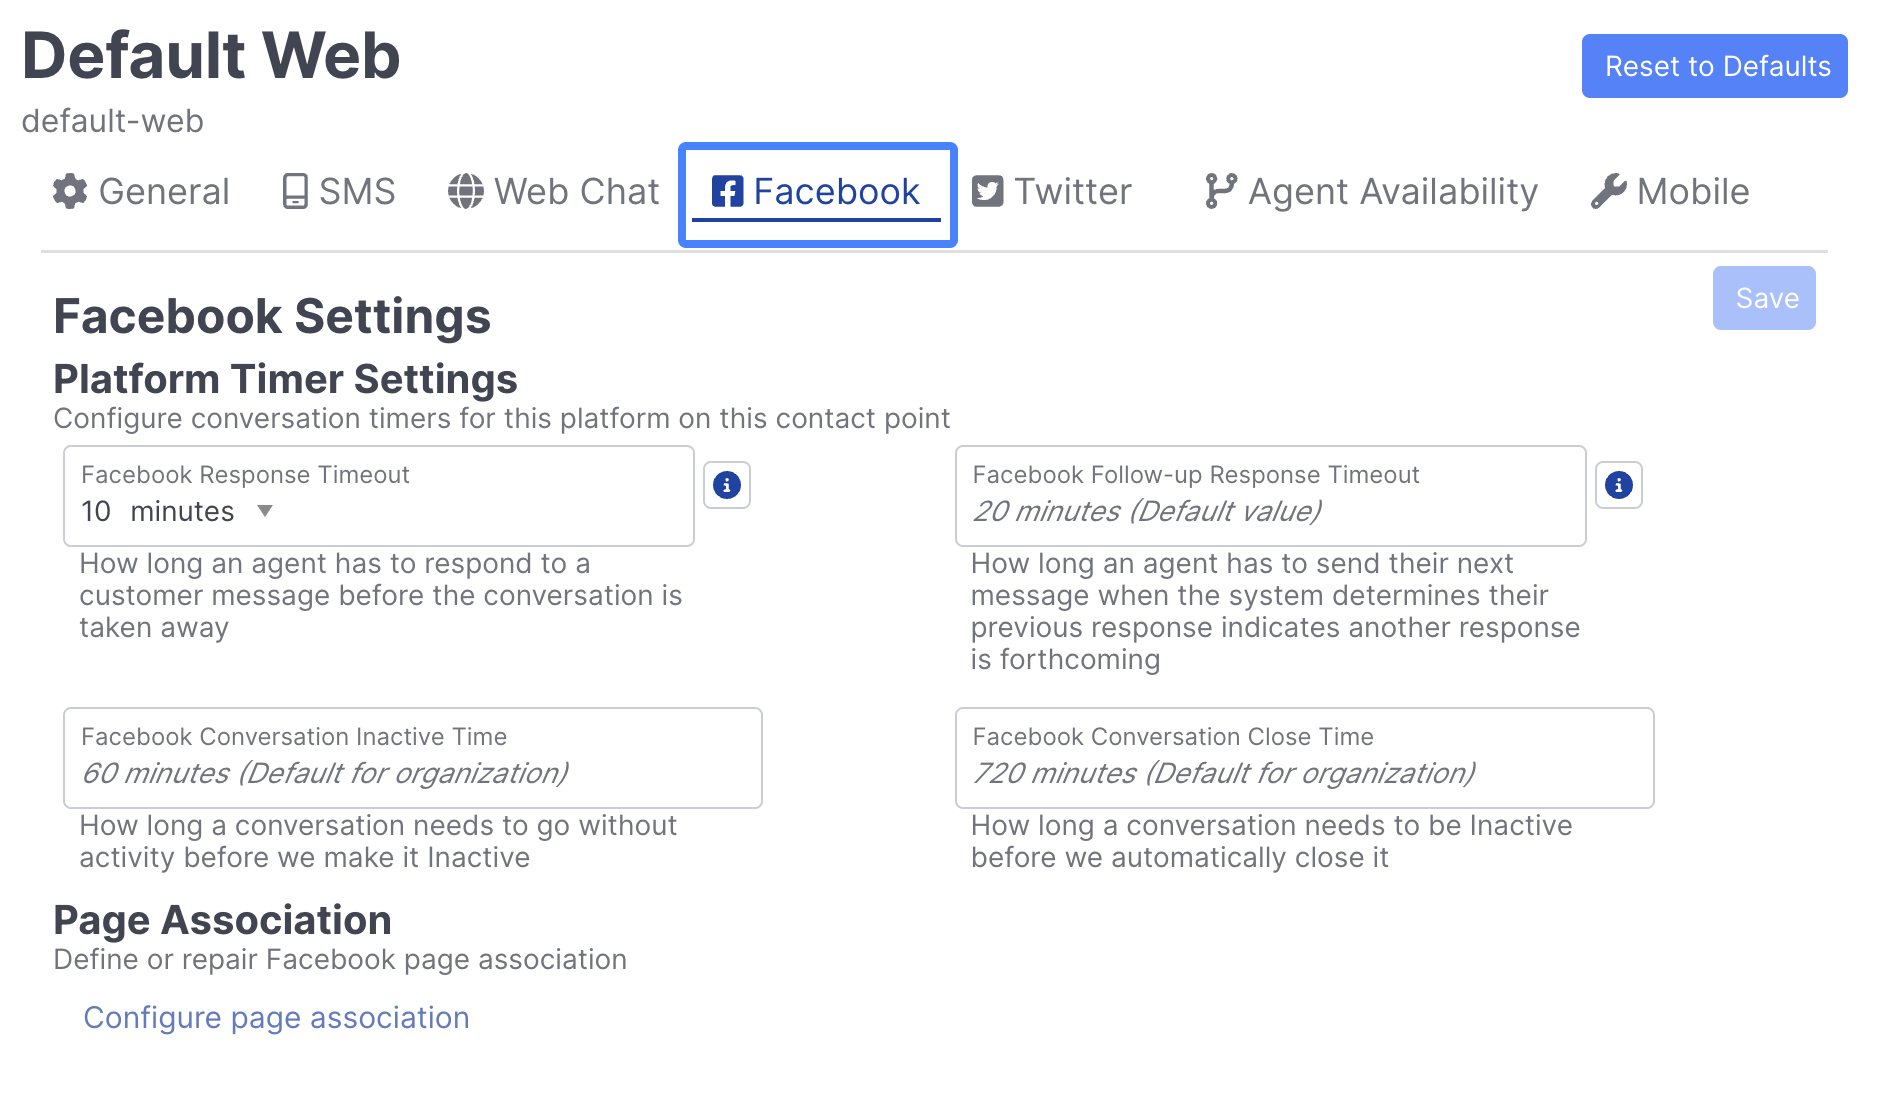
The Facebook tab enables Admins to configure Facebook Messenger specific settings per Contact Point. Learn more
The Twitter tab enables Admins to configure Twitter specific settings.
Additional Platforms
Additional Platforms may be added such as Apple Business Chat, Google RBM, Whatsapp, & Voice These require coordination with the messaging providers. Contact Quiq Support via [email protected] for assistance with these platforms.