
CSV Import
Outbound Notifications CSV Import
Overview
If you elect to utilize the CSV file option for sending outbound notifications you can leverage your source system to export recipient mobile numbers and other personalized information.
Please be cognizant that while any spreadsheet program can be used to create your .csv file, Quiq requires the information to be configured as demonstrated below in your .csv export:
ex. +15551234567, “Hello world!”
On your spreadsheet your information will populate two columns:
Column A will contain your recipient’s phone number.
column B will contain the message you will send them.

Files should be CSV formatted with 1,000 rows or fewer, and no header row should be included. Each row should have the destination phone number and the message for that number.
Personalized Notifications
You may want to use the Quiq Outbound Notification tool to send personalized messages to your customers. For example, you may want to include the customer name and a tracking number to each notification recipient. You can customize each message sent by using a merge formula in your spreadsheet application.
In the example below you can see that the first column of our spreadsheet includes our customer mobile number and the second contains a message with their name and a tracking number.

This was done by using the merge formula to call specific data from other fields on the spreadsheet. In this case we used =C2&” “&D2&”“&E2&” “&F2&” “&G2&”“&H2&” “&I2
Please download the sample spreadsheet for future reference. Sample Quiq Outbound Notification Spreadsheet with Merge Formula. You will need to go to File > Download > and select the file format you need such as .xlsx for Excel.
NOTERemember that you will need to save the file as a CSV for uploading into Quiq.
Here’s the breakdown of the information contained on sample spreadsheet.
-
Column A will have the customer cell phone number you want to text.
-
Column B contains a formula to merge all pertinent pieces of the message together into a single custom notification.
-
Column C has the Intro to the message “Hello”.
-
Column D has a column that is filled with the Customer Name.
-
Column E has a period to end the first sentence.
-
Column F has additional verbiage of the message “Thank you for ordering from Quiq Training Company. Your product has shipped successfully. Your tracking number is”.
-
Column G contains the tracking number for that customer order.
-
Column H contains a period to end the fourth sentence.
-
Column I contains the verbiage you’d like to use to end the message.
If you have the ability to export from your shipping system a column with your customer’s phone number, name and their tracking number, you can replace the contents of Column A, D and G you’ll be able to have a custom message for each shipment.
Feel free to customize the sample spreadsheet with your outbound notification messages.
Using Snippets in Outbound Notification CSV Import
Supported Snippet TypesOnly Snippets that consist of solely text and assets can be used in the CSV upload for notifications. Snippets that contain Cards, Carousels, or other rich messaging content are not supported.
To use a pre-defined Snippet in your CSV import file:
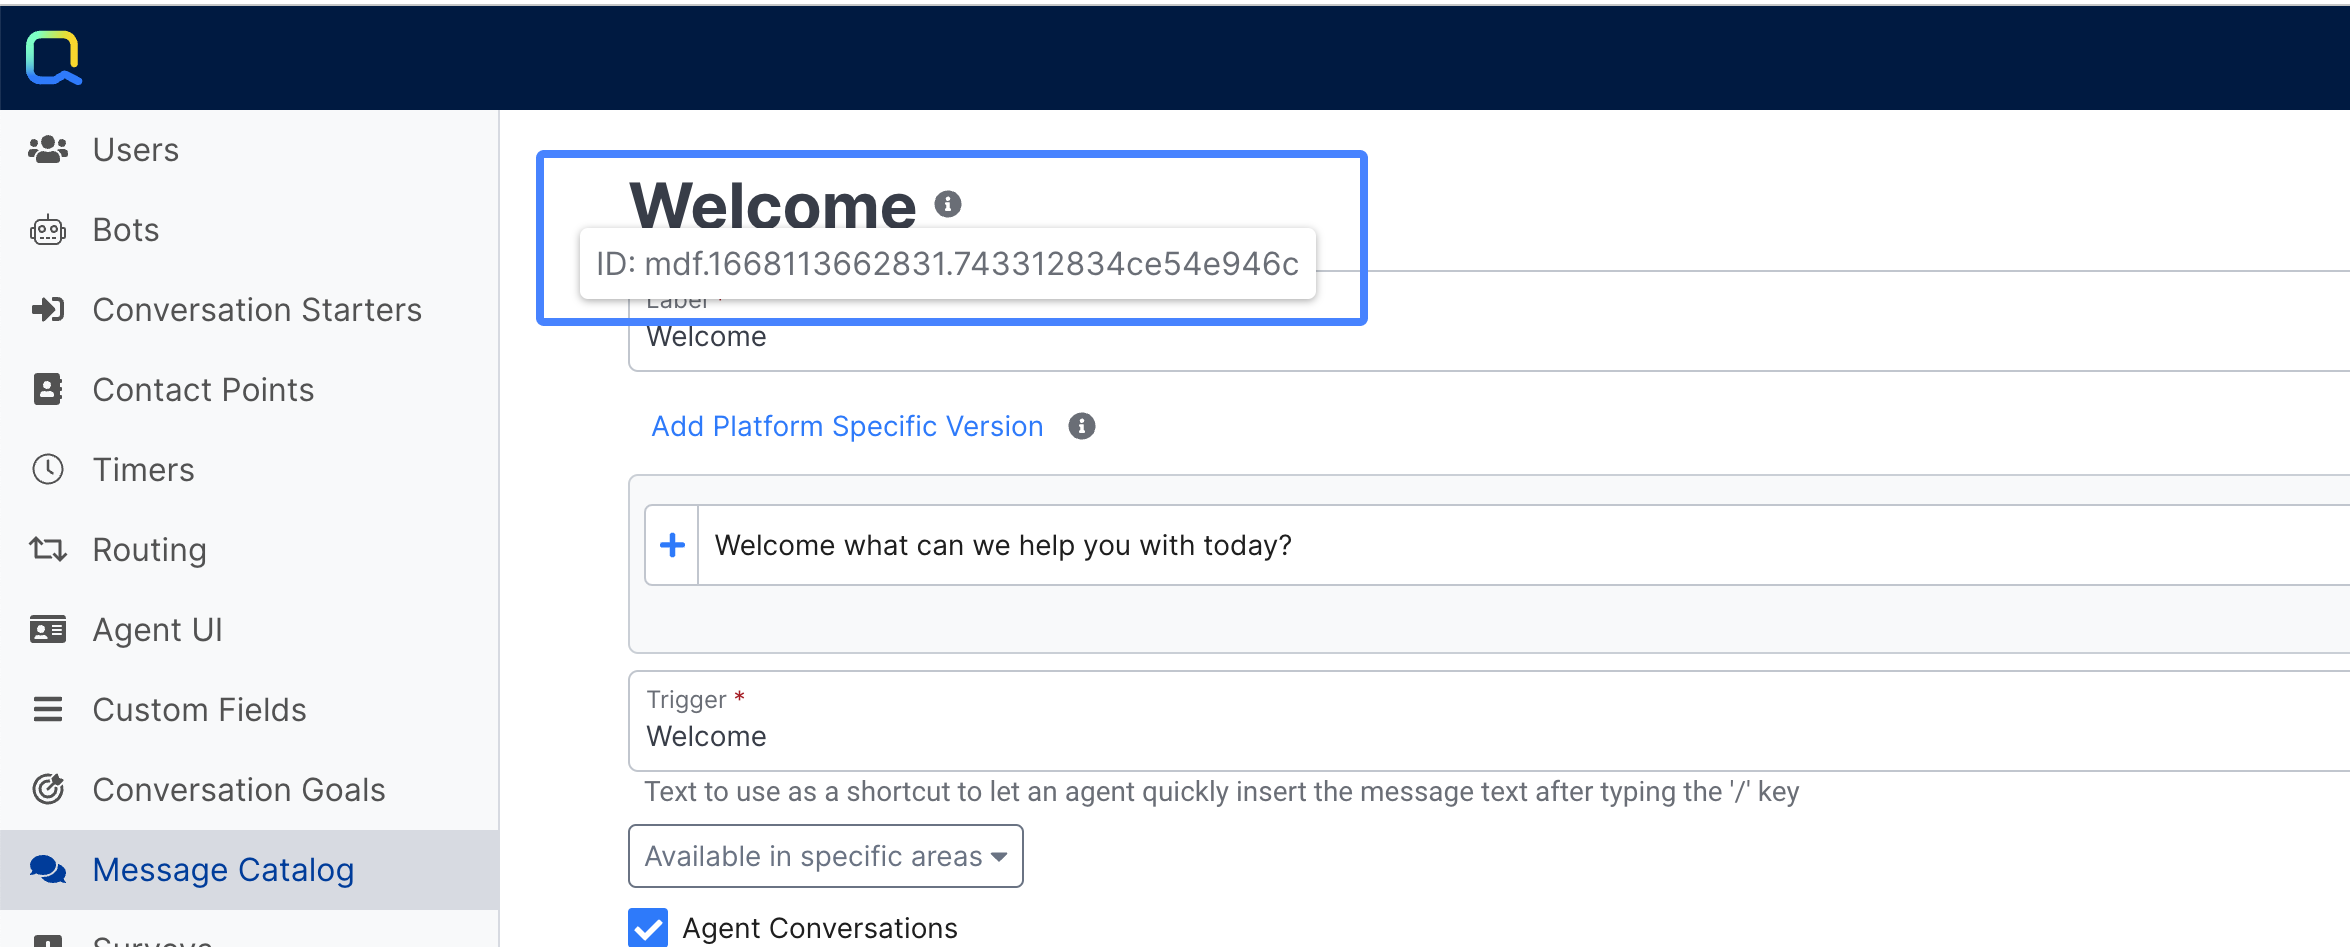
- Navigate to Admin > Message Catalog or Settings > Snippets and select the Global Snippet (one available for everyone) that you want to use
- Click on the Information icon button next to the message's label at the top of the editor, and copy the ID
In your CSV file:
- Column A will have the customer cell phone number you want to text
- Column B will be blank
- Column C will have the Snippet ID (just the ID value, without the "ID" label) for all line entries
If your Snippet is simply an attachment without Text, you will need to add verbiage to column B or your message will be just the attachment.
Updated 9 months ago