Segments
Overview
Segments are available in both AI Agent Goals and Funnels. Applying a Segment will return only data that meets some set of criteria laid out in your Segment.
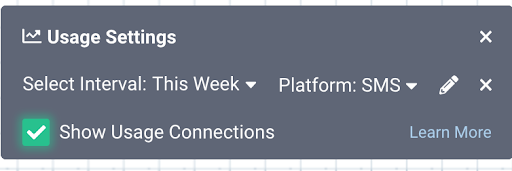
The Segment selector appears next to the Interval selector when viewing a Funnel and in the Usage Settings dialog in the Bot Designer:
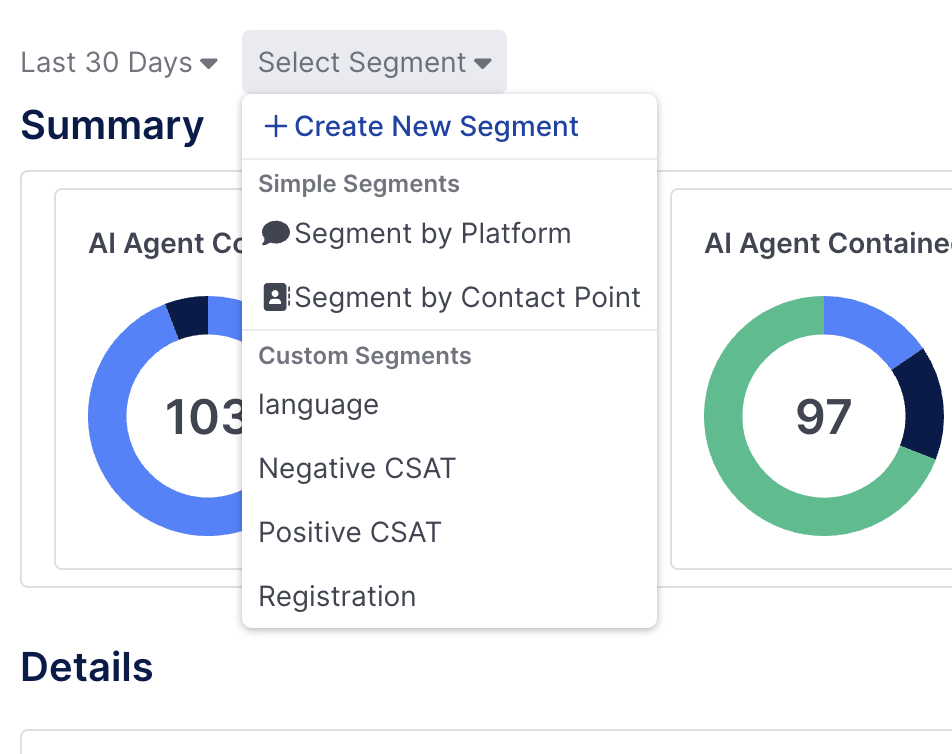
Simple Segments
Two simple segments are available by default:
Segment by Platform
When Segment by Platform is selected, the user is prompted for a platform. After selecting an item from the list, and hitting the Select button, the funnel or bot usage will be restricted to only conversations that occurred on that selected platform.
Segment by Contact Point
When Segment by Contact Point is selected, the user can select any of their configured contact points and only conversations occurring on that contact point will be counted.
When a Segment has been applied, it appears in the Segment selector. The X can be selected to clear the selected Segment such that the returned data is no longer restricted. The pencil image can be selected to pick a different platform or contact point.
When using Simple Segments, only one platform or contact point can be selected. If you wish to see the data for multiple platforms or contact points together, that can be done by creating a custom segment.
Creating Custom Segments
You can also have the ability to create your own Segments in order to view data based on a more complex set of conditions, or on data fields that are custom to you. To create a custom Segment, choose the + Create New Segment button from the Select Segment drop-down.
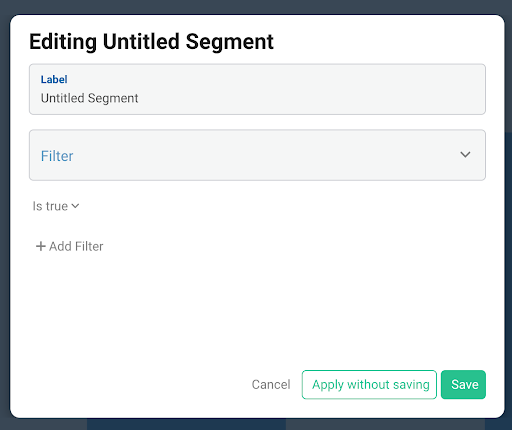
Every custom Segment is defined by having the following:
Label: The name the users will see in the Select Segment list when applying a segment
Filter: Used to select the type of event that occurred.
Is true/Is false: Used to say that the specified event had occurred, or had not occurred
Additional Filters: Used to specify certain data restrictions that were present when the selected Filter event occurred
Managing Segments
When a Segment has been applied, it appears in the Segment selector. The X can be selected to clear the selected Segment such that the returned data is no longer restricted. The pencil image can be selected to pick a different platform or contact point.
Saving Segments
After defining the Segment, you can select ‘Apply without saving’ in order to apply it to the currently viewed funnel or bot usage, but it will not be available in the Select Segment list for later use. Selecting ‘Save’ will save the Segment so it can be used later, and on other funnels and bots, and y other users.
Examples of Segments
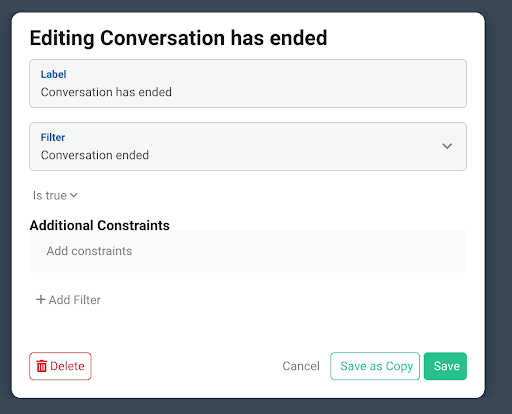
Restricting to journeys for conversations that have ended
This Segment requires that a conversation must have ended. When applied, this would restrict the data to only count conversations that have ended.
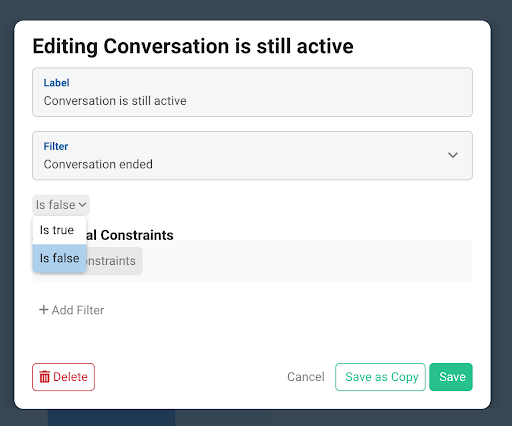
Restricting to journeys where conversations have not closed
By changing the toggle setting to ‘Is false’, the segment could be changed to only count conversations that have not yet ended (there is no ‘Conversation ended’ event for them). When applied, this would restrict the data to only count conversations that have not yet ended.
Restricting to journeys based on custom data
Additional constraints can be selected to restrict to conversations where some data field has (or does not have) some specified value. You still need to select the type of event Filter. The check will be done to verify the data conditions at the time the listed Filter event occurred. Here we want to be able to view a funnel definition on only conversations which had a mainIntent of ‘Accommodations’ at the time it ended.
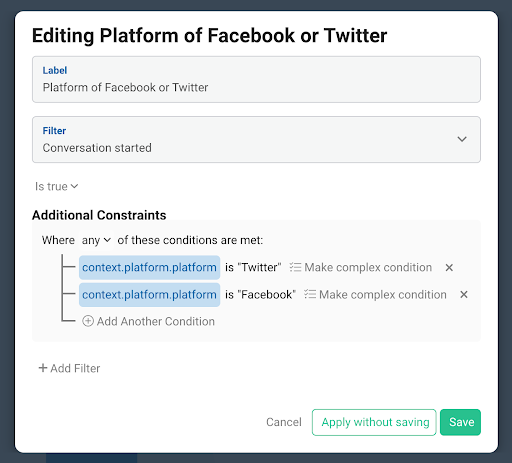
Restricting to journeys for multiple platforms together
You can use a combination of constraints in your Segment definition. Since the Simple Segment for Platform only allows selecting a single platform at once, you can create a segment in which you can group several platforms together.
Updated 3 months ago
