
Custom Events
Overview
Custom Events allow you to create a special type of contact event with a set of defined properties. Custom events can be useful when triggered in an AI Agent because they can happen multiple times in a conversation's flow (even within a single turn technically) whereas Custom Fields, session fields, and Goals can only be set once and then are overwritten as the same parts of the flow happen. This can make custom events better suited to examine behaviors in conversation flow with analytics insights.
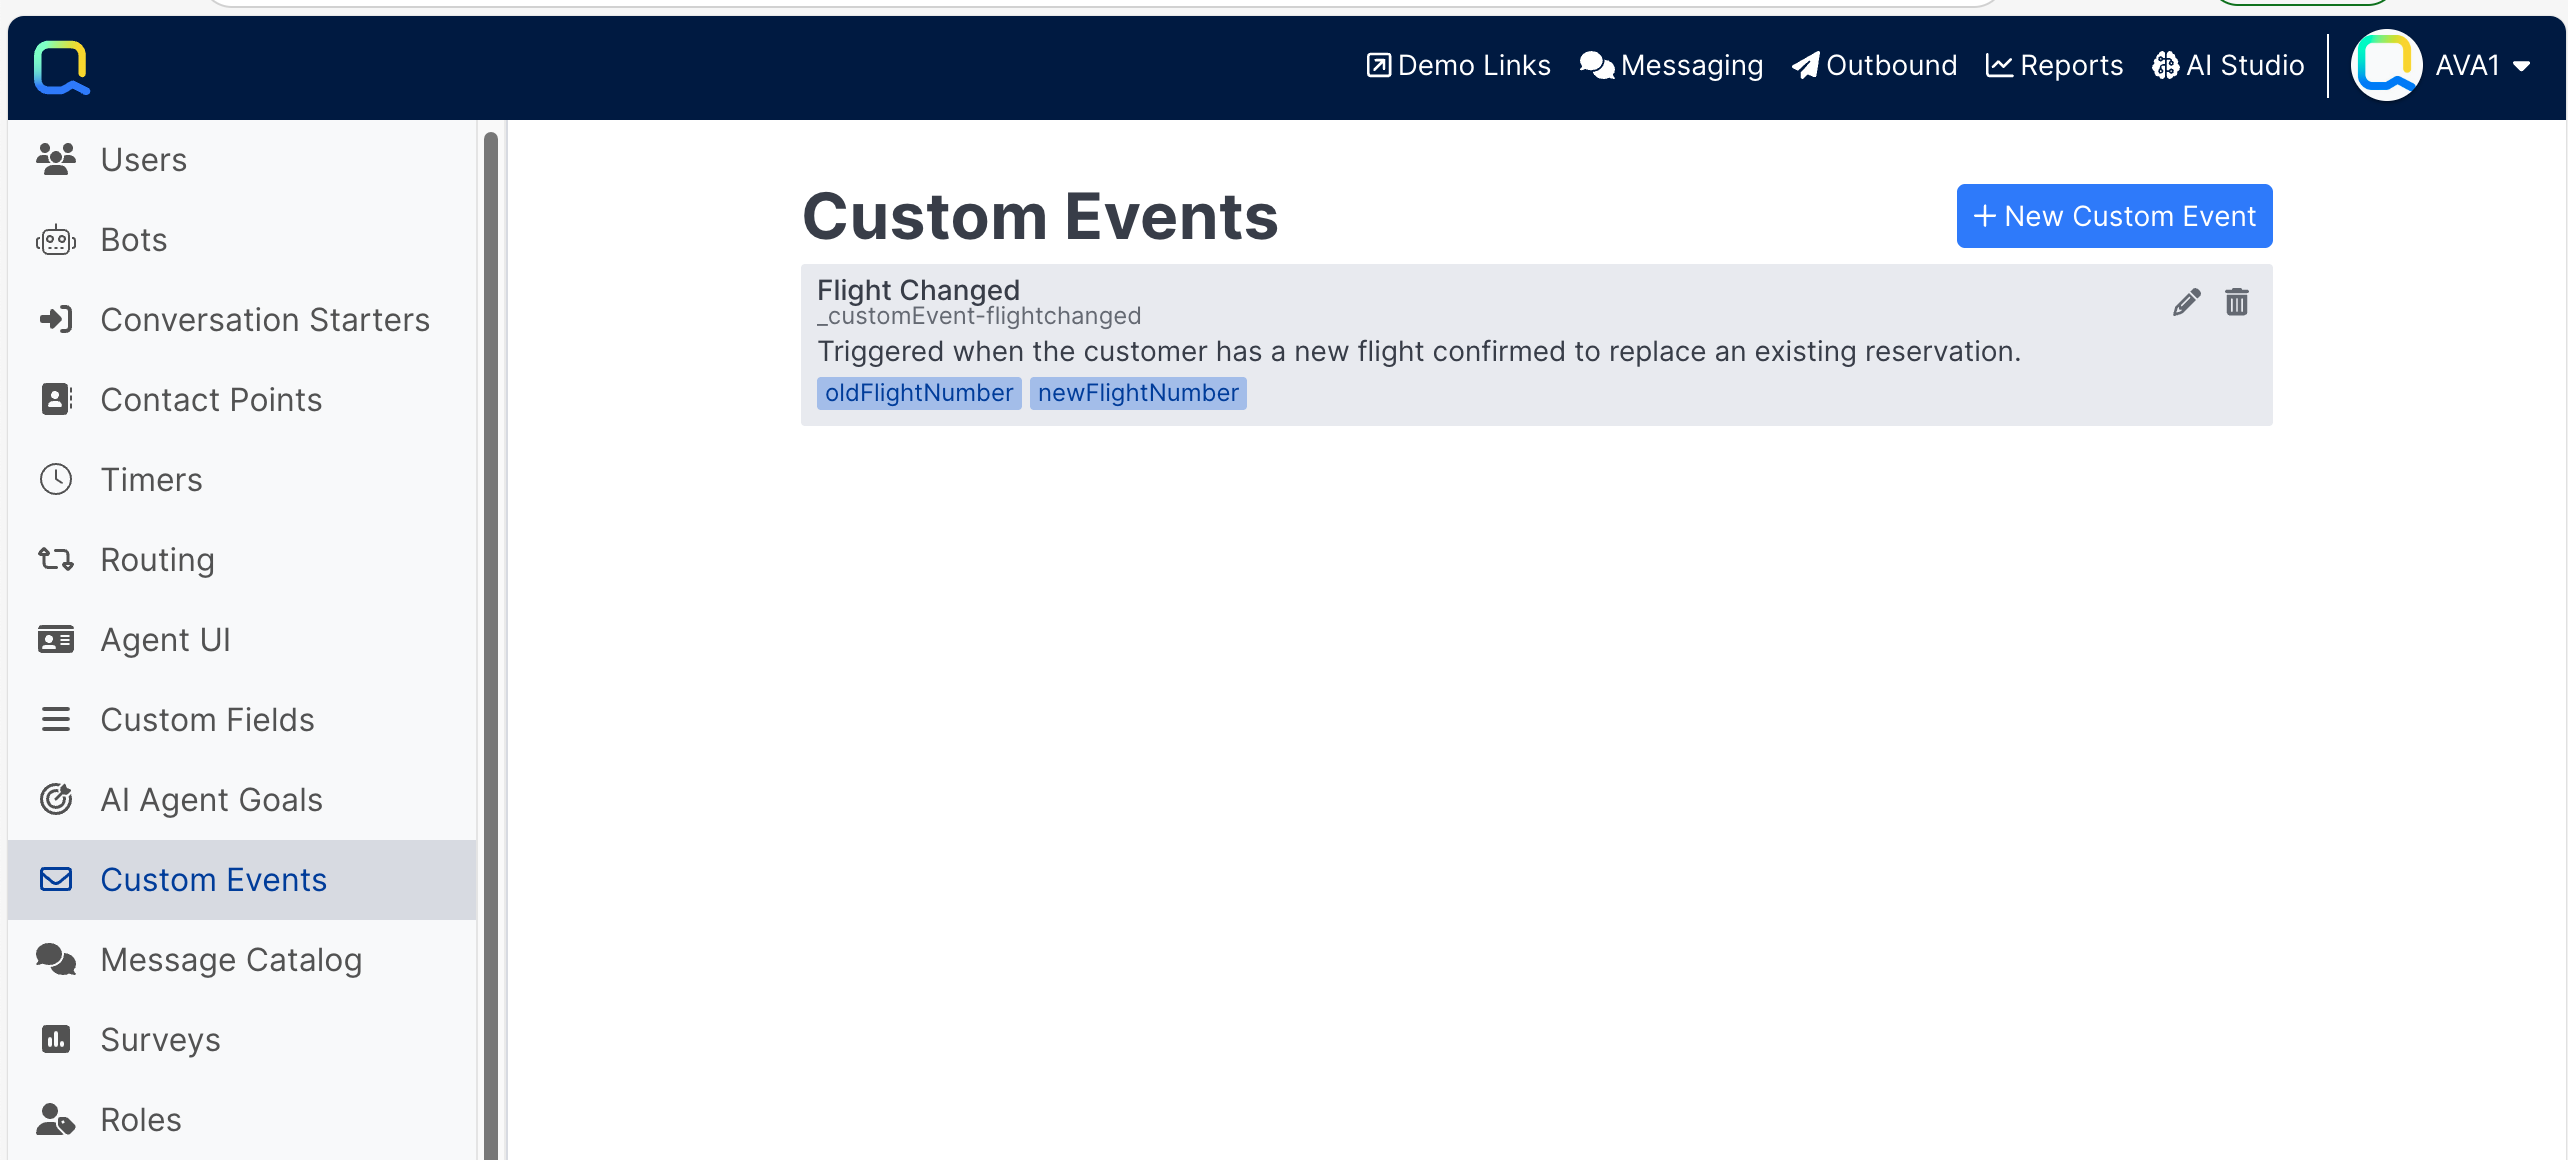
Add a New Custom Event
To add a new custom event, simply click on the + New Custom Event button.
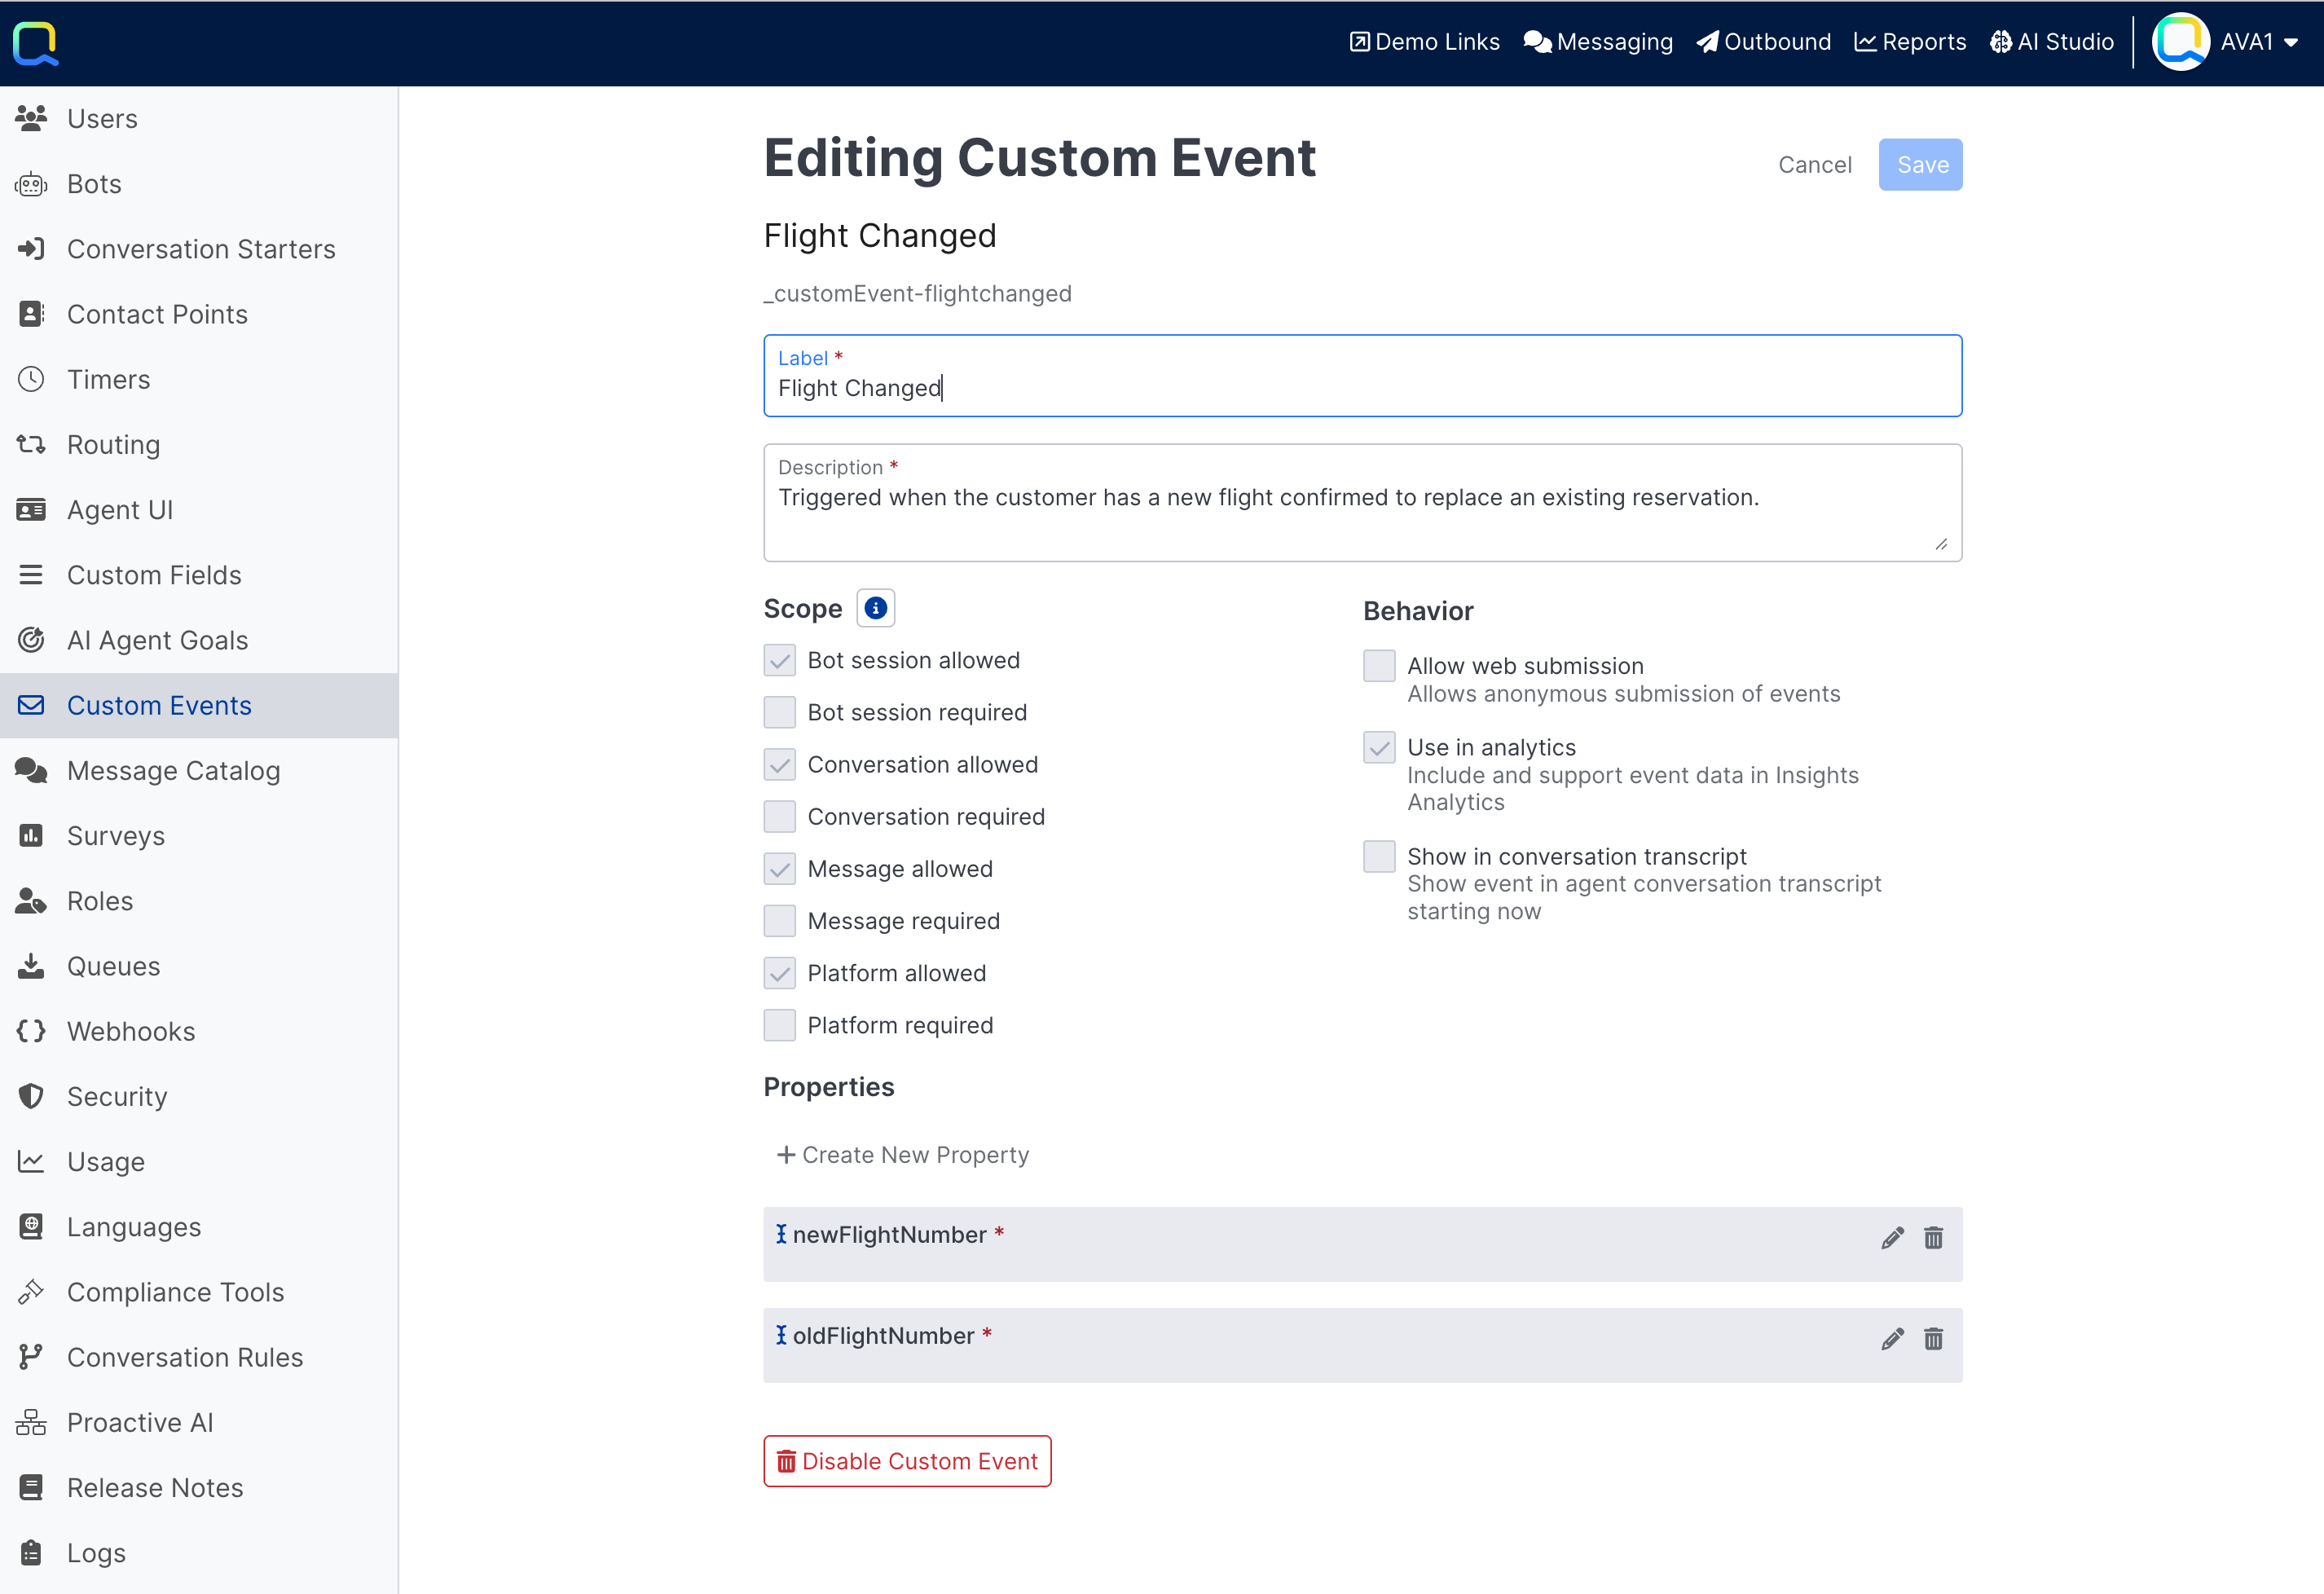
1. Enter a Label
- The label may contain spaces or special characters
- Max label character length is 128 characters
- Be sure to follow your business’s naming convention
2. Enter a Description
- This is for internal use only
- Max characters are 256
3. Select the allowed or required checkboxes to indicate the Scope of the event
- If the custom event will be used with an AI Agent, make sure the Bot session allowed and Conversation allowed boxes are selected
- The Scope of a custom event cannot be changed once it is saved.
4. Select the checkboxes to indicate the Behavior of the event
- Select the Use in analytics box in order to be able to report on the event in Insights and within AI Studio, when applicable
- Select the Show in conversation transcript box in order to see the event in the conversation history when working Active or viewing Closed conversations in Reports
- The Behaviors of a custom event cannot be changed once it is saved
5. Configure any Properties for the event. Properties can be used to store certain data conditions that existed at the time the event was triggered.
6. Save
Event Properties
Properties are pieces of applicable data that should be stored with the event. Like when defining Custom Fields, event properties can be created for text, number or select-type data types. Properties are available for review when analyzing the custom events that were generated.
To add a new custom event property, click on the + Create New Property button.
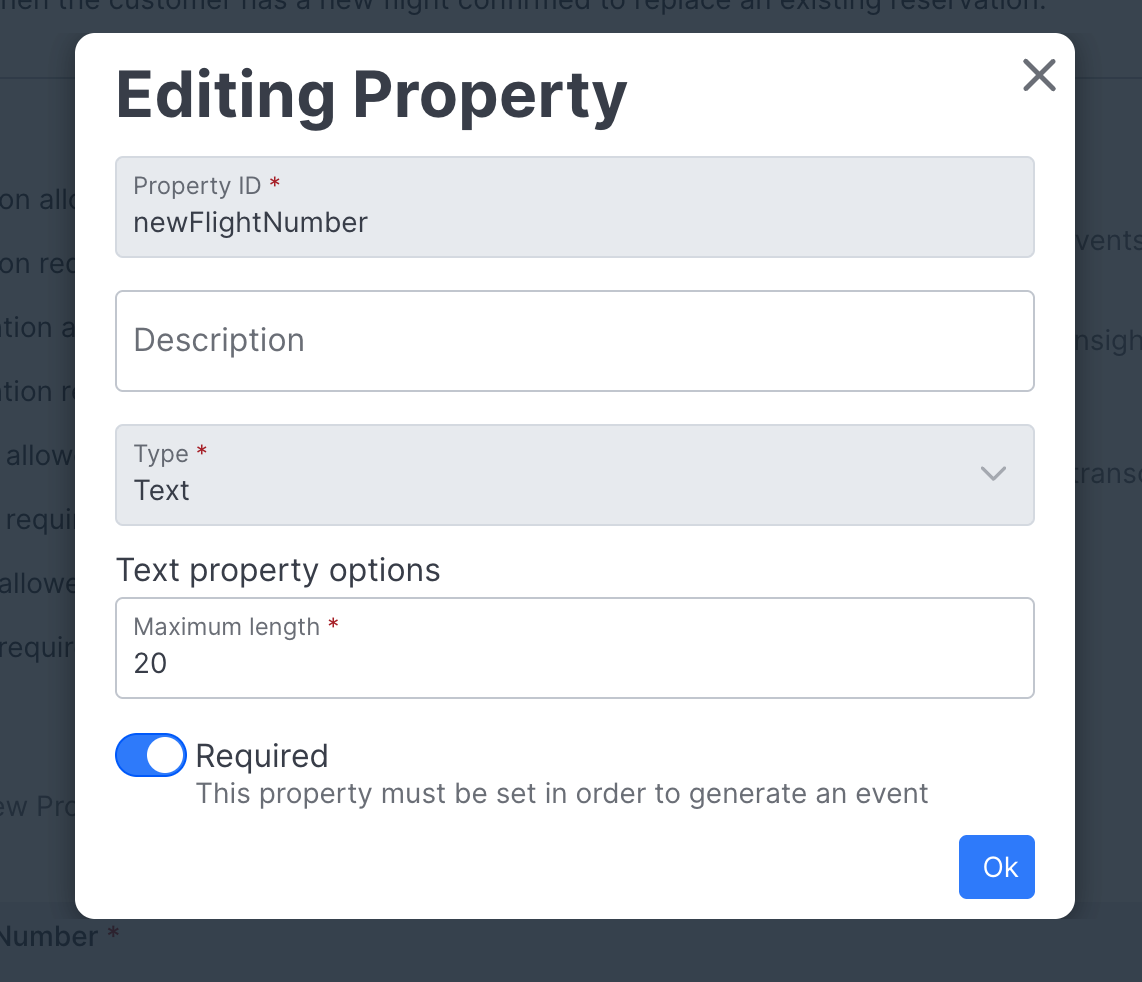
1. Enter a Property ID
- The ID can only contain alphanumeric characters. It cannot contain spaces or other special characters.
- The Property ID will be used in table column headings and data filtering when reporting on the event
2. Enter a Description
- This is for internal use only. It will be used in AI Studio Tools when examining events.
- Max characters are 256
3. Set the Type of field - Text, Integer or Select
4. Depending on the Type selected, configure the required Property options
5. Set the Required toggle button to your preference. If it is set to required, a value has to be entered for the field in order for an event to be successfully generate.
6. Save
Additional properties can be added to an existing custom event. Once a property is added to a custom event and it is saved, the Property ID and Type cannot be changed. The Required toggle button can be reset after the event is saved and will be applied to events generated going forward.
Disable Custom Events
If you no longer need a custom event you can disable it. Disabled custom events are not available for selection when configuring Insights Funnel or Card steps or examining events in AI Studio Tools.
To disable a custom event:
1. Select the “trash” can button next to the field label
2. You will be prompted for your confirmation
3. Select Disable
To view a list of your disabled custom events, change the filter to Show disabled custom events.
Updated 8 months ago