Secure Web Chat
This article walks through the process of performing secure web chat sessions between end users and agents using Quiq’s Web Chat product.
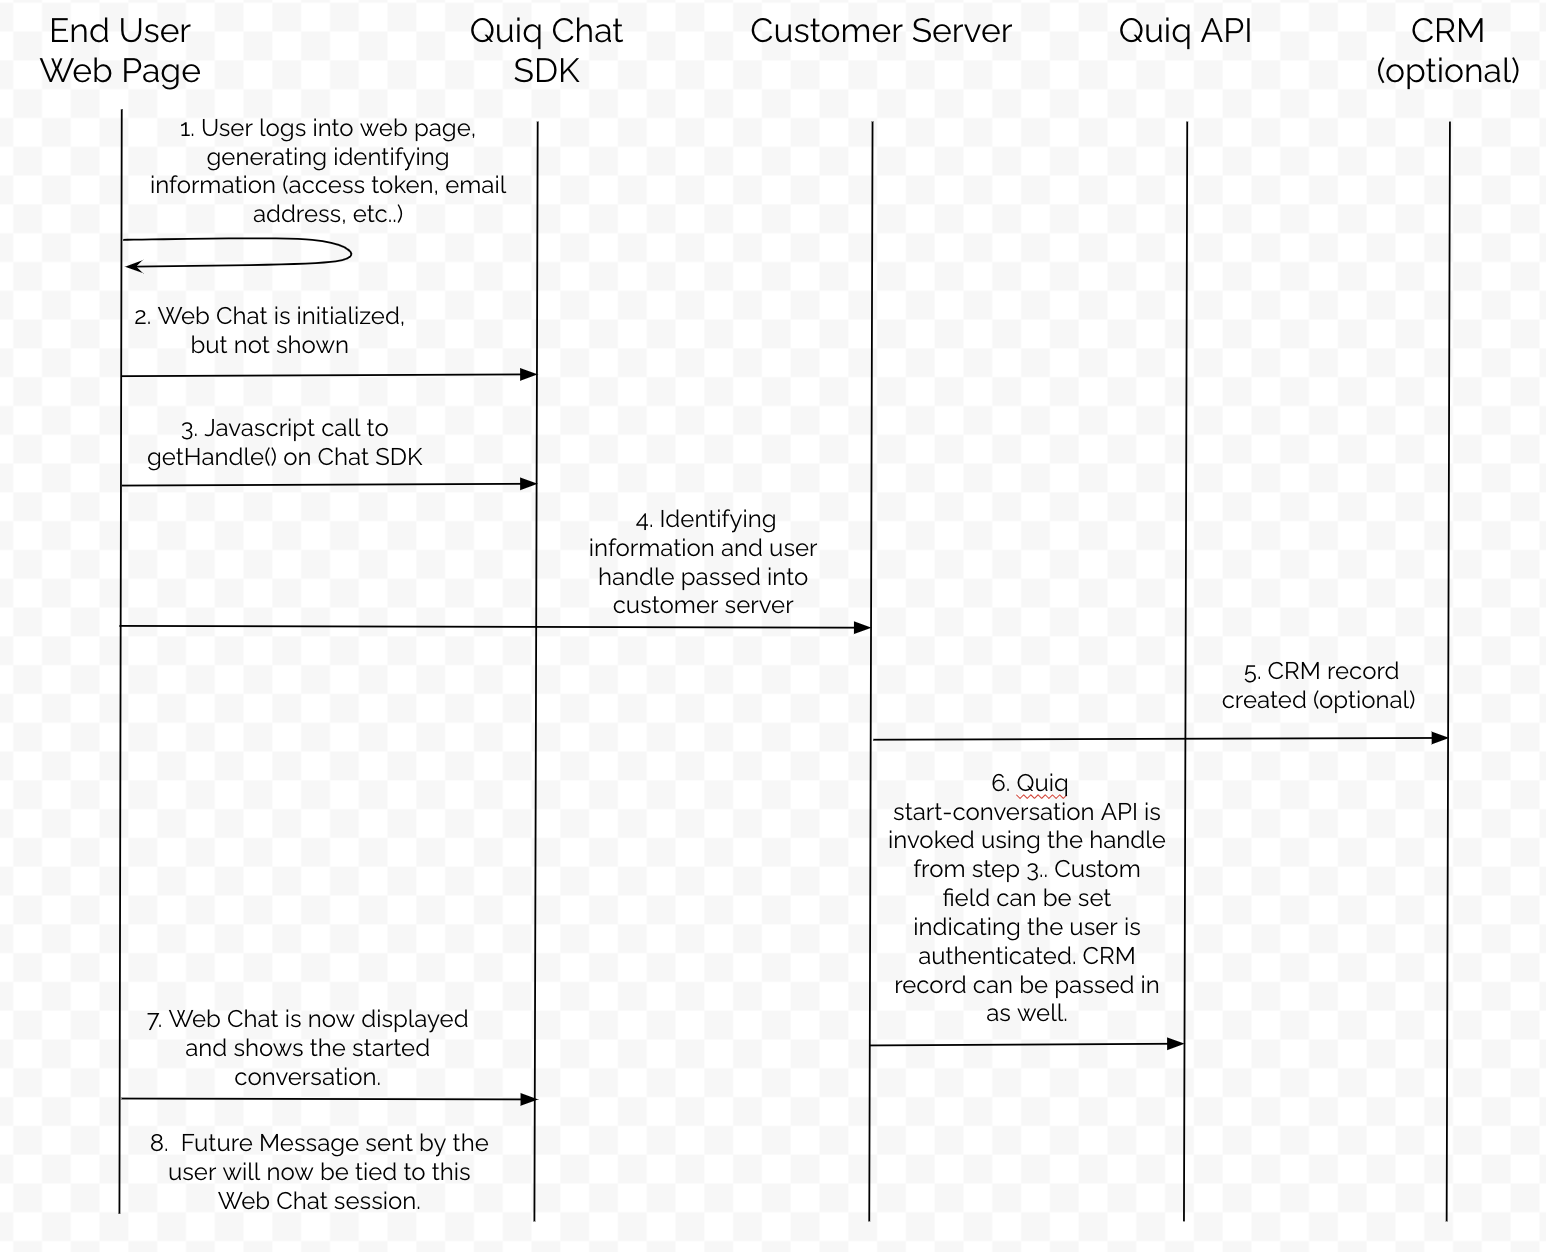
The following sections further describe the steps outlined in the diagram below.

Step 1: User Login
The first step in the process is to have the user identify themselves. Once this is done you can use whatever information your system used to verify a user to show that they are authenticated throughout the rest of this process. Some systems prefer to use an email address to identify a user, while other systems might generate an access token.
Step 2: Web Chat Initialization
The next step is to initialize Quiq’s Web Chat product. This can be accomplished with a few lines of javascript code. For more details please see the documentation here.
Step 3: Getting End User Identifier (Handle)
After Web Chat is initialized, we need to get the user’s identifier, which will be used when starting a Web Chat conversation with the user. Please use this method on the SDK to do this.
Step 4: Passing Identifier and Access Token
Now that you have identifying information for the user, and the user’s identifier in Quiq, you can pass both pieces of information into your back end server.
Step 5: Creating CRM Record (Optional)
At this point, you may choose to create a CRM record from your back end server to represent this customer interaction. Note, that if you are using a CRM that is integrated with Quiq, but don’t want to make this call, Quiq can automatically create the CRM record for you during the next step.
Step 6: Starting Conversation in Quiq
Now it’s time to create the conversation in Quiq. To do this a call must be made to this Quiq API. In this call you can do the following to signal that the user has been authenticated:
Set a custom field on the conversation (or CRM record) indicating the user is authenticated
Set identifying information on the conversation (or CRM record)
Pass along the CRM record that you created in step 5
Once the call to this API has been made, the conversation will appear in Quiq and be visible to your agents.
Step 7: Displaying Web Chat to End User
Now that a secure conversation has been created, it’s time to display Web Chat to the end user, so they can have a conversation with your agents. To do this use the Web Chat SDK.
Step 8: Session Created, Messages Can Now Flow
At this point a secure Web Chat session has been created, and any future messages sent by the user from the Web Chat window will be associated with it.
Updated 3 months ago
