Surveys
Overview
With Quiq surveys you can gather feedback from your customers right from their favorite messaging application or chat window. Quiq surveys are in-channel resulting in higher submission rates and more accurate results than email or web surveys.
Quiq surveys are administered via Quiq Bots and survey invitations are sent with Quiq Conversation Rules , providing you all of the power and customizability you are used to with Quiq. Since Quiq surveys are initiated after your agent ends the conversation your agents don’t need to change anything about their current workflow to gather results.
Survey Types
Quiq supports CSAT score questions, NPS, FCR, textual responses, number ratings, and more. Read more on survey types below
Creating a Survey
Notethe survey editor is still in a limited release status. Please contact Quiq support to enable the survey editor, or provide Quiq support with the survey questions that you would like to ask and support can create the survey definition for you.
Create the Survey Definition
The first step is to create a survey definition. The survey definition controls how your survey results will be grouped in reporting, as well as which questions will be available to administer by your Quiq bot.
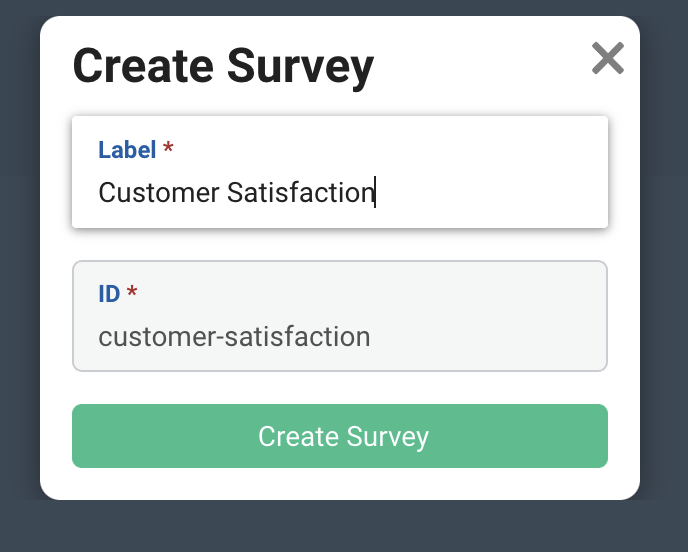
Navigate to the Admin portion of the Quiq app. Select the Surveys tab from the left-hand side and click the Create New Survey button at the top. Provide a label for the survey and an ID will be automatically generated.
Create a Queue
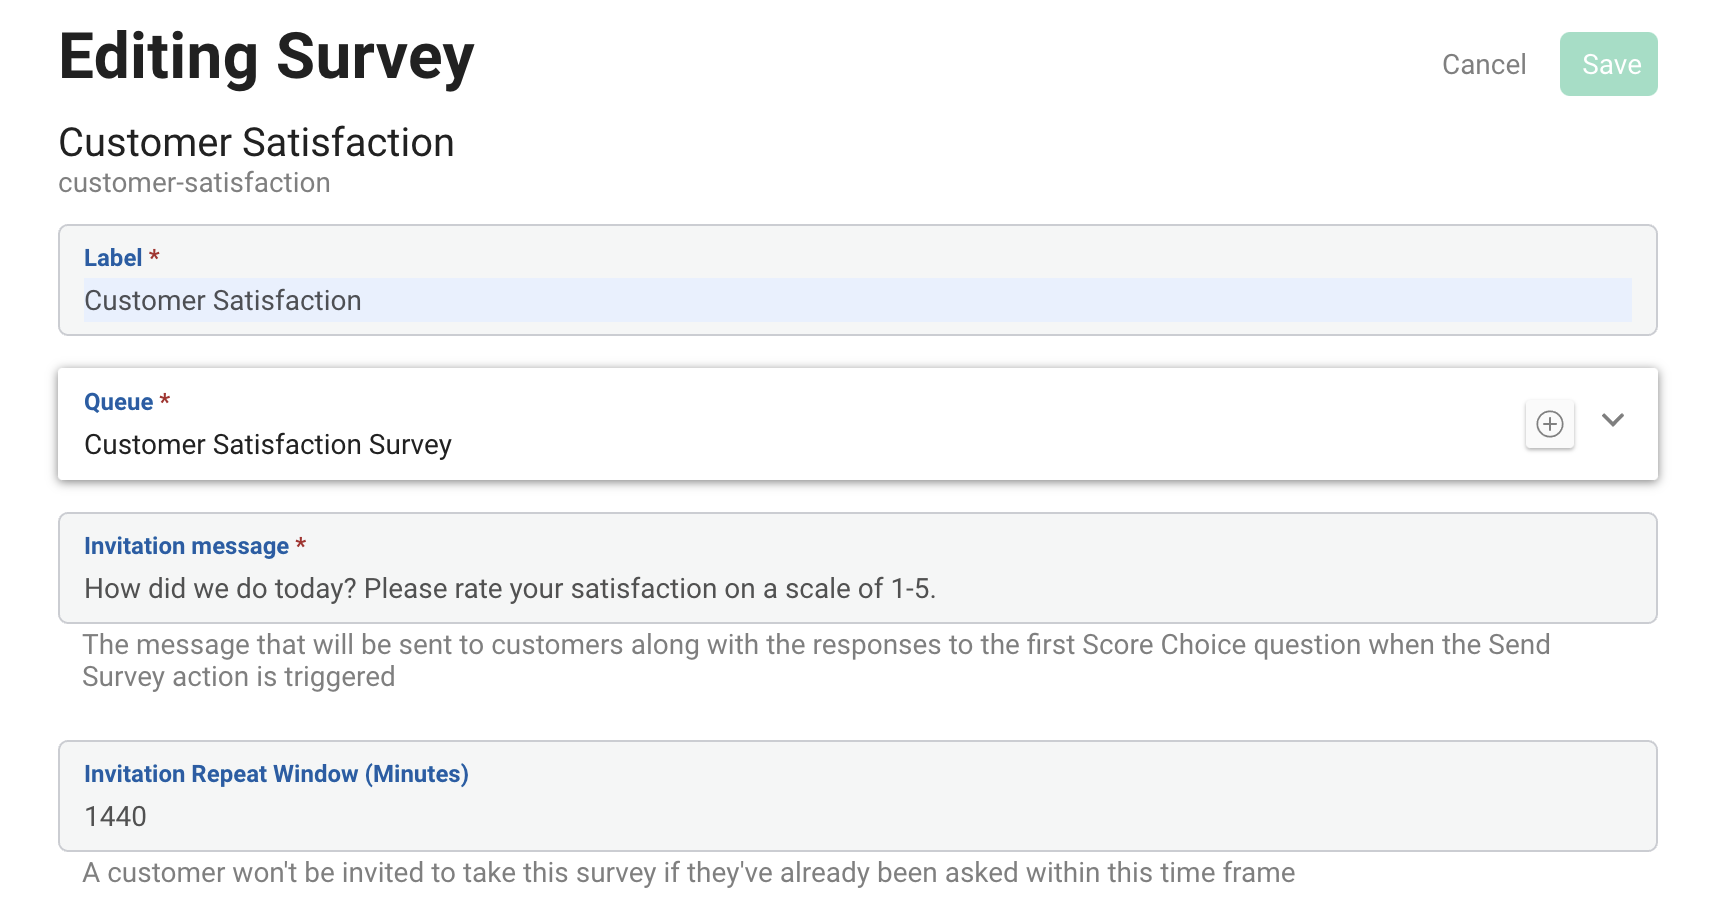
After creating the survey you will now set it up. Quiq surveys require a Queue (the bot will be set up to administer the survey from this queue), so create a new Queue for your survey or you can pick an existing queue if you already have one in mind. In most setups you would want 1 queue for each 1 survey.
Configure the Invitation Message
Type your invitation message that will be sent to users inviting them to take the survey. This message will be triggered once the agent conversation has ended.
Alongside this message the first score choice question will be included.
Editing a Survey
Choose an invitation repeat window. This controls how long Quiq will wait before offering a survey to the customer. This is useful for customers who have repeated conversations with your so you aren’t pestering them to take a survey too often.
Configure the Questionnaire
Now configure your questionnaire. Click the Add Question button in the “Questions” section. Start with your first question that will be offered alongside your invitation message.
Typically this is a “Star rating” question from 1-5. Another typical setup is to configure a “Yes/No” question that will go alongside an invitation message such as “Would you like to take our survey today?”. Learn more about configuring Survey Choice questions
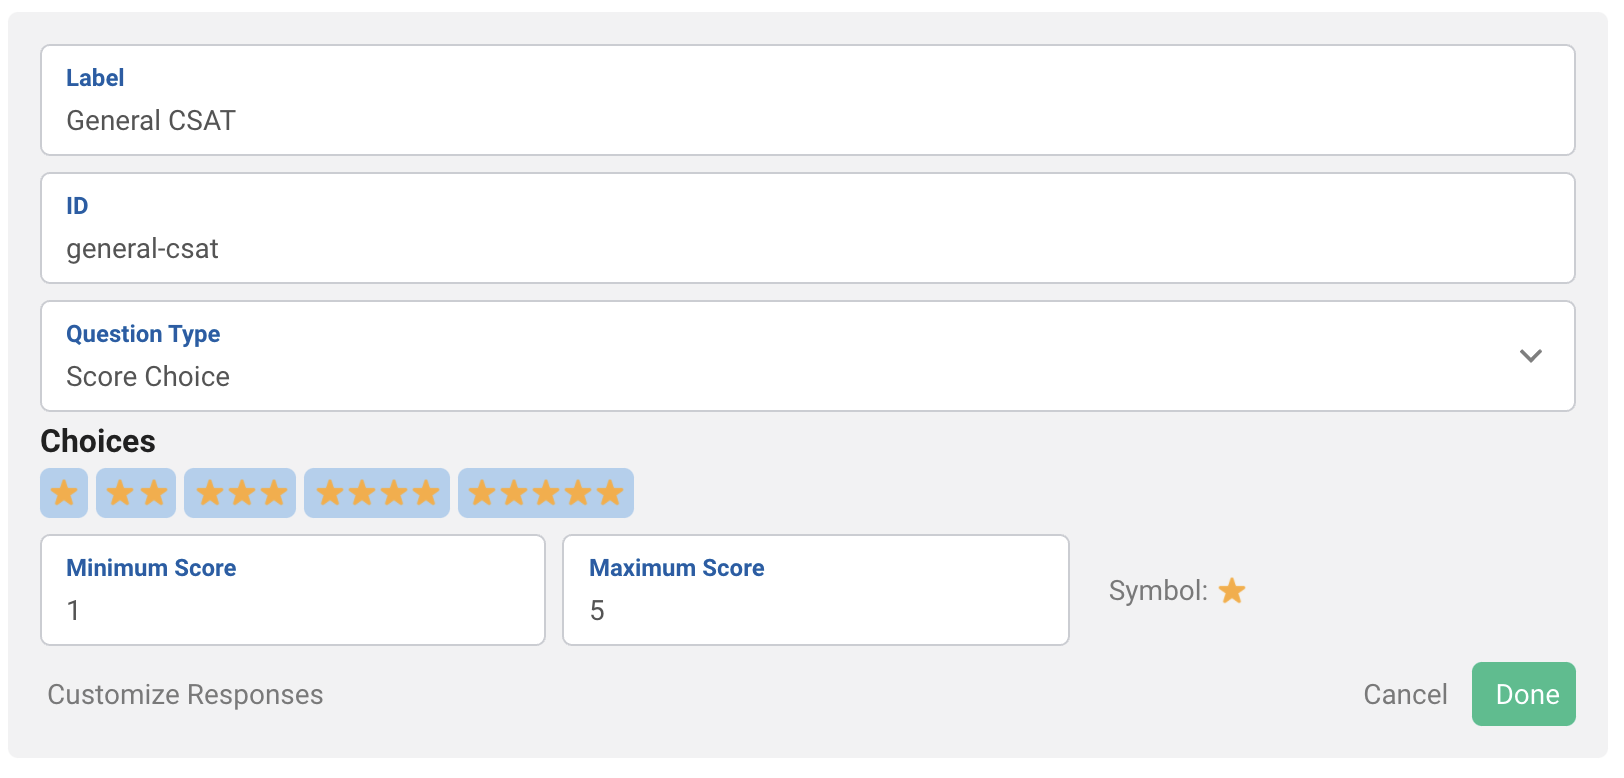
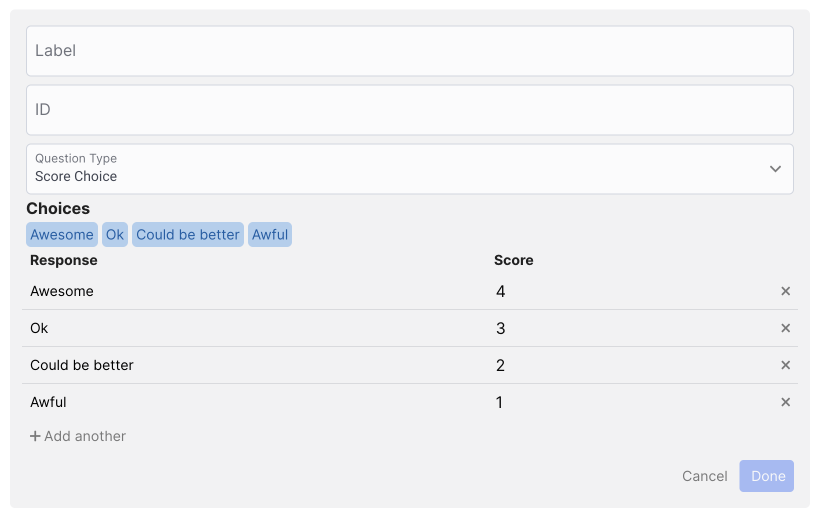
In this example we will do the default star rating CSAT question. You can change the symbol used for the rating system and also customize the max/min score. You can also customize the responses to use textual descriptions of the rating system rather than symbol based.
Another common question is the “Any additional comments?” question. We will set up a Free Form Text question to achieve this.

Configure Survey Context
Lastly, we will configure the Survey Context. The Survey Context provides additional details from the agent conversation to have available in your survey results dataset.

You may have important business context such as the product that customer was getting support on. You can add that context here for future reporting use. Any Quiq custom field can be used here as well as built-in Quiq fields.
And that’s it! Your survey definition is completed. Now you will need to build your Quiq Bot to administer this survey.
Creating a Survey Bot
Quiq Surveys are administered by Quiq Bots. As with all bots in Quiq, a Role and a queue are required for survey bots to handle conversations.
Create a Role for the Survey Bot
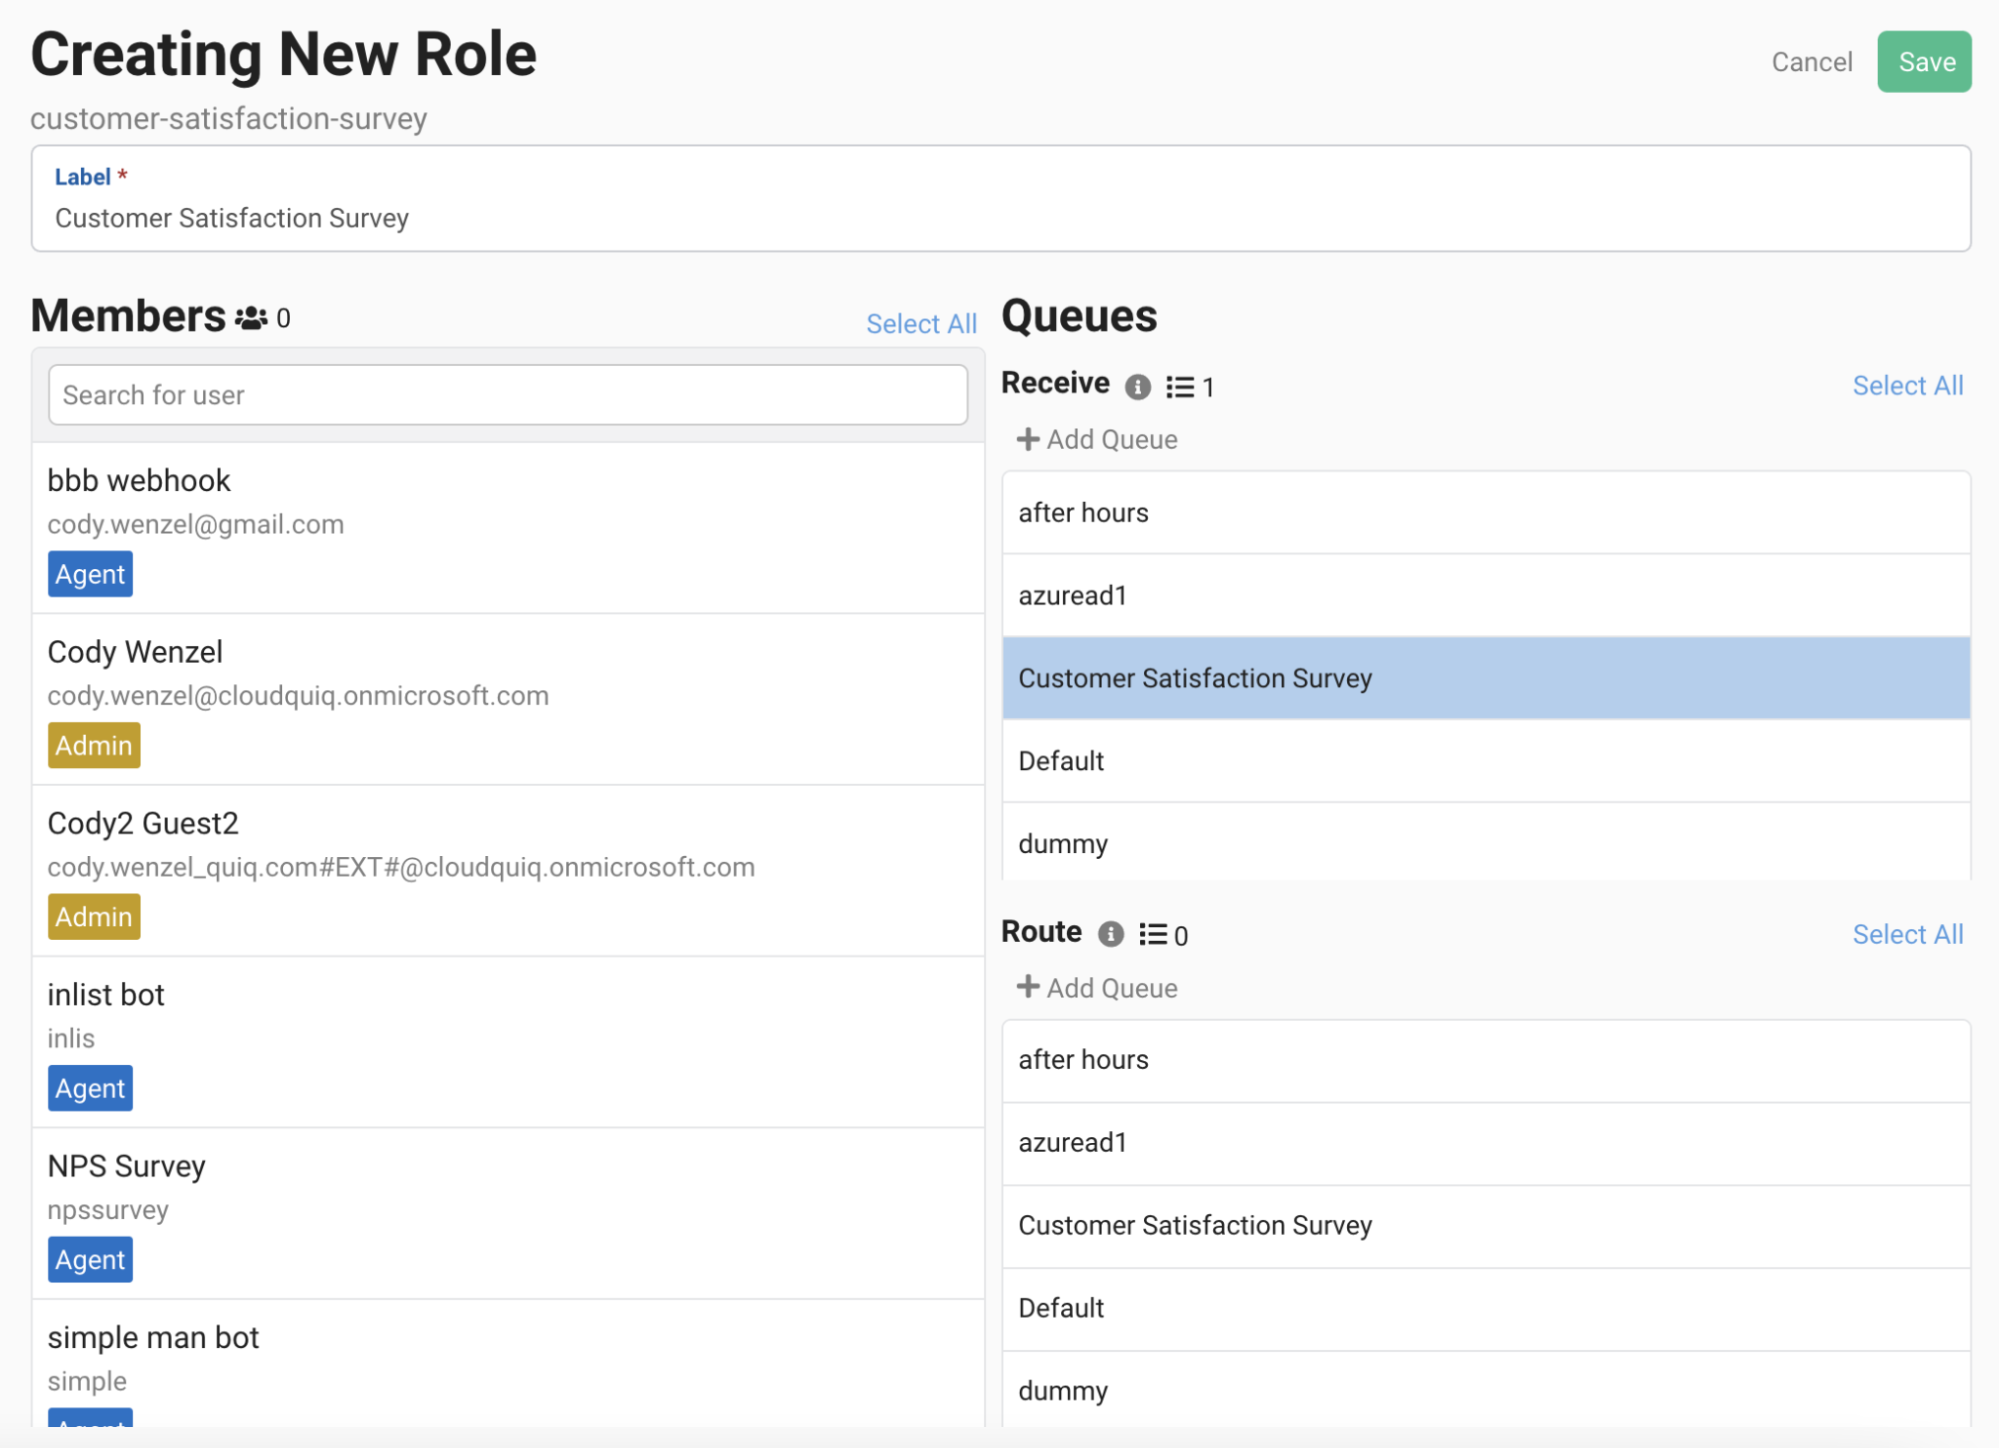
We already created the queue when we built the survey definition, so next let’s create a role to receive from the survey queue. Go to roles in the left hand side of the Quiq admin area and create a new role for your survey bot. For receiving queues select the survey queue you already created and save the role.
Create a new Quiq Bot
Now that you have your survey role, create a new Quiq Bot to administer the survey. Navigate to the Bots admin area and click Create New Bot. For Roles choose the role you just created.
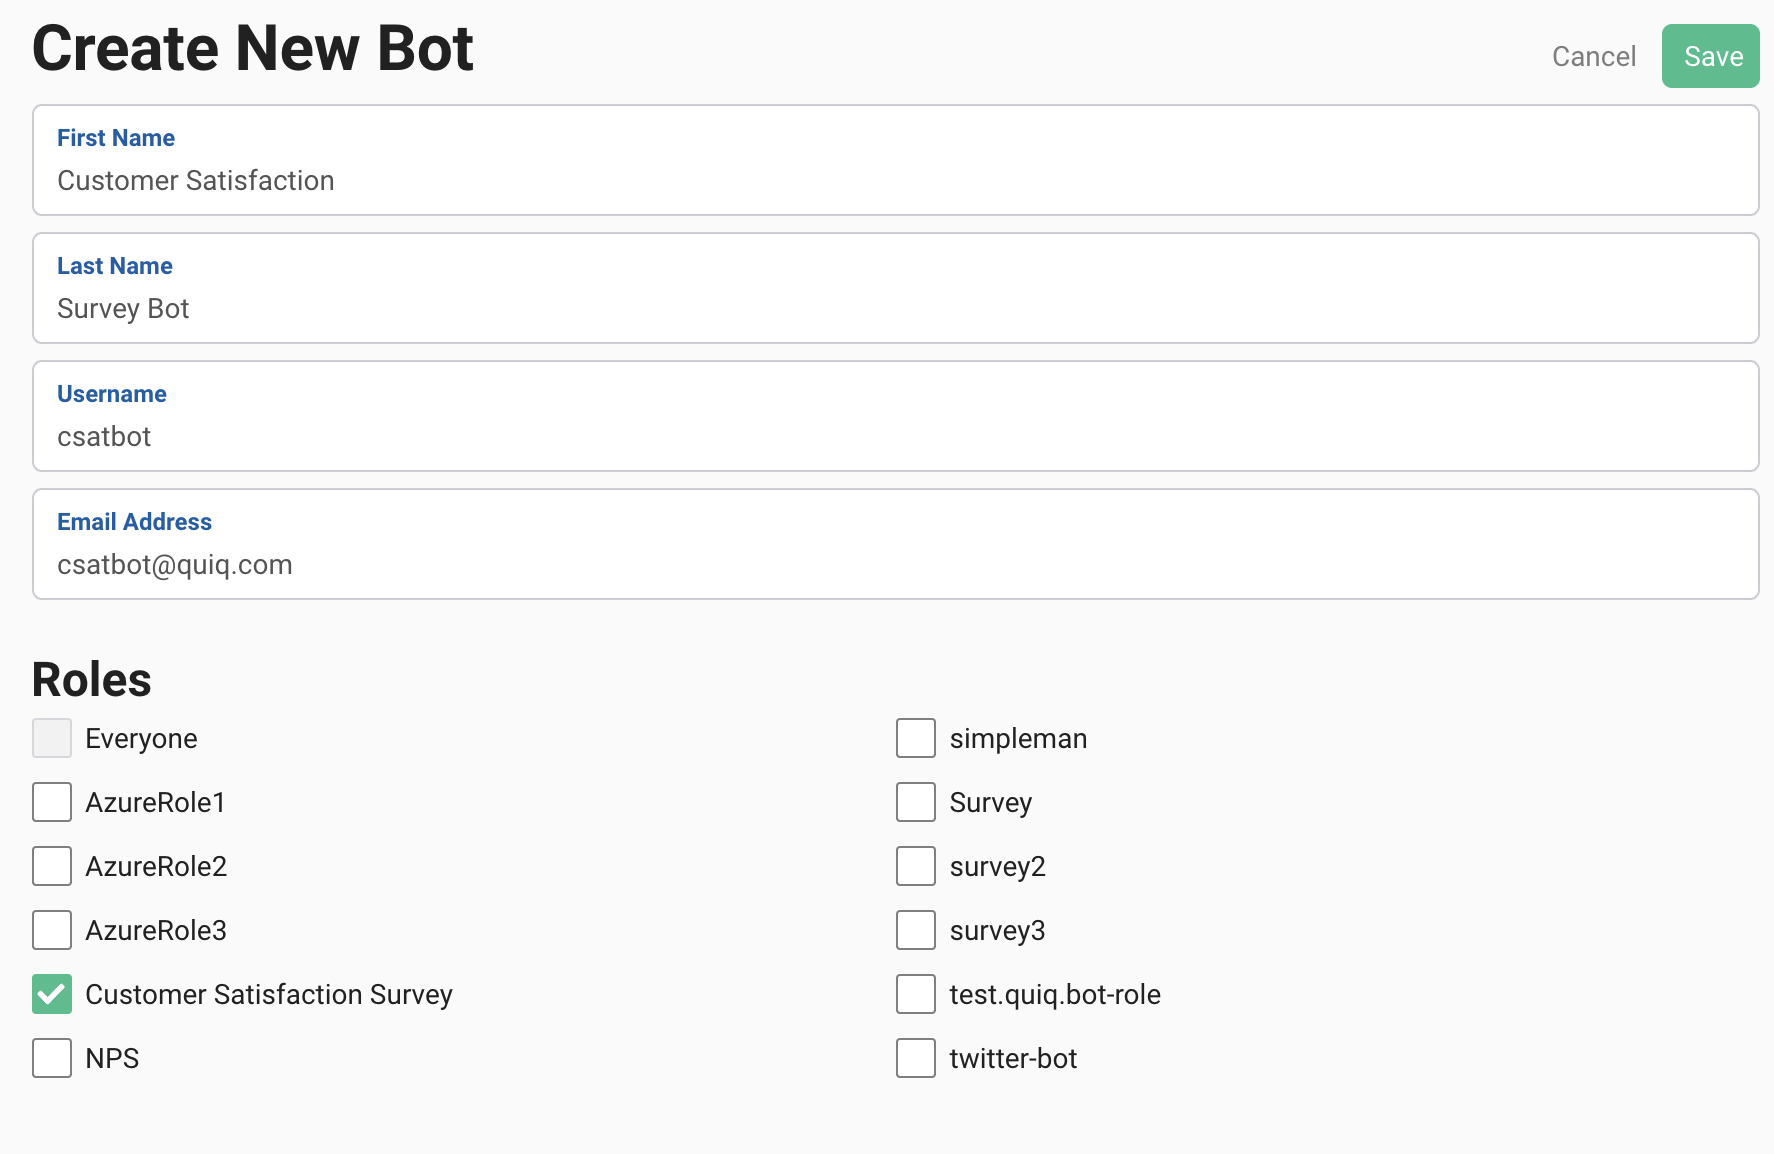
Edit the Bot
Next choose Quiq Bot for bot type, set the bot to be available and online and save. Now open the Quiq Bot Designer and create a new draft to start designing the bot. Remove the default Send Message and Route behaviors and add a Gather Data behavior.
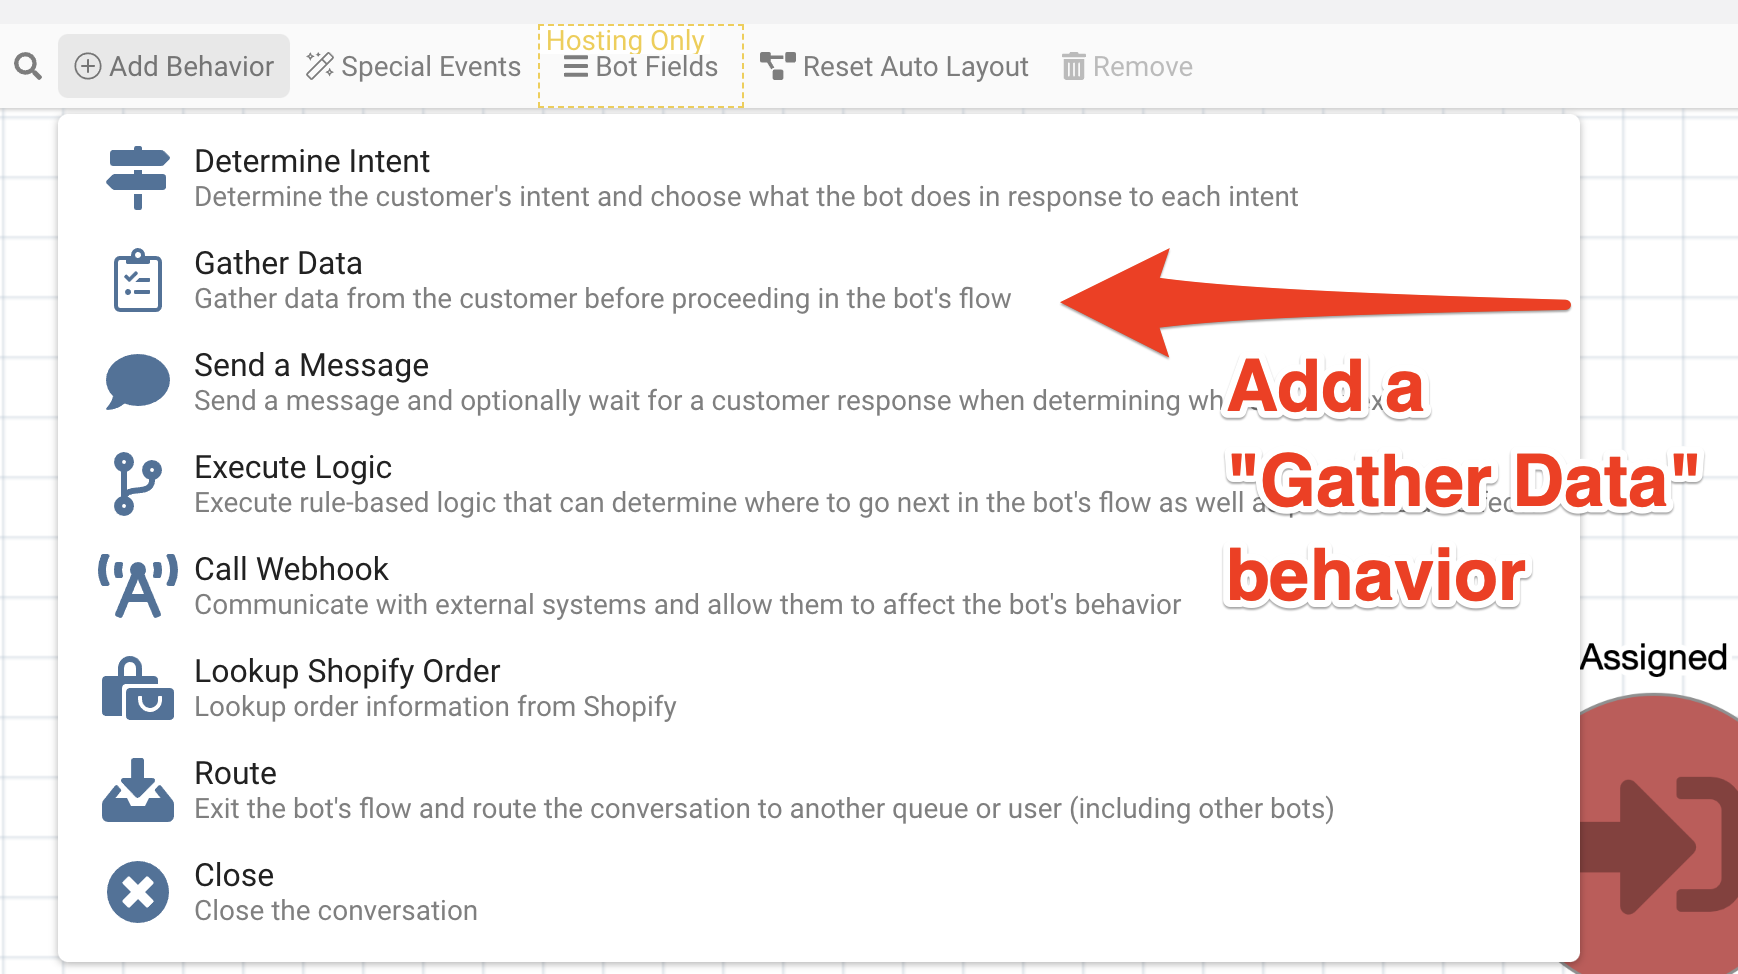
Add the Survey Fields to the Gather Data behavior
Within the “Gather Data” behavior we will add the survey fields from our survey definition, and the Quiq Bot will take care of the rest!
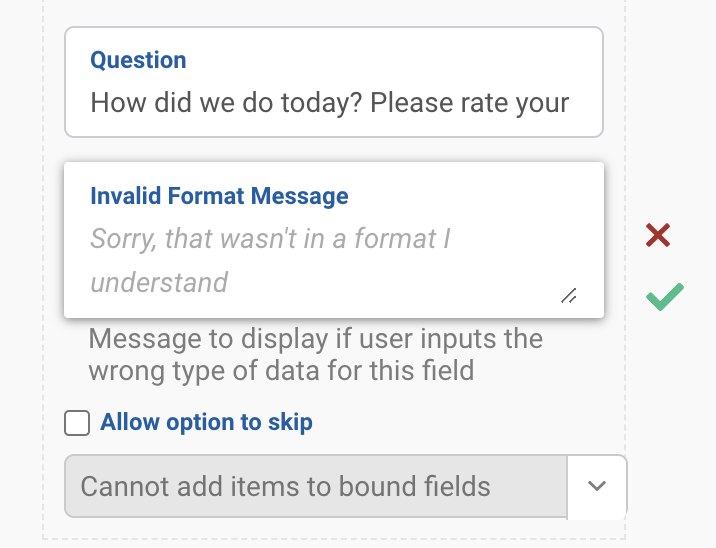
All fields from your survey definitions are available to add to the data gathering behavior. First add the score choice question. Edit the settings on the field to have a good prompt for all of your survey questions.
Repeat this process for every question in your survey, and you should have a “Data Gathering” behavior like so:
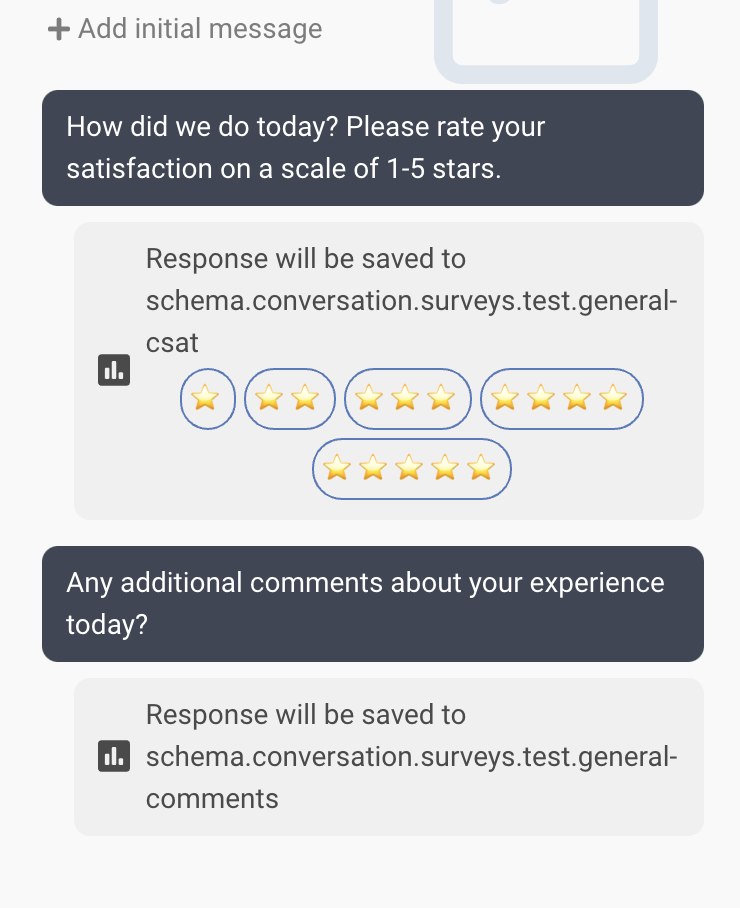
Configure the remaining Bot Flow
Next, have your Assigned behavior start the journey by transitioning to your “Data Gathering” behavior. The last step in designing the survey bot is to close the conversation once the data is collected. So add a Close behavior to your bot. Have the “Close” behavior do an “Immediate Close” and configure your “Data Gathering” behavior to transition to the “Close” behavior after collecting the data.

Save and publish the bot and your bot is all ready! Next we need to invite your customers to take the survey.
Invite Customers to the Survey
To gather feedback on the conversations your business is having with customers, you will need to invite customers to the survey. This is accomplished in Quiq conversation rules. Once the conversation with the agent ends, we will send a survey invitation.
Add a Closed Conversation Rule
To get started, navigate to Conversation Rules in the Quiq admin area. Create a new draft and find an existing or create a new Conversation Rule that triggers when the conversation closes.
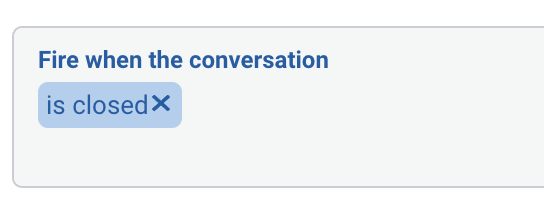
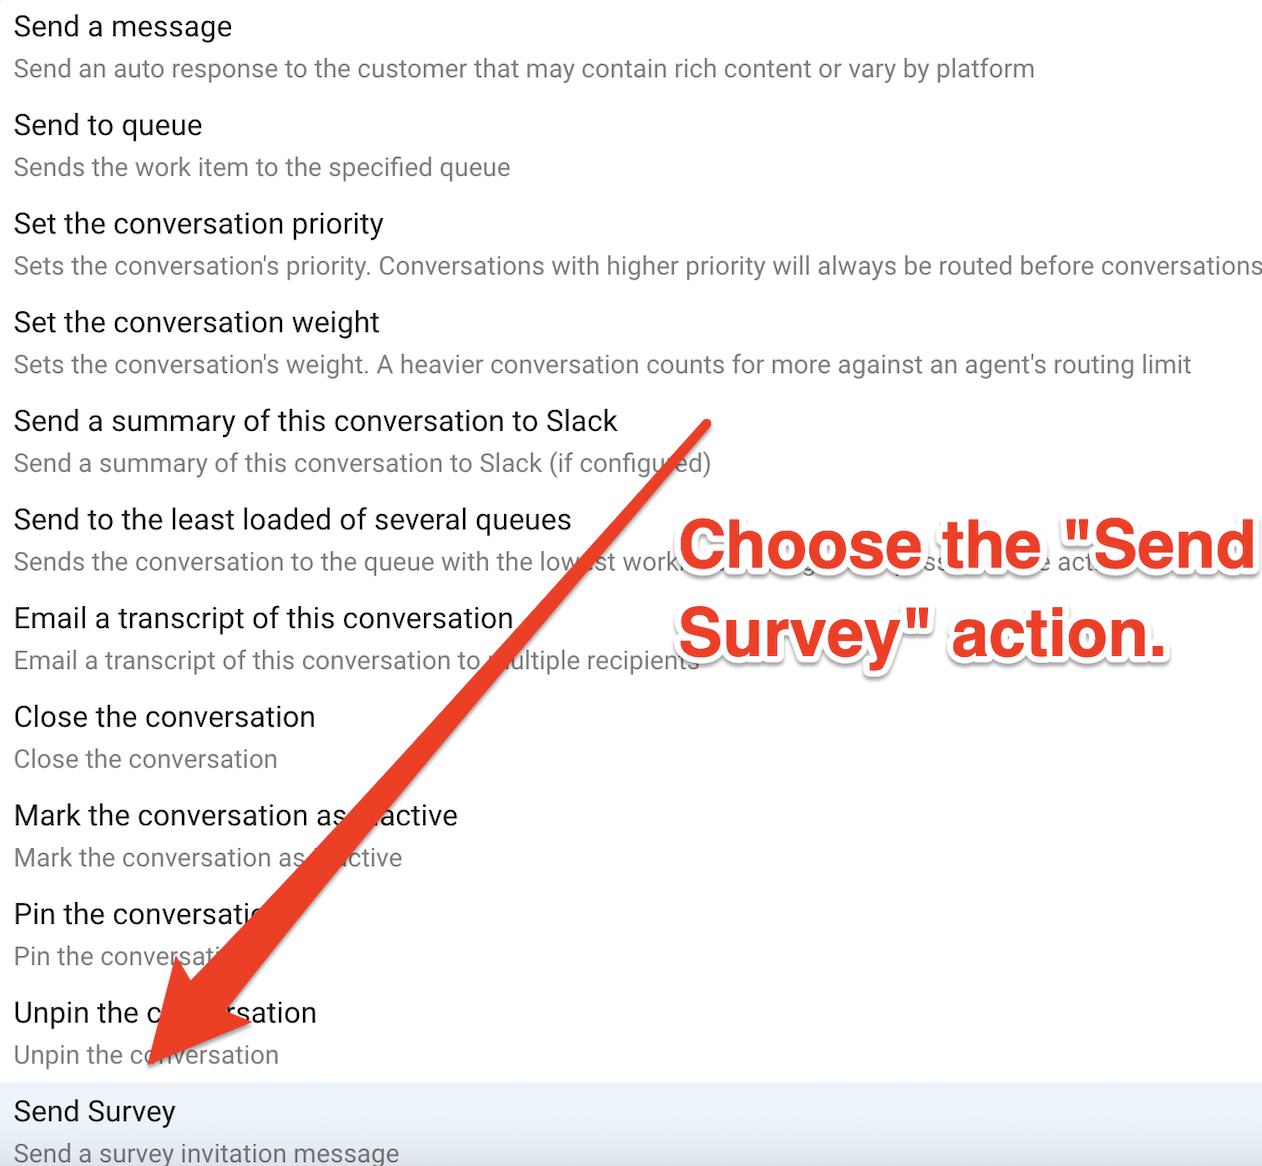
Add Send Survey action
Next add an action for “Send Survey”.
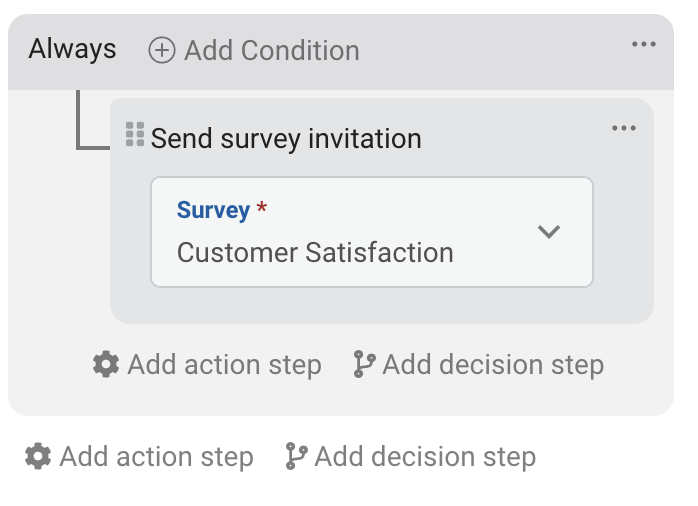
Choose the survey you just created in the Survey dropdown.
Publish the Conversation Rules
Save & Publish your conversation rules and your survey will be live!
NoteCertain advanced setups can be achieved that are not outlined in this help page nor available in the Quiq survey editor at this time. If your exact setup is not outlined or available please reach out to your Quiq implementation specialist or representative for assistance.
Survey Types Cont'd
Learn more about the various Survey Types available in Surveys.
Score Choice
Score Choice by default will prompt users for a rating from 1 to 5 stars:
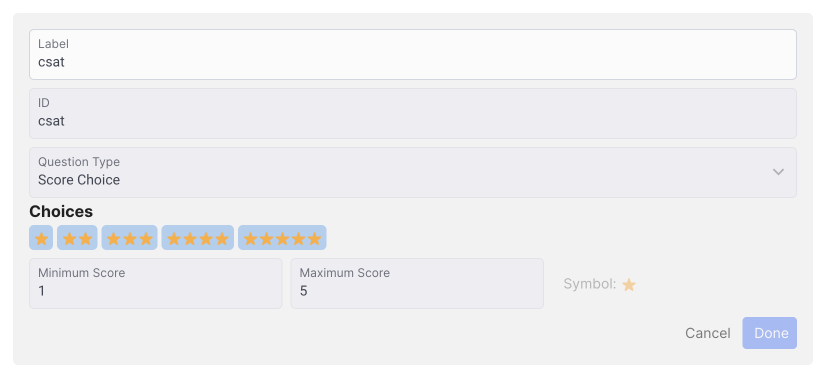
Configuring Score Choice
You can configure the score choice from a rating of 1 up to 5 options. You can configure the Symbol button to select an emoji other than stars if you'd like:
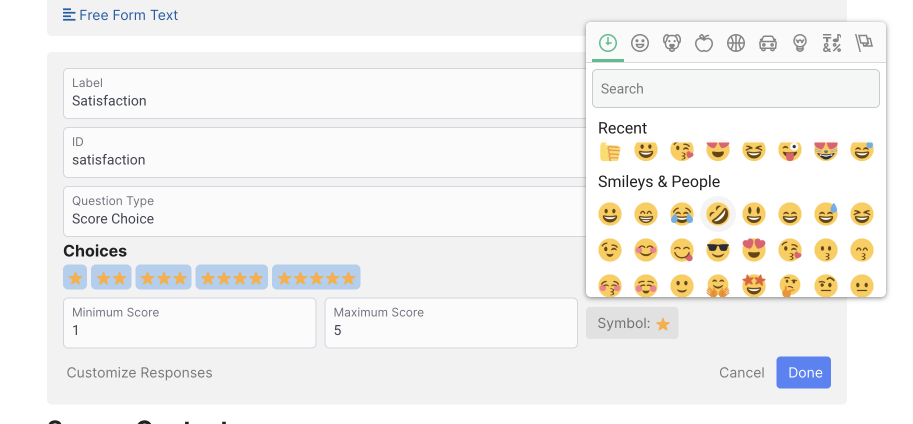
You can also use the Customize Responses button to use words or numbers instead of symbols if you'd like:
NotesScore choice has a maximum of 5 options, if you'd like present more options (say for NPS) use Number Rating, covered below.
Free Form Text
Prompts the user for a free form text response, whatever answer the user enters will be stored:

Number Rating
Number Rating type questions enable you to reply to a Survey question with a number value between 1 and 100, rather than having the limit of 5 options present in Quiq reply score choices. This is helpful for creating standard NPS surveys, as well as other types.
Configuring Number Rating
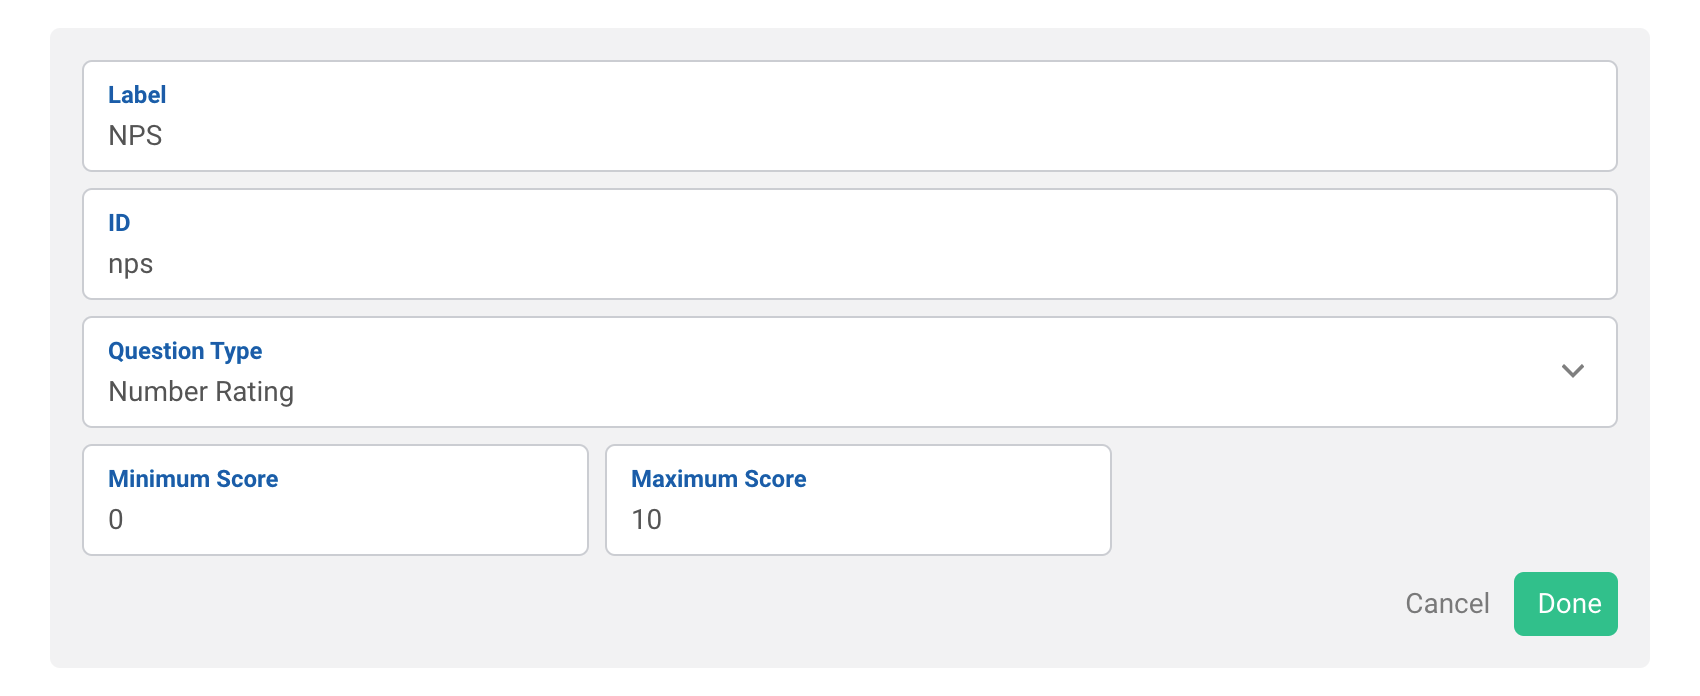
Number rating requires both a Minimum and Maximum Score:
-
The Minimum score most be at least 0 and at most 99.
-
The Maximum Score must be at least 1 and at most 100.
*The minimum and maximum values cannot be changed once the question is added to the survey and saved.
Number Rating & Score Choice
A survey must still have a Score Choice type question as the first question in a survey when using a Number Rating question.
If you'd like to have a survey that asks only the Number Rating question, you can add a simple Score Choice question in the first position. The score-choice type question should not be added to the Bot Designer. Using Advanced Mode, the Hosting user can change the Invitation Message to use something like “Do you want to take a survey?” with a “Yes” option that routes to the survey bot and a “No' option that is dismissed.
Number Rating Validation
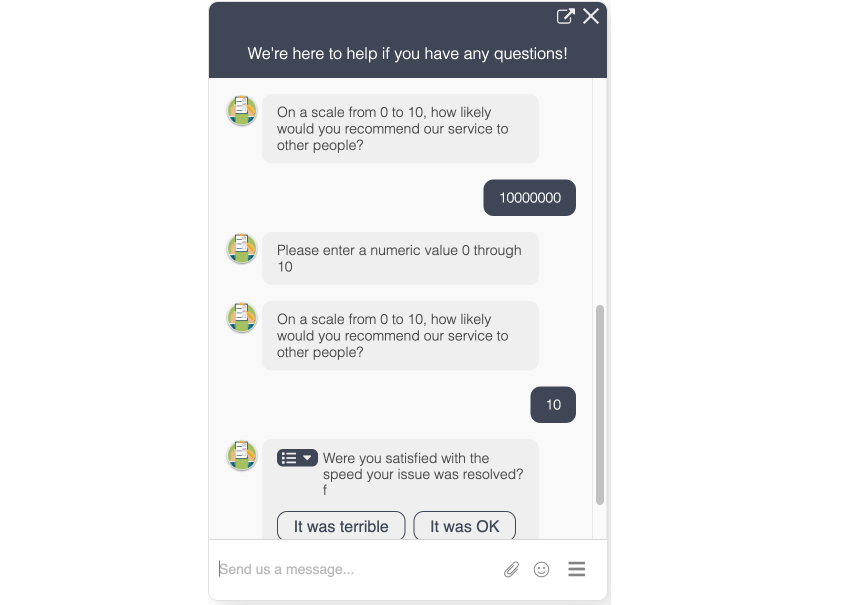
If the customer sends in a message outside the defined number rating, they will be send the invalid format message:
Updated 3 months ago
