Microsoft Dynamics Setup
Microsoft Dynamics backend data sync setup
Setup
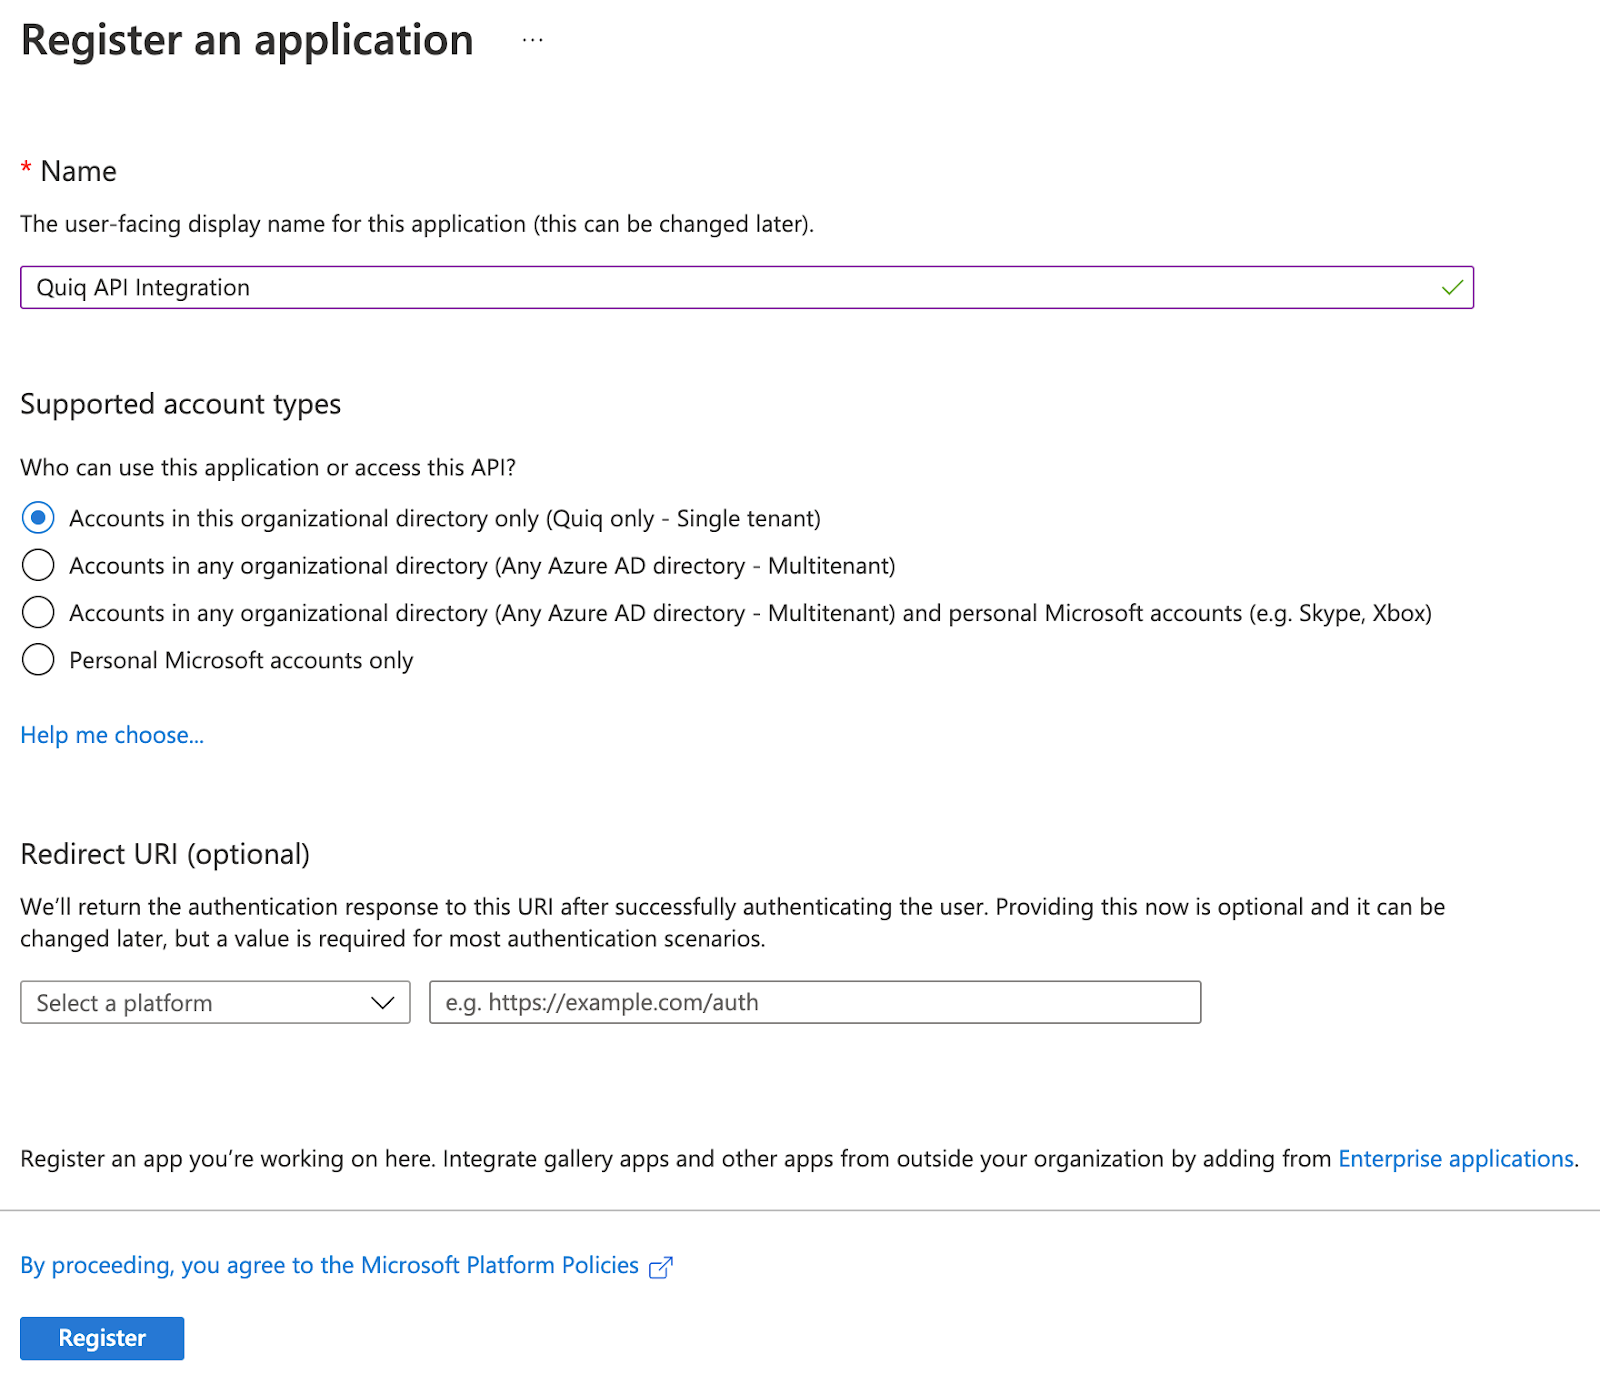
1. Register an application in portal.azure.com
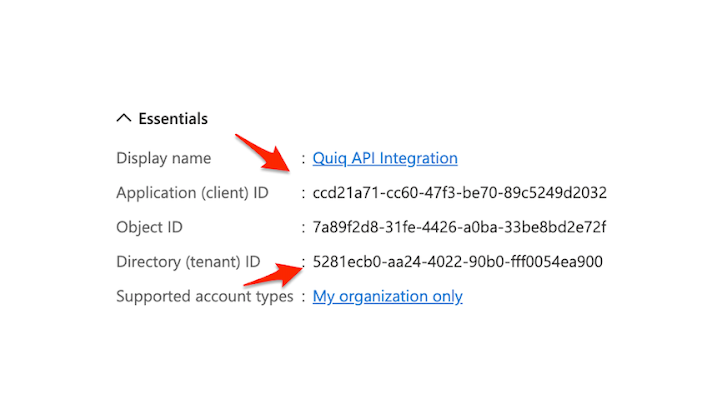
2. Copy the Application (client) ID to a notes file for sending to your Quiq implementation specialist later.
3. Copy the Directory (tenant) ID to a notes file for sending to your Quiq implementation specialist later.
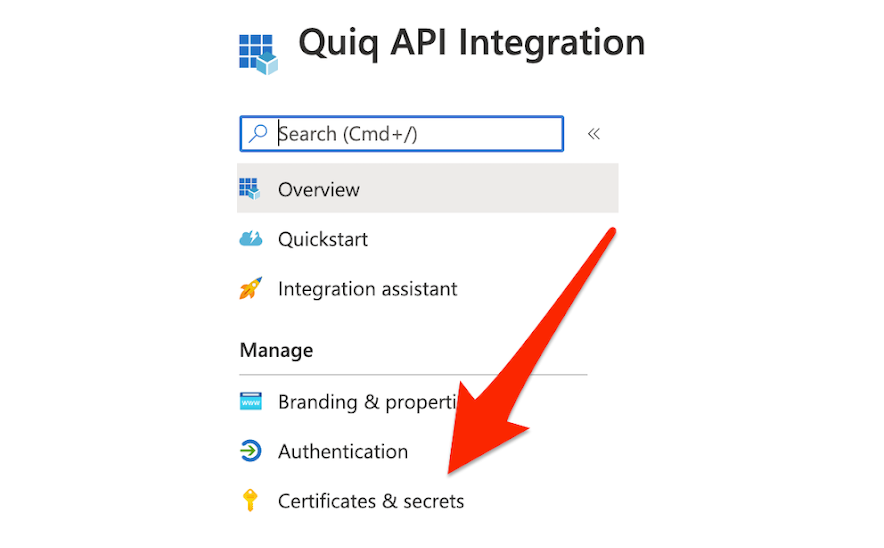
4. Go to “Certificates & secrets” on the App Registration:
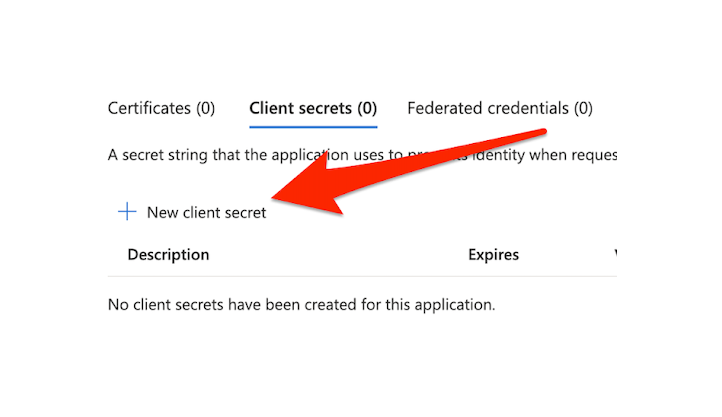
5. Create a New client secret.
6. Set the expiration date as you desire.
Note that when the date expires the Quiq + Dynamics integration will no longer function, so work with Quiq support/your implementation specialist to ensure that the secret is updated as the expiration date approaches
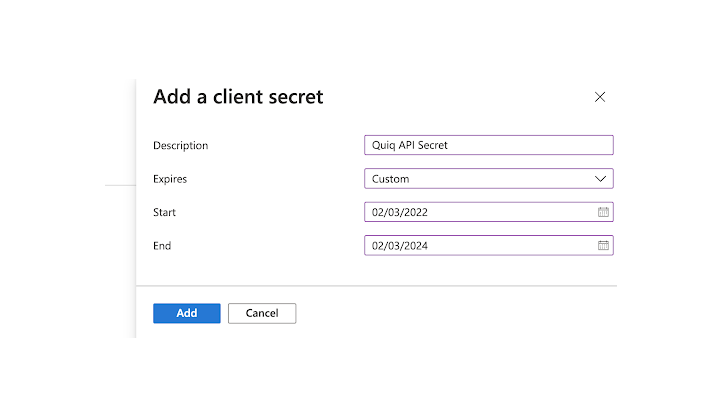
7. Copy the expiration date, value, and secret ID to a notes file for sending to your Quiq implementation specialist later.

8. Log into dynamics to determine your appid. It will be in the URL of your dynamics instance in the appid= parameter. Copy to a notes file for sending to your Quiq implementation specialist later.
9. Also get your “baseUrl” from the same URL. The https://$ORG.crm.dynamics.com part. Copy to a notes file for sending to your Quiq implementation specialist later.
10. Log on to the Microsoft Power Platform Admin (D365 Admin) center as a system administrator.
11. In the navigation pane, go to Environments, and then select an environment from the list.
12. On the Settings tab, go to Users + permissions, and then select Application users.
a. The application users page appears.
13. Click + New app user.
a. The Create a new app user dialog box appears.
14. Select a business unit, and then click +Add an app.
a. The Add an app from Azure Active Directory dialog box appears.
15. Select an app, and then click Add.
a. The Create a new app user dialog box appears.
16. Configure Security roles for the application user. You have two options here. You can grant the Quiq API Integration user “System Administrator” permission, or you can fine tune the security settings by adding a new security role.
Permissions
At a high level Quiq will need the permission to:
a. Read metadata about the entities in your system. This is required so that Quiq can validate and trim the data that Quiq writes into your CRM.
b. Search for Contacts (or Accounts if you are using Accounts)
c. Create Contacts (or Accounts if you are using Accounts)
d. Read/Create/Update Cases (or Tasks if you are using Tasks)
Minimum Security Role Privileges
Core Records
- Account (All)
- Activity (All)
- Contact (All)
- Note (All)
- Queue (Read)
Service
- Case (All)
Business Management
- User (Read)
Customization
- Attribute Map (Read)
- Entity (Read)
- Entity Key (Read)
- Entity Map (Read)
- Field (Read)
- Process (Read)
- Relationship (Read)
- System Application Metadata (Read)
- System Job (Read)
- User Application Metadata (Read)
Quiq + Dynamics UI integration setup
Setup
1. Log in to dynamics and navigate to Power Apps
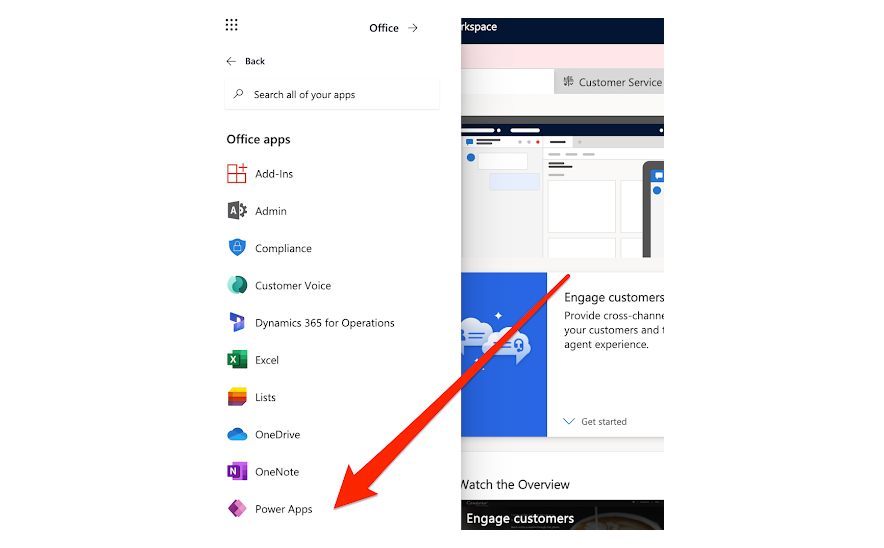
2. Change environment to the customer service environment that you are hooking Quiq up to (top purple bar)

3. Click ‘App Profiles’ in left navigation pane
4. Find ‘Customer Service Workspace’ (or whichever workspace you want to add Quiq to), click the ellipses, and then click ‘App Profile Manager’ in the menu
5. In App profile manager, click ‘App profiles’ in the LHS nav pane
6. Create a new profile
7. Once a new profile is created, select that profile
8. Click the ‘Channels’ tab and toggle the ‘All active channels’ toggle
9. Select ‘+ Add channel providers’ and then ‘Create new channel provider in unified interface’ and then hit ‘Ok’
Channel Integration Provider Form
Fill out the new channel integration provider form
1. Name & Unique name must be of the form **_** (e.g. quiq_integration) or else you might get a confusing error and be unable to save
2. Set channel url to be https://{YOUR_QUIQ_TENANT}.goquiq.com/app/messaging/integrations/dynamicsLoader?base=https://{yourOrgNumber}.crm10.dynamics.com&orgId={yourOrgNumber}
3. Set ‘enable out bound’ to ‘Yes’
4. Set channel order to 0 (or if there are multiple channels, the higher the channel order number the higher precedent the channel provider has)
5. Set trusted domain to https://{YOUR_QUIQ_TENANT}.goquiq.com/
6. Save and close
Assigning Users
1. Go back to App profile manager in power apps, select the app profile previously created, go to ‘channels’
tab, select ‘+Add channel providers’, and then search and select the channel provider that you just created
2. In App profile manager with the app profile you created, select ‘Assign Users’ at the top
3. Select ‘Add existing user’ and add users that you want using the app profile
User Permissions
Make sure the added users have the proper permissions
1. Go to Power Apps > Settings (gear icon in top bar) > Admin Center
2. Select ‘customer service trial’
3. Select ‘see all’ under ‘Security roles’ in the ‘Access’ box
4. Add user to the following roles:
Role | Description |
|---|---|
App Profile Manager Administrator | Required for creating and assigning app profiles to users of Customer Service and Omnichannel for Customer Service. |
App Profile User | Required by users of Customer Service and Omnichannel for Customer Service. |
Basic User | Required by all users of Omnichannel for Customer Service. |
Omnichannel administrator | Required for performing administrator tasks; also requires the System Administrator role to manage user roles and privileges in Omnichannel for Customer Service. |
Omnichannel supervisor | Required for performing supervisor tasks. |
Omnichannel agent | Required for performing agent tasks. |
Productivity tools user | Required by users of Dynamics 365 Productivity Tools. |
Productivity tools administrator | Required by administrator users of Dynamics 365 Productivity Tools. |
5. Go back to Customer Service Workspace, refresh, and ensure that the quiq widget loads in the LHS
Updated 3 months ago
