
Agent UI
Overview
Agent UI allows an Admin to configure how the Messaging interface appears to agents.
Agent Settings
Toggle the listed settings to allow or disallow the use of the emojis, giphys, and stop and block selections. These settings are universal across the application.
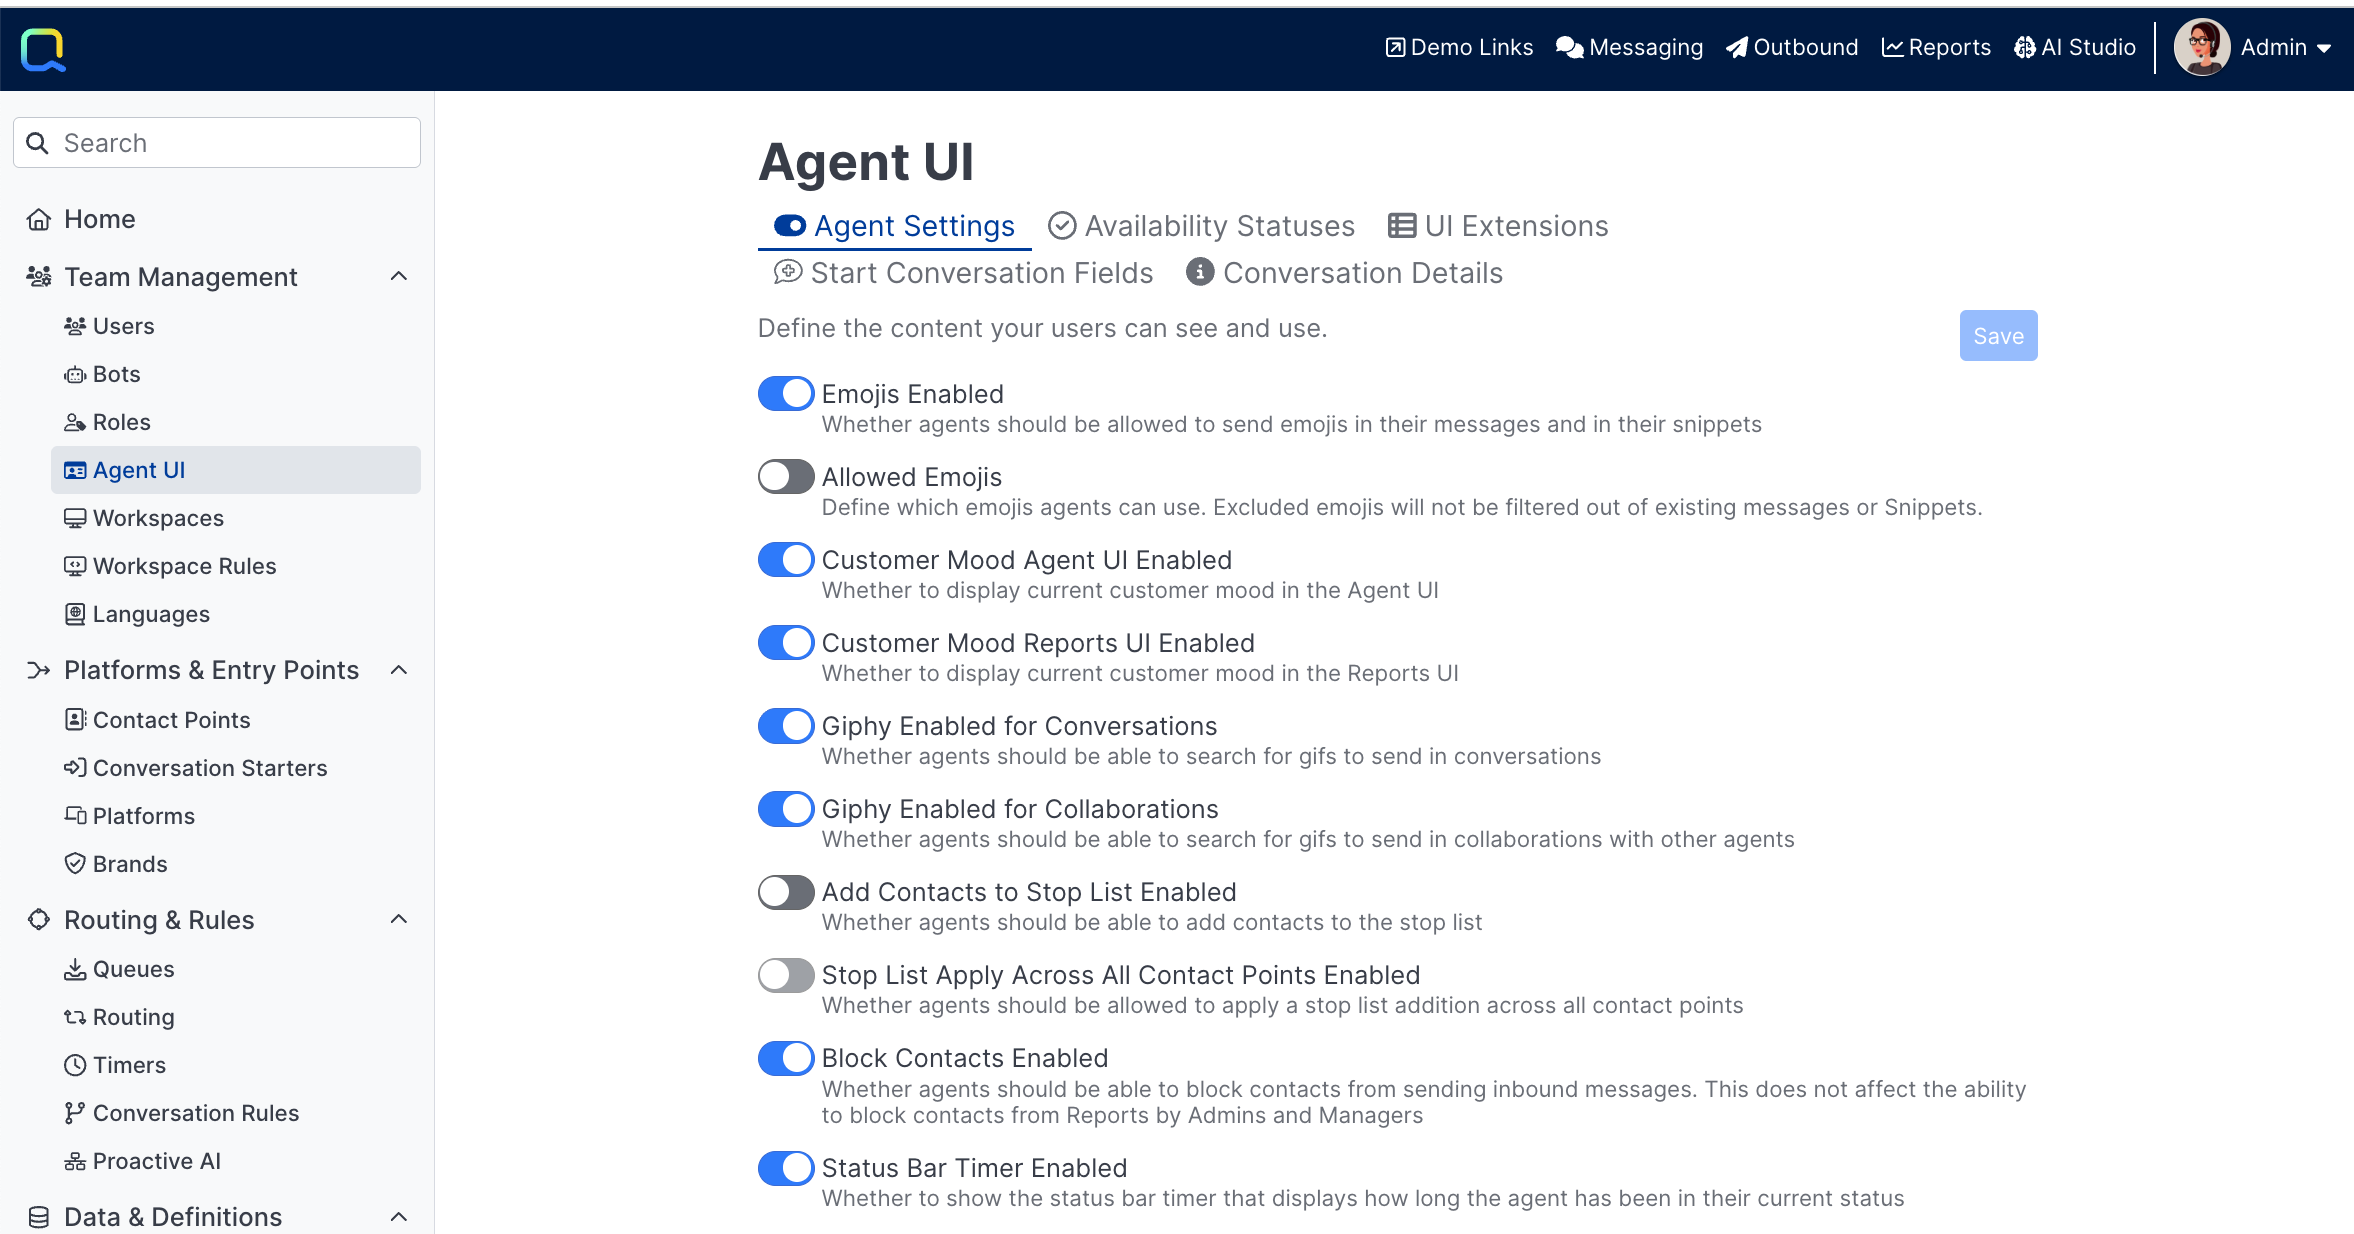
Emojis Enabled
Master switch to enable the use of emojis by agents. This does NOT block emojis customers send in the conversation. Turning this off removes the ability to add emojis to conversations, collaborations, and snippets.
Allowed Emojis
Allows the selection of allowed or disallowed emojis. Certain emojis may be removed to ensure an agent does not send an inappropriate emoji. If Included is selected, only the chosen emojis will be available to agents. This allows a small, safe set of emojis for agent use.
Customer Mood Agent UI Enabled
Whether to display current customer mood in the Agent UI
Customer Mood Reports UI Enabled
Whether to display current customer mood in the Reports UI
Giphy Enabled for Conversations
Most messaging applications support gif search and insertion into conversations. This option can provide a more engaging and personal experience, but may be too informal for some organizations.
Giphy Enabled for Collaborations
As above, this setting allows gif insertion into internal facing collaborations. This is enabled by default and allows agents to provide expressive gifs specifically in the collaboration. Collaborations are NOT visible to the customer.
Add Contacts to Stop List Enabled
Allows an agent to add a customer to the Stop List (essentially opting the customer out of messages). This opt out takes place as soon as the exiting conversation is complete. This provides agents the means to opt a customer out at the point of contact vs. submitting to an Admin user.
Block Contacts Enabled
This option allows an agent to block incoming messages from the given contact, after marking the conversation as spam. The block takes place immediately. See also Agent Blocking and also Manager Blocking.
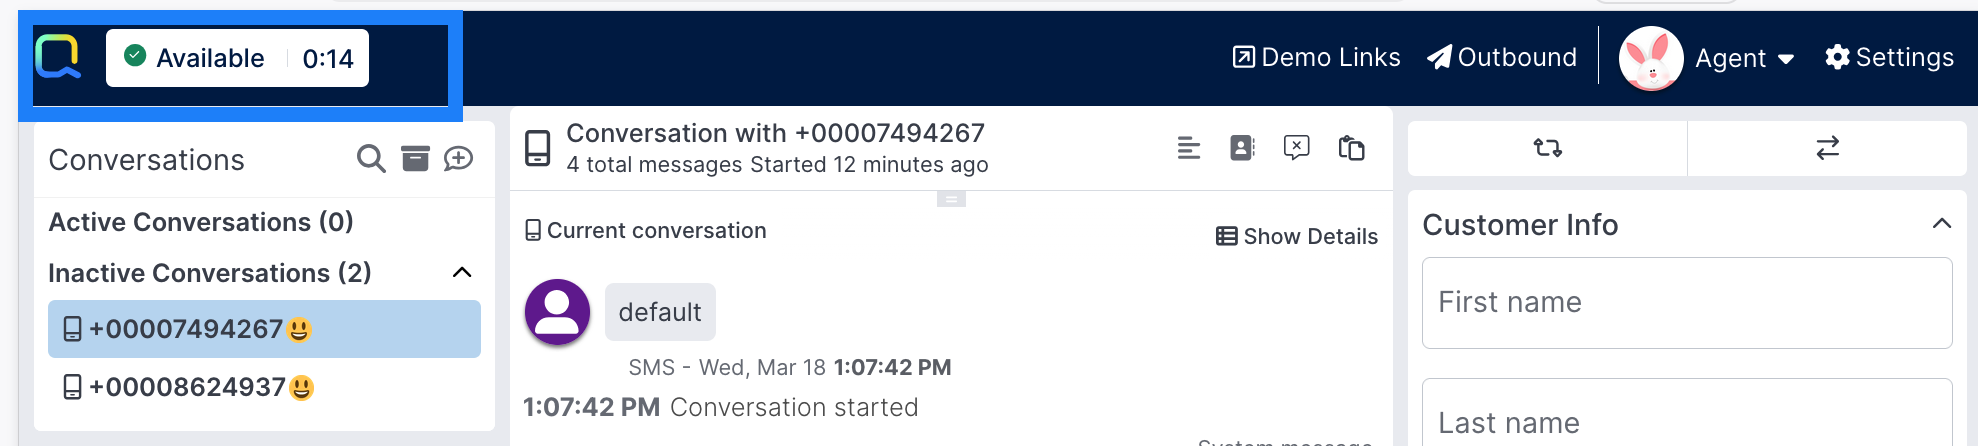
Status Bar Timer Enabled
When enabled, a timer will display next to an agent's currently selected status in the Messaging tab's status bar, indicating how long they've been in that status. The time is formatted in HH:MI.
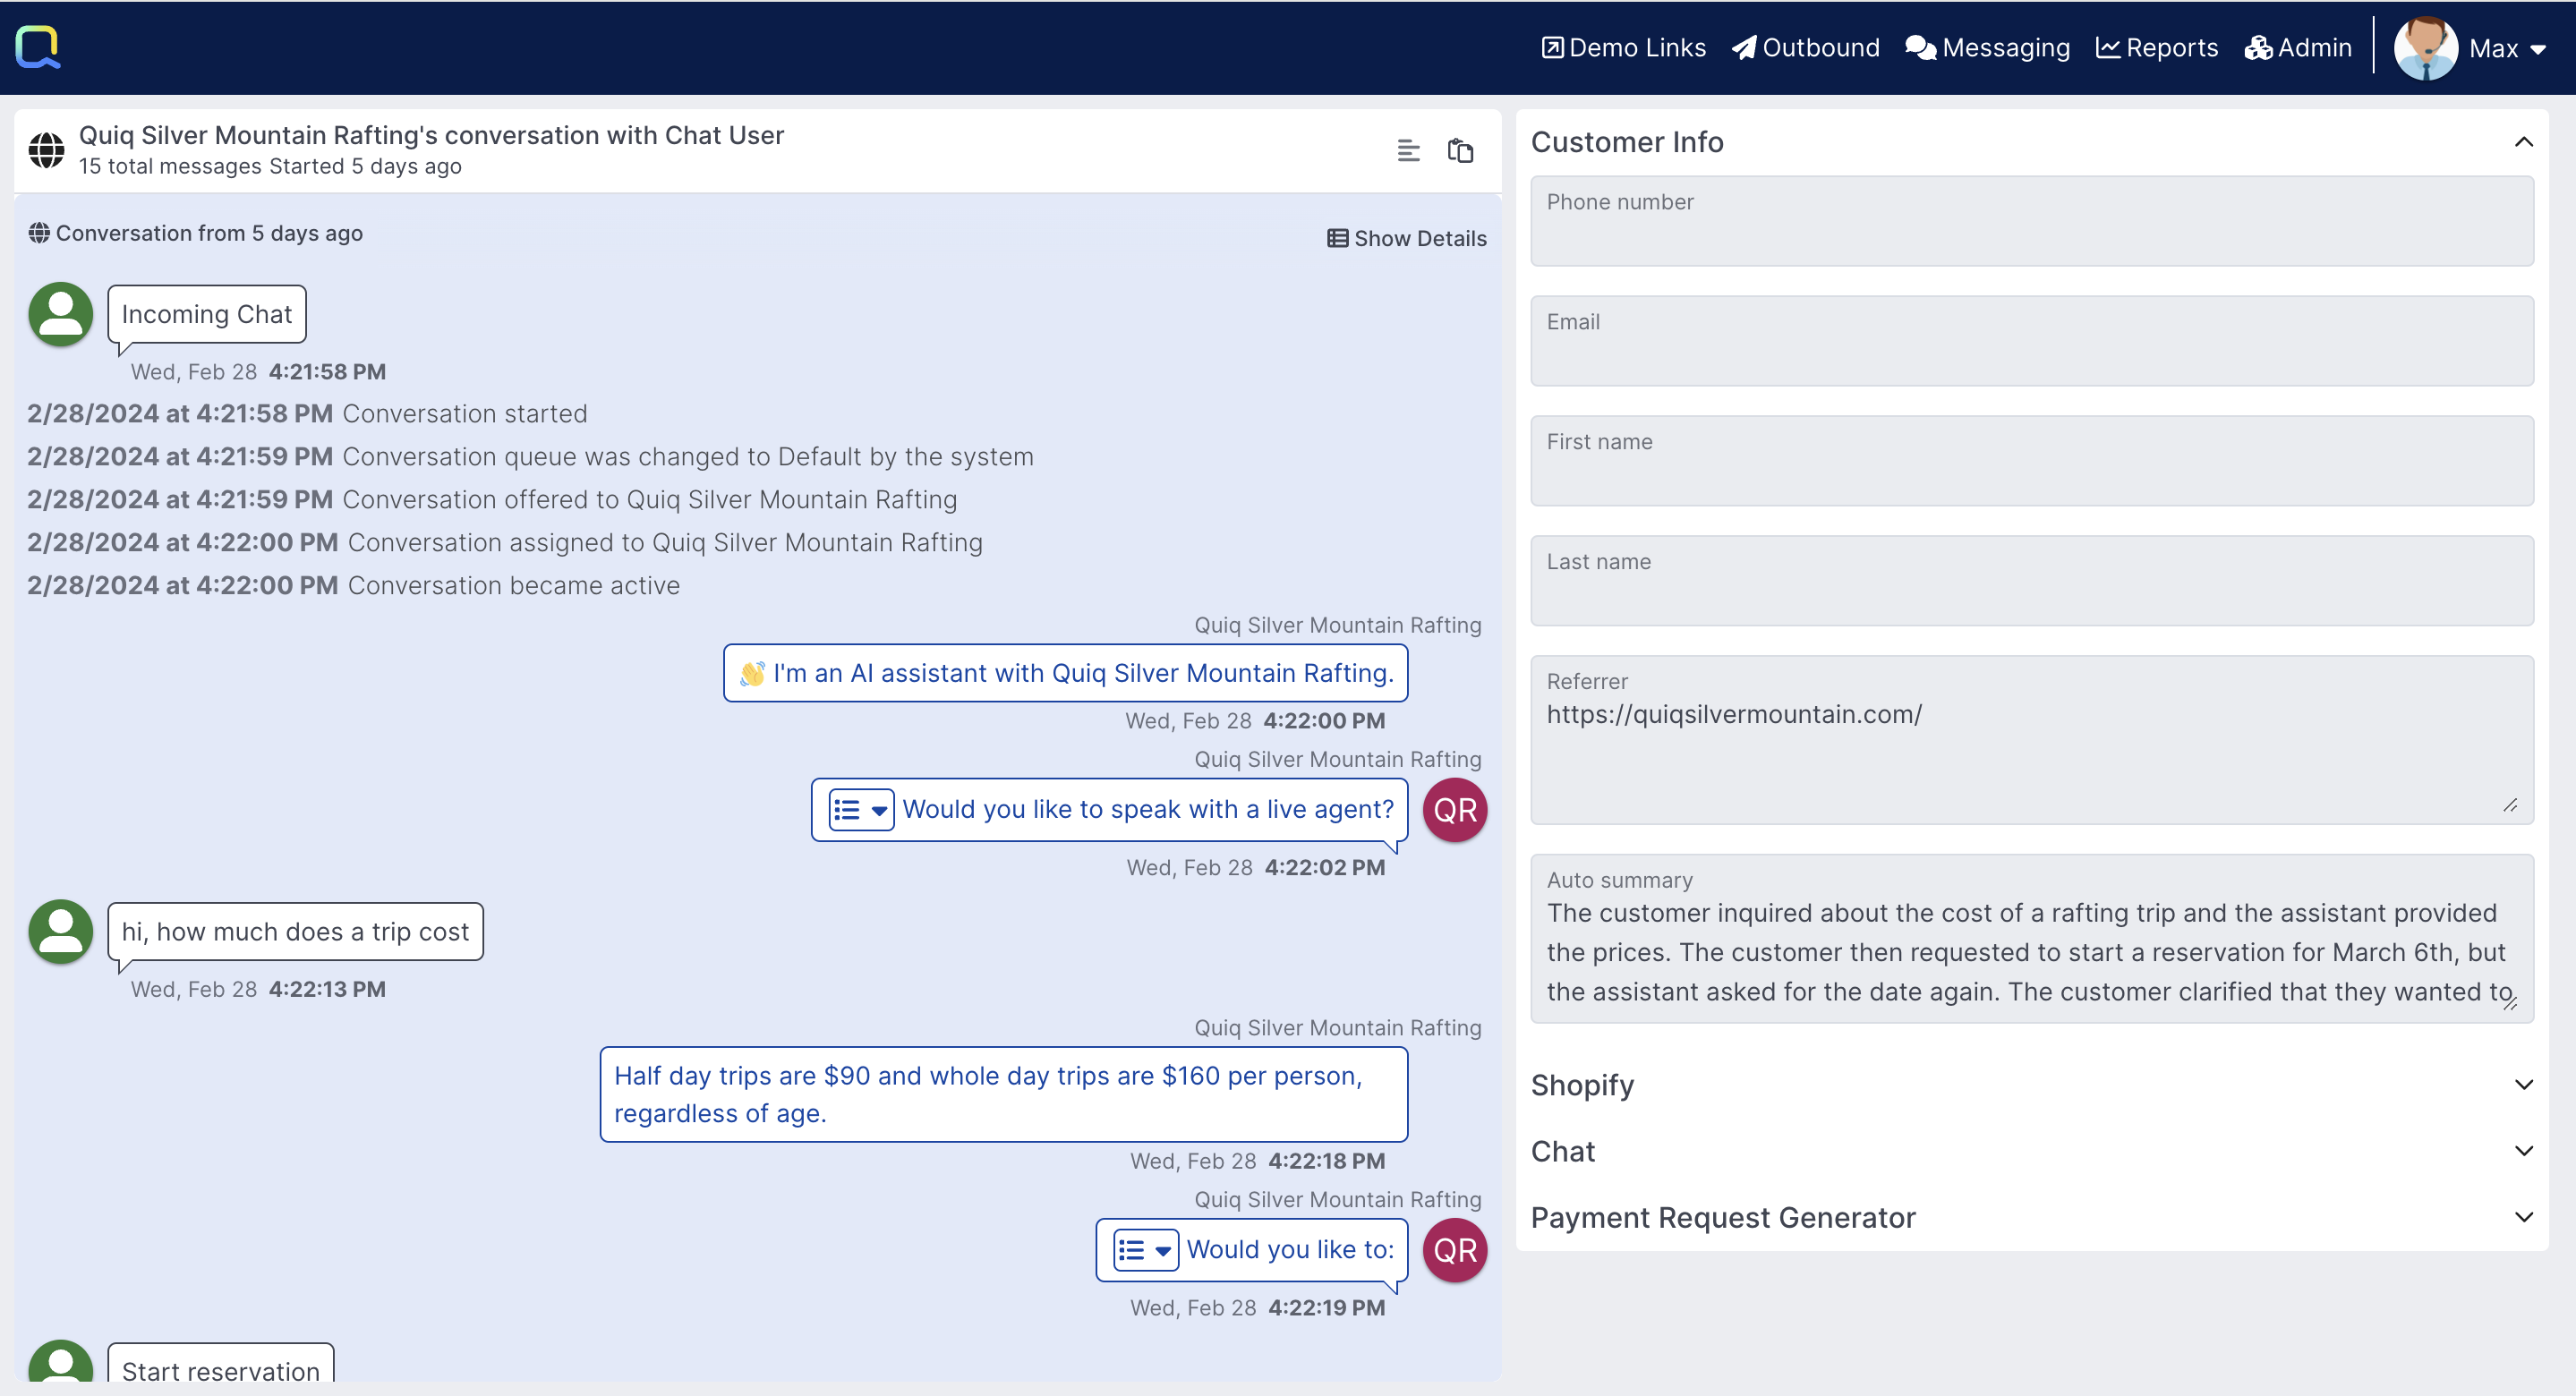
Copy Conversation URL Enabled
When enabled, this allows Admins, Staff Admins and Managers to easily copy and share conversation URLs with other uses who can access that conversation. A Copy Conversation URL button will appear when viewing conversations:

If you'd like Agents to have the ability to view and copy conversations, there is an additional Copy Conversation URL Enabled for Agents toggle button:

When viewing conversations from this URL, users are taken to a special conversation view that presents a read only view of the conversation and any additional information in the right hand extension area:
Availability Statuses
When a custom availability status is created, it's associated with one of the standard Unavailable, Current Conversations or Unavailable statuses. Custom statuses can be set to be "enabled", which means that they'll be visible to users in the Quiq application, or "disabled", to hide the status if it isn't needed anymore, or shouldn't be visible yet. Custom statuses can be toggled between Enabled/Disabled as needed.
Enabled custom statuses are ordered alphabetically within each standard status type by default in the Availability Statuses editor, but custom statuses can be reordered by clicking on the status's icon and dragging it to the desired location. Statuses can only be reordered within their original status type - so for example, you can't move a custom status that was originally created for the Unavailable status type to the Available status type. Custom status labels can be edited at any time (the labels for the three standard statuses cannot be edited), but the ID (which can be viewed by hovering over the status) always remains set to the original value.
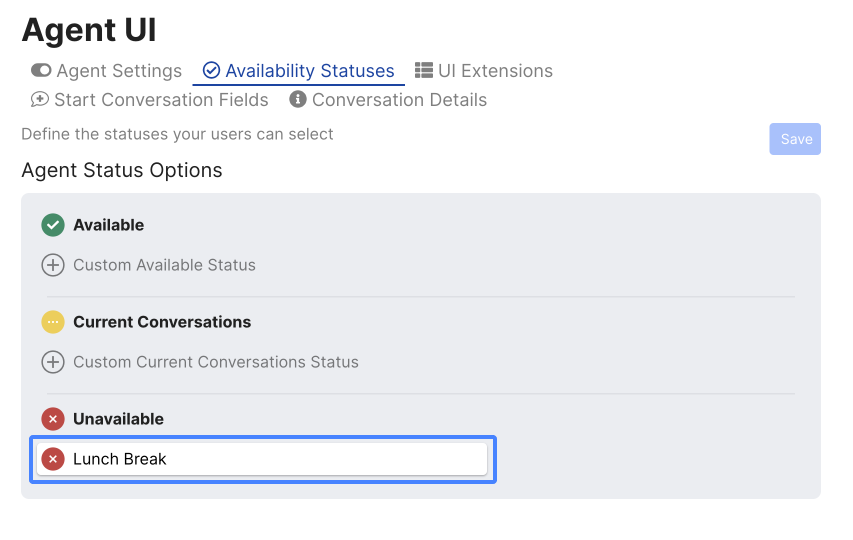
A Custom Unavailable Status being added for "Lunch Break"
The Missed Invitation Status & Missed Response Status fields in the Admin > Routing page are both set to the standard Current Conversations status by default, but all Current Conversations-type custom statuses are available in the field menus, so you can select the status that agents are automatically set to when Invitation or Response timeouts are missed.
UI Extensions
The content that displays in the right hand side of the agent conversation view, which can include fields or custom extensions, can be configured per Workspace in the Workspaces editor.
Start Conversation Fields
For sales or other use cases where agents often initiate conversations, the ability to set conversation custom fields when starting the conversation may be beneficial. Conversation custom fields can be created in the Custom Fields editor. Available fields may be selected and subsequent fields will then be available.
Conversation Details
Allows you to customize the content that displays in the Show Details dialog within conversation transcripts.
The Conversation Details tab contains a Use Workspace Configuration toggle button, enabled by default. When that toggle button is enabled, the sections and fields defined for the Workspace being used, along with the default content that always displays at the top of the Show Details dialog, will display in that dialog in the conversation transcript.
When the Use Workspace Configuration toggle button is disabled, an editor becomes available that you can use to customize the sections and fields that will display in the conversation Show Details dialog. You can drag & drop fields to reorder the content within the same section, and reorder sections with either drag & drop or the up/down arrow buttons. The content you define will then always display in the Show Details dialog within conversation transcripts independent of the content that's defined in the Agent UI tab of the Workspace being used.