
OneLogin Setup
Learn how to use Quiq with OneLogin.
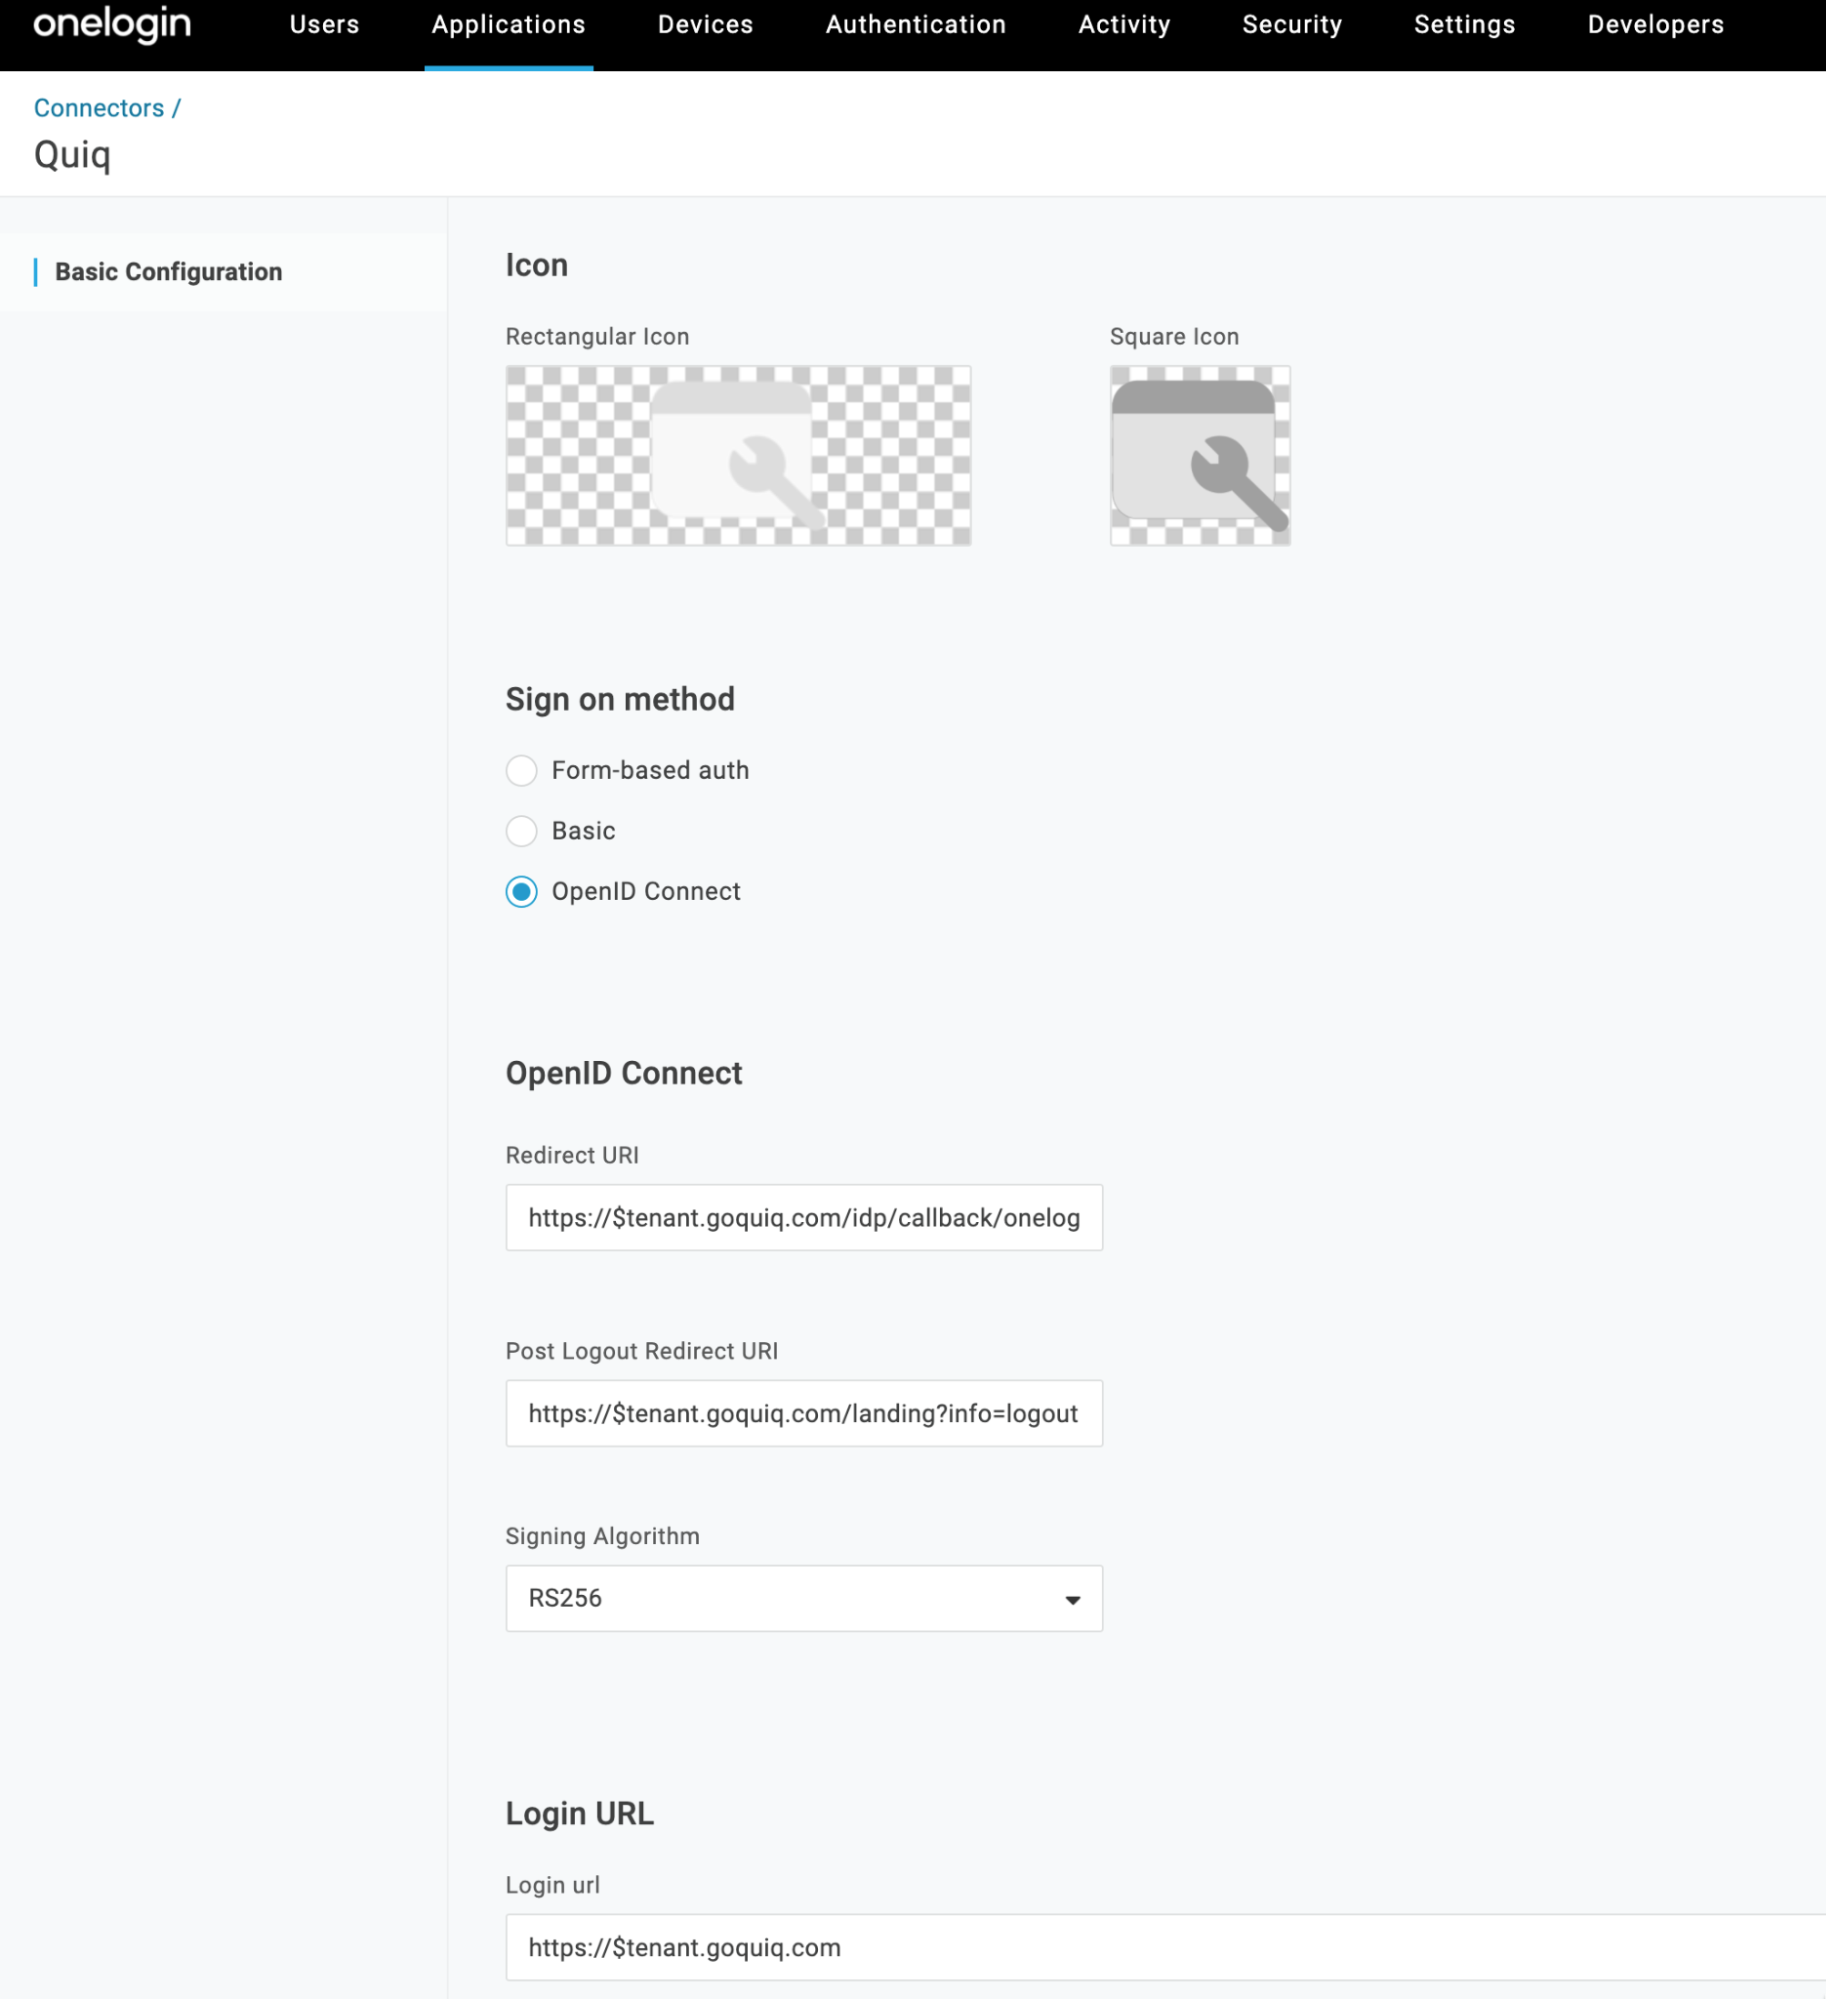
- Create a custom connector in OneLogin
- Name the connector: Quiq
- For Sign on method select OpenID Connect
- For Redirect URI input https://$YOUR_QUIQ_TENANT.goquiq.com/idp/callback/onelogin
- For Post Logout Redirect URI input https://$YOUR_QUIQ_TENANT.goquiq.com/landing?info=logout
- For Signing Algorithm use RS256
- For Login url input: https://$YOUR_QUIQ_TENANT.goquiq.com
Make sure to replace YOUR_QUIQ_TENANT in the URLs above with your unique tenant name.
- Save the connector and it should be filled out as below
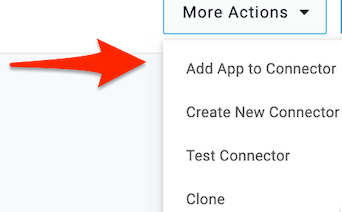
- Now add an application for the connector.
- Under the More Actions dropdown choose Add App to Connector
- Click Save on the configuration page.
- Edit the Quiq application and click on SSO in the left hand side menu.
- For Application Type choose Web.
- For Token Endpoint choose Basic as the Authentication Method.
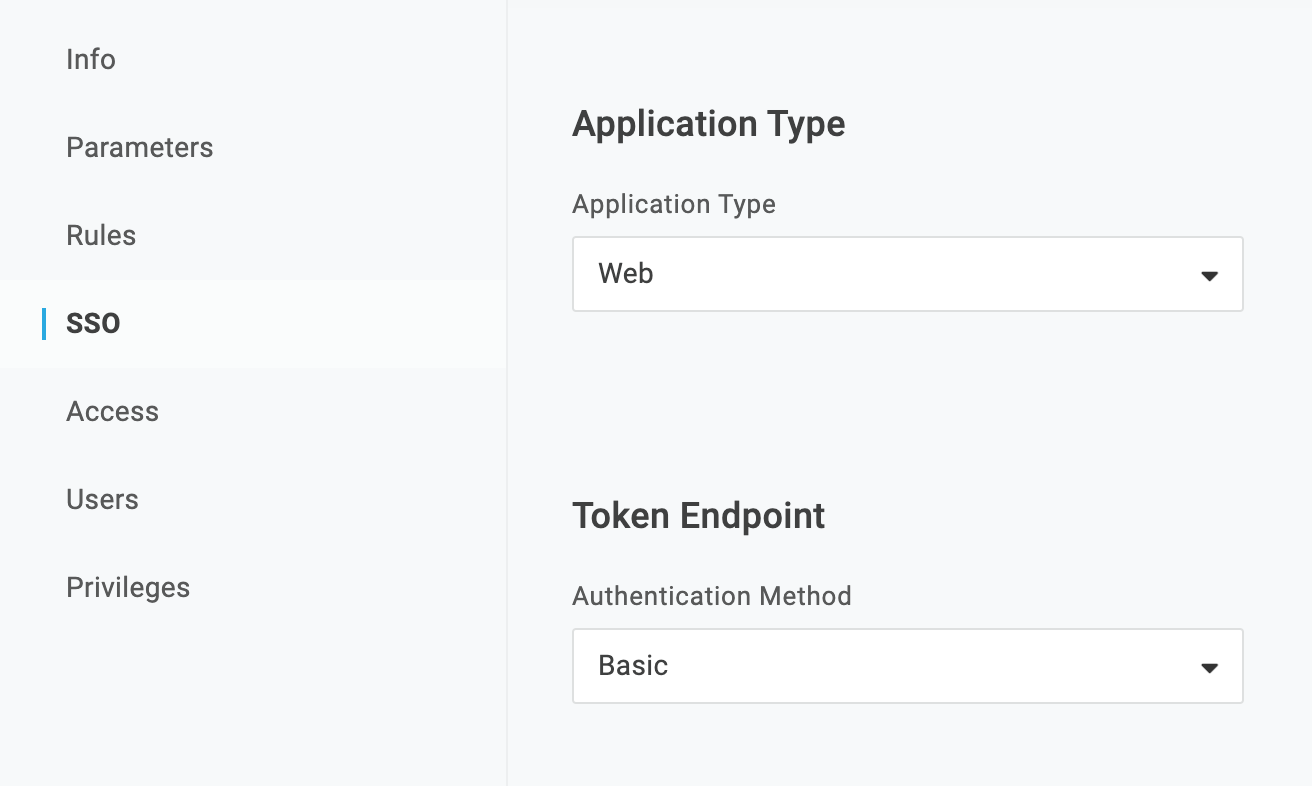
- Save the Application.
- Gather info from your setup to pass along to your Quiq implementation specialist.
- Pass the information securely by inputting the info into https://yopass.quiq.com/ and generating a link. Then email your implementation specialist the link.
- Your implementation specialist will need the following information:
a. client_id
b. client_secret
c. Issuer URL
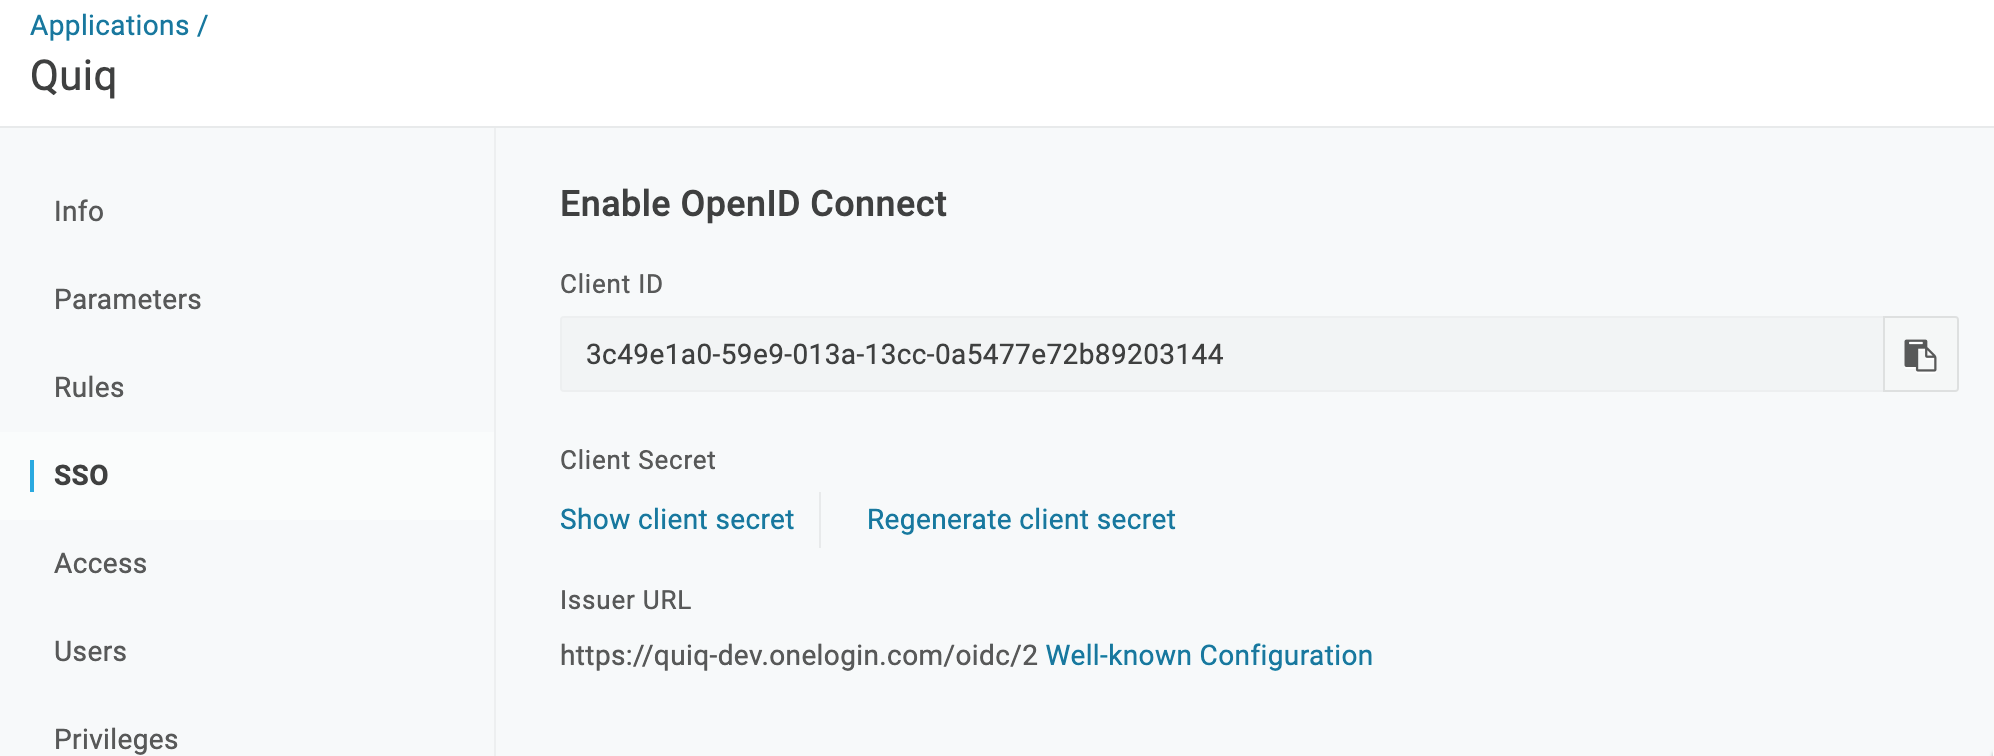
- That should be it! Once your implementation specialist injects these values securely into the Quiq platform OneLogin can act as your Single Sign On for Quiq.
Updated 9 months ago
Did this page help you?